70
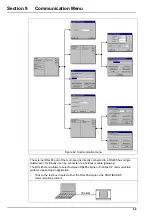
Communication Menu
9.1 RS-485 simple mode configuration
This protocol allows the instrument to output data to an external device (PLC, SCADA, PC,
etc.). The communication is unidirectional. The data are output on the RS-485 link as simple
ASCII text. If for instance you use a PC, the data can be easily visualized and saved in a file
using the "Hyperterminal" software.
To use this communications mode, on the instrument:
•
Select the
RS-485
option from the
Communication
menu
•
Choose the protocol
Simple
(default configuration) and press on
OK
•
Then select the
RS-485 Simple
option from the
Communication
menu:
•
"Baud rate", "Parity", "No of stop bits", "Byte size" Standard parameters of the RS-485
link.
•
"Enable" The measurements can be sent continuously (approximately every 2 sec.).
This field allows enabling or disabling this feature.
•
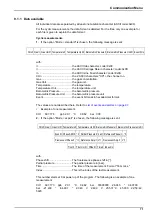
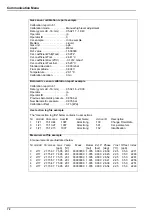
"Mode" This is the format of the measurements sent continuously. Refer to
. In "Expert" mode, more data are sent. These additional data
can be useful for diagnostic purpose.
Note:
In case of problem verify first that jumper J3 is not installed on the mother board (default
configuration).
Send data
This dialog box is used to send text files to an external device. The possible files are the
following:
•
Calibration reports
•
User actions log file
•
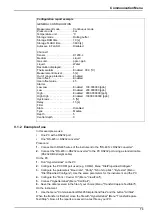
Instrument configuration
Measurements stored in the instrument memory.
The button "Stop Cyclic meas." allows to stop and to restart the cyclic transmission of
measurements. It is advised to stop the cyclic transmission in order not to mix cyclic
measurements and data of the file being transmitted. This button has the same effect as the
"Enable" checkbox of the "Communication/RS-485 Simple/Configuration" window.
After stopping the cyclic measurements, select the "Calibration Reports", "User Actions",
"Configuration", "Measurements" button to send the corresponding file, or the "All files" button to
send all these files in one shot.
Once the button is pressed, the file is sent immediately. The field "Current file status" shows
“Sending” alongside the file transmission progress bar. On completion this changes to “Sent”.
Summary of Contents for ORBISPHERE K1200
Page 5: ...4 Table of Contents...
Page 13: ...12 General Information...
Page 39: ...38 Installation...
Page 45: ...44 User Interface...
Page 46: ...45 Section 5 View Menu Figure 34 View menu...
Page 49: ...48 View Menu...
Page 59: ...58 Calibration Menu...
Page 60: ...59 Section 8 Inputs Outputs Menu Figure 40 Inputs Outputs menu...
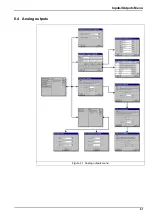
Page 62: ...61 Inputs Outputs Menu 8 4 Analog outputs Figure 41 Analog outputs menu...
Page 69: ...68 Inputs Outputs Menu...
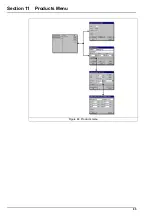
Page 86: ...85 Section 11 Products Menu Figure 44 Products menu...
Page 89: ...88 Global Configuration Menu...
Page 90: ...89 Section 13 Services Menu Figure 46 Services menu Part 1...
Page 91: ...90 Services Menu Figure 47 Services menu Part 2...

