background image

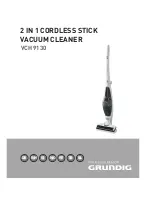
2 IN 1 CORDLESS STICK 

VACUUM CLEANER

VCH 9130

DE EN

PT

IT

TR

NO

EL

Summary of Contents for VCH 9130

Page 1: ...2 IN 1 CORDLESS STICK VACUUM CLEANER VCH 9130 DE EN PT IT TR NO EL...

Page 2: ......

Page 3: ...3 ____________________________________________ A B E G H I K C D F J L M...

Page 4: ...rocess before cleaning or carrying out any maintenance on the appliance or the charging unit 7 7 Avoid using extension cables or multipoint connectors Plug the appliance directly in a wall socket if p...

Page 5: ...ruses respirable dust dust mite larvae and deposits pollen smoke particles asbestos bac teria various toxic dust and aerosols are trapped in the filter Special features 7 7 Versatile usage as a cordle...

Page 6: ...own the handle C Button for removing the handheld vacuum cleaner D Body E On Off button for the handheld vacuum cleaner F Button for opening the dust container power indicator G Handheld vacuum cleane...

Page 7: ...ean crevices and corners difficult to reach or attach the up holstery nozzle onto the crevice tool to extend it Crevice tool Placing the 3 in 1 nozzle and brush attachment M on the holder will prevent...

Page 8: ...body The handheld vacuum cleaner can be installed onto the body D and be removed again if nec essary When installing the handheld vacuum cleaner G onto the body D plug it into the slot and push lightl...

Page 9: ...unit Connector Power adaptor socket 3 Connect the connector of the power adaptor with the socket under the charging unit J When connecting the power adaptor with the wall socket the power indicator K...

Page 10: ...vacuum cleaner Blue Indicator LED 4 Insert the vacuum cleaner into the charging unit J Note 7 7 If the vacuum cleaner is inserted into the charging unit J while it is on it turns off automatically Sw...

Page 11: ...Dust container 1 2 Remove the filter from the dust container H Dust container Filter 3 Remove the HEPA filter 4 Open the cyclone cover 3 4 Cyclone cone HEPA filter Cyclone cover 5 Clean the cyclone co...

Page 12: ...3 After the brush roll is cleaned and dry re insert it and close the cover by locking it again with a screwdriver CLEANING AND CARE________________________ Storage You can store the appliance standing...

Page 13: ...erformance electric brush L The vacuum cleaner cannot be charged The power adaptor O might not be plugged into the wall socket Plug the power adaptor O into the wall socket The connector of the power...

Page 14: ...evice and disposed separately This is indi cated by this symbol on the product in the oper ating manual and on the packaging Please consult your local authorities to find out where the nearest collect...

Page 15: ...www grundig com 72011 908 1900 12 02 AUS GUTEM GRUND...

Reviews: