


GV 411-2
Allgemeiner Teil / General
GRUNDIG Service
1 - 7
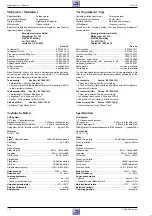
Servicehinweise
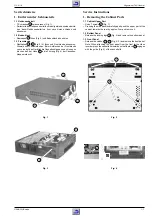
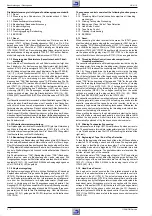
1. Entfernen der Gehäuseteile
1.1 Gehäuseoberteil
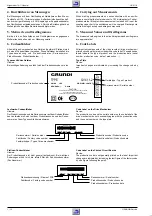
– 7 Schrauben
A
herausdrehen (Fig. 1).
– Seitenteile des Gehäuseoberteils vorsichtig etwas auseinanderzie-
hen, dabei Gehäuseoberteil ca. 3cm nach hinten schieben und
abnehmen.
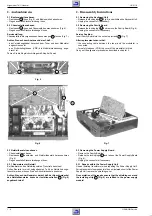
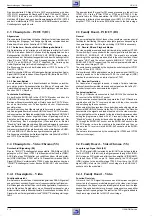
1.2 Bodenblech
– Rastnasen
B
lösen (Fig. 2) und Bodenblech abnehmen.
1.3 Frontblende
– Rasthaken
C
/
D
(Fig. 2 / 3) lösen und Frontblende abnehmen.
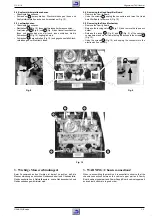
Hinweis zum Zusammenbau: Beim Aufstecken der Frontblende
von vorne auf das Gerät ist die Cassettenklappe so nach innen zu
drücken, daß der Hebel
E
in die Führung (Fig. 4) der Cassetten-
klappe eintaucht.
Service Instructions
1. Removing the Cabinet Parts
1.1 Cabinet Upper Part
– Undo 7 screws
A
(Fig. 1).
– Pressing the side panels carefully apart push the upper part of the
cabinet towards the rear by approx. 3cm and remove it.
1.2 Bottom Panel
– Release the locking lugs
B
(Fig. 2) and remove the bottom panel.
1.3 Front Panel
– Release the catches
C
/
D
(Fig. 2 / 3) and remove the front panel.
Note: When attaching the front panel from the front to the video
recorder press the cassette lid inwards so that the lever
E
engages
with the guide (Fig. 4) of the cassette lid.
Fig. 2
B
C
Fig. 4
E
Fig. 1
Fig. 3
A
A
A
A
A
D
D


