Introduction
These dual mini halogen lamps provide wide area
illumination in indoor and outdoor environments.
Inventory
(Figure 2)
1.
Safety Screens (shown installed) ............... 2
2.
Halogen Lamps .......................................... 2
3.
Tripod ......................................................... 1
4.
Mounting Arm ............................................. 1
Minor Components and Hardware
•
Carriage Bolts M6-1 x 30 ........................... 2
•
Threaded Knobs M6-1 ............................... 2
•
Quartz Halogen Bulbs 250W ...................... 2
•
Carry Case ................................................. 1
Note:
Some components may already be pre-
assembled.
Assembly for Each Lamp
1.
Unscrew the Phillips head screw holding the
lamp cover closed and open the lamp cover.
2.
Install the safety screen by fitting the four
safety screen lugs between the glass and the
screen housing, as shown in
Figure 3
.
3.
Using a clean, dry cloth, gently install a 250W
halogen bulb into the lamp socket. Close
the lamp cover and tighten the Phillips head
screw.
Note:
NEVER touch a halogen bulb with
bare skin! Oils in human skin can cause
"hot spots" on the bulb, leading to drastically
shortened bulb life.
4.
Mount the lamp to the mounting arm using
a threaded knob and an M6-1 x 30 carriage
bolt.
5.
Seat the mounting arm in the tripod bracket
and snap the spring lugs into place.
If you need help with your new halogen lamps,
call our Tech Support at: (570) 546-9663.
MODEL H7860
DUAL MINI HALOGEN
LAMPS W/STAND 250W
INSTRUCTION SHEET
COPYRIGHT © FEBRUARY, 2006 BY GRIZZLY INDUSTRIAL, INC.
WARNING: NO PORTION OF THIS MANUAL MAY BE REPRODUCED IN ANY SHAPE
OR FORM WITHOUT THE WRITTEN APPROVAL OF GRIZZLY INDUSTRIAL, INC.
#JK7967 PRINTED IN CHINA
Figure 3.
Fitting locations of safety screen lugs.
Figure 2.
Model H7860 Inventory
2
3
4
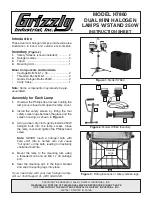
Figure 1.
Model H7860.
Screen
Lugs
1
1
2

