14
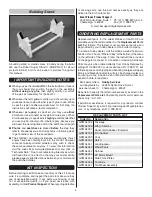
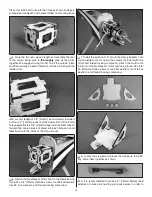
Press four 6-32 blind nuts into the holes as shown and apply
some glue around each nut to prevent them from coming loose.
❏
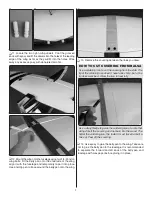
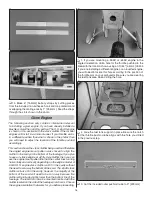
4. Glue the two rear pieces together. Assemble the rest
of the mount being sure to
thoroughly
glue all the joints
together. We suggest using thin CA on all the outside joints
and then running a bead of medium or thick CA along all the
inside joints.
❏
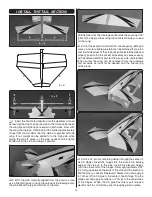
5. A short length of 1/8" [3.2mm] wood dowel is included.
Cut four 1/2" [13mm] pieces from the dowel. Drill 1/8" [3.2mm]
holes approximately 3/8" [9.5mm] deep into the center of each
forward tab. Glue a piece of dowel into each hole and sand
them fl ush with the sides of the motor mount.
❏
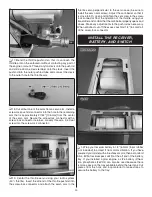
6. Attach the brushless motor mount to the fi rewall using
four 6-32 x 3/4" [19mm] machine screws, four #6 fl at washers,
four #6 lock washers, and thread locking compound.
❏
7. Install the aluminum ‘X’ mount and prop adapter onto
your brushless motor using the screws included with the
motor and thread locking compound. Attach the motor onto
the front of the brushless motor mount using four 6-32 x 5/8"
[15.9mm] machine screws, four #6 fl at washers, four #6 lock
washers, and thread locking compound.
❏
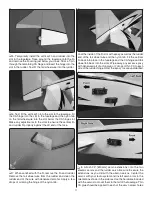
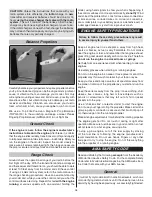
8. Locate the six plywood pieces that make up the ESC
tray. Glue them together as shown.
❏
9. It is recommended to make a 3" [76mm] battery lead
extension to make connecting your pack easier. In order to


