¾
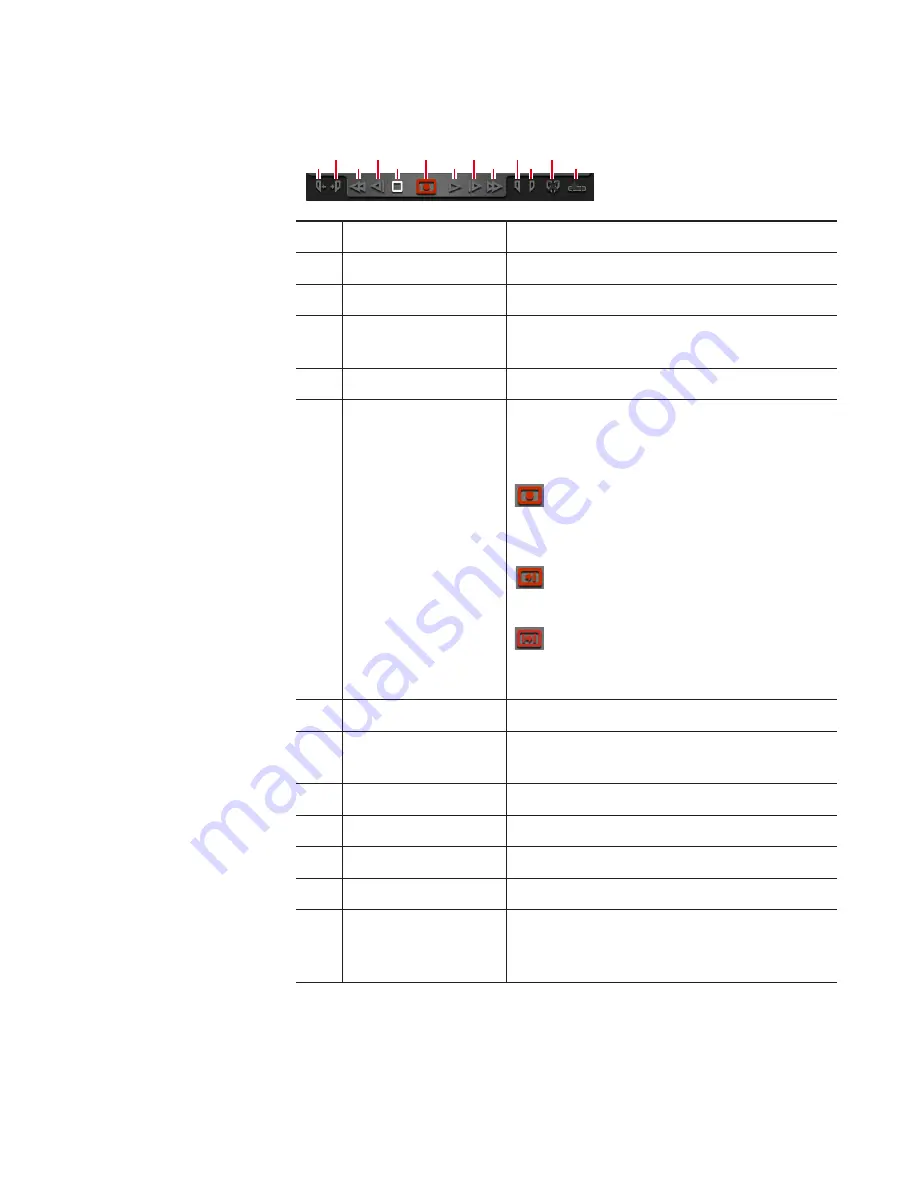
Operation buttons of R1 channel
(1)
(2)
(3)
(4)
(5)
(6)
(7)
(8)
(9)
(10)
(11)
(12)
(13)
(1)
[Cue(In)]
*1
Moves the VTR to the In point.
(2)
[Cue(Out)]
*1
Moves the VTR to the Out point.
(3)
[Rewind]
*1
Rewinds the VTR.
(4)
[Move to the
previous frame]
*1
By every click, moves back the VTR frame
by frame.
(5)
[Stop]
Stops playback or recording.
(6)
[Record]
Starts recording.
The icon display changes depending on
the recording mode.
:
Indicates that a recording stop operation is
necessary.
:
Indicates that it is a fixed length recording.
:
Indicates that In point and Out point are
set.
(7)
[Play]
*1
Plays the VTR.
(8)
[Move to the next
frame]
*1
By every click, moves forward the VTR
frame by frame.
(9)
[FastFwd]
*1
Fast forwards the VTR.
(10)
[Mark(In)]
Sets In point to the current position.
(11)
[Mark(Out)]
Sets Out point to the current position.
(12)
[Clear (In/Out)]
Clears set In/Out points.
(13)
[Create Subclip]
*2
Creates a sub clip between In-Out points
set while recording, and saves it as
highlight.
*1 Only for R1-VTR mode.
*2 Only for R1-live mode. However, if the video being recorded is saved
to an external media or storage, a sub clip cannot be created.
149
May 16, 2016
T2 Elite 2/Pro 2/Express 2/Elite/Pro/Express User Manual
Screen elements


