2-5
2.5 Installing the Driver Software
C
heckpoint
The procedure outlined below is based on the requirement that you are logged on to
Windows with administrator rights. Consult your Windows XP or Windows 2000 manual
for more information.
For Windows XP
(1) Use the USB cable to connect the scanner to the computer, and then turn on the
computer.
(2) When Windows starts up, insert the CD-ROM supplied with the scanner into the CD-
ROM drive. The “Start” screen opens automatically. Click the [Quit] button to close the
“Start” screen.
(3) Turn on the power to the scanner.
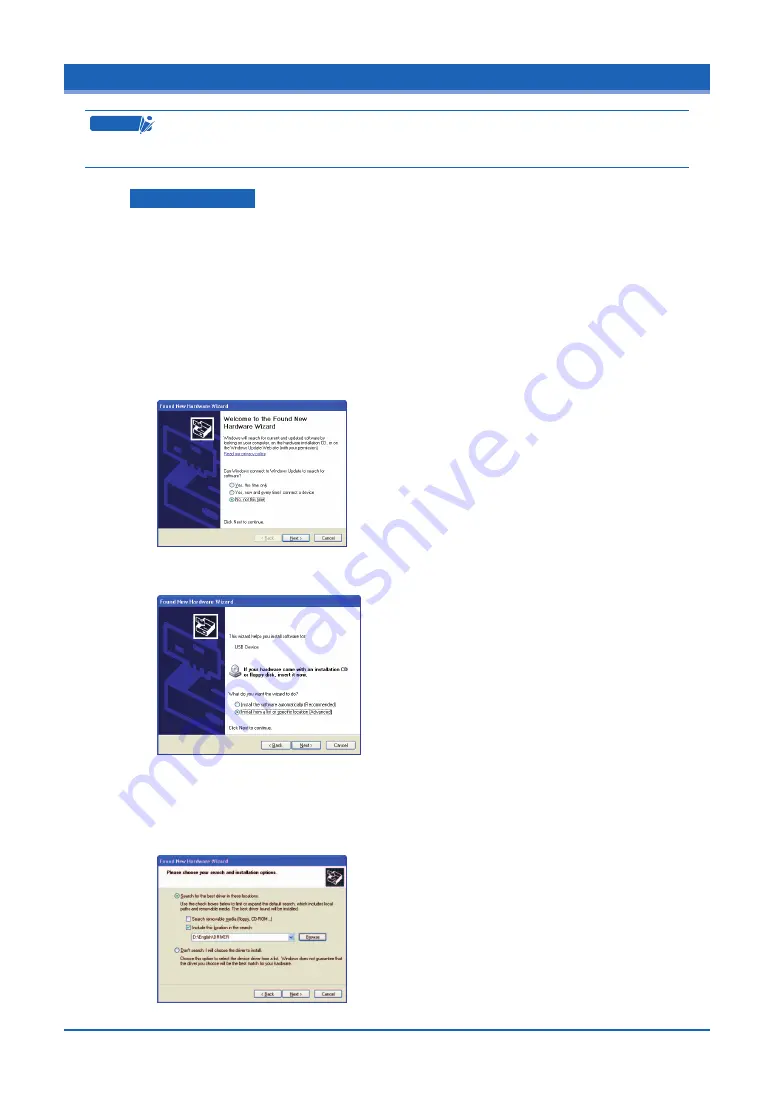
(4) When Windows XP starts up, the following screen appears (if Service Pack 2 has not
been installed, the screen shown in (5) below appears). Select the option “No, not this
time” and then click [Next].
(5) If Service Pack 2 has not been installed, the following screen appears. Select the option
“Install from a list or a specific location (Advanced).” and then click [Next].
(6) The screen shown below is displayed. Select the option “Search for the best driver in
these locations” and select the check box entitled “Include this location in the search.”
Click [Browse] and select the [English]-[DRIVER] folders in the CD-ROM drive or enter a
CD-ROM drive name and \English\DRIVER using the keyboard.
Example: For drive D, enter “D:\English\DRIVER”.


