5-8
Chapter 5 FUNCTION SETTINGS AND OPERATIONS
5.7 Assigning THICK Mode
Ths functon allows you to assgn the THICK mode to COND Nos. 1 to 8. THICK mode s used for cuttng
thck meda such as maskng rubber for sandblastng, thck pattern paper for apparel desgn as well as for
hard media such as acrylic film.
(1) Press the
[PAUSE] key
to select PAUSE mode.
(2) Press the
[NEXT] key
repeatedly untl the followng menu s dsplayed.
FORCE
OFFSET
SPEED
QUALITY
I/F FUNCTION
TOOL COND AREA OPT
(3) Press the
[F2] key
(TOOL COND) to dsplay the menu shown below.
FORCE
OFFSET
SPEED
QUALITY
THICK CUT LINE
TOOL No. ADJ.T POS
(4) Press the
[F1] key
(THICK) to dsplay the menu shown below.
FORCE
OFFSET
SPEED
QUALITY
THICK No.
OVERLAY
(5) Press the
[F2] key
(THICK No.) to dsplay the THICK mode assgnment settng screen.
FORCE
OFFSET
SPEED
QUALITY
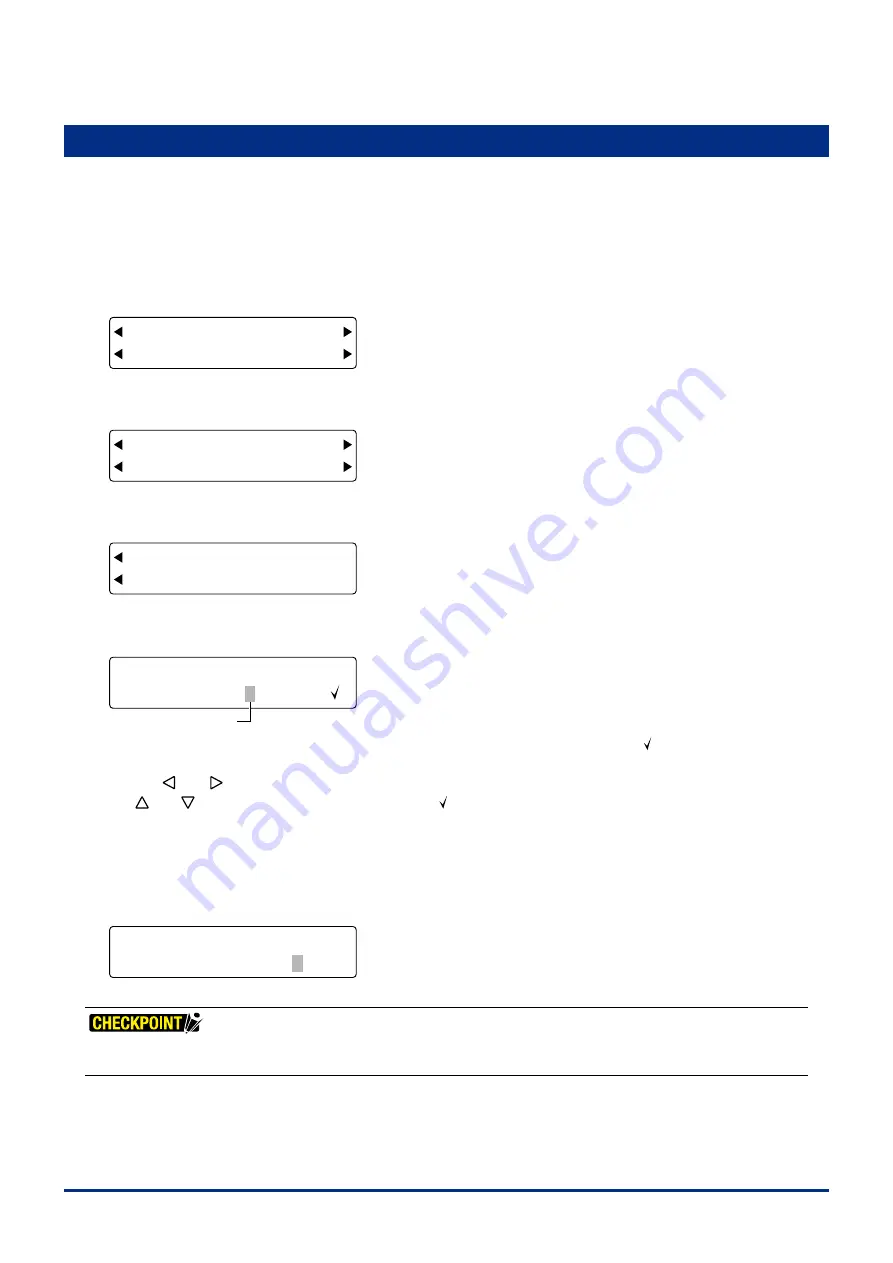
COND. No. 12345678
THICK
Blinking cursor
The upper row of the dsplay represents the cuttng condton COND Nos. A check mark [ ] s dsplayed for any of
the COND. Nos. to whch THICK mode has been assgned.
Use the
[ ]
or
[ ]
key
to move the blnkng cursor to the COND. No. that you want to assgn THICK mode to, and
the
[ ]
or
[ ]
key
to dsplay or hde the check mark [ ].
Press the
[ENTER] key
to confirm your selection.
(6) Press the
[PAUSE] key
to cancel PAUSE status.
(7) When THICK mode has been assgned to a condton number, the blnkng cursor appears over the Tool No. when
the plotter s n Ready status.
FORCE
OFFSET
SPEED
QUALITY
20,20 COND1 09U 0
30 READY+ TOOL1 4
•
THICK mode is disabled when "PEN" or "CP-001" has been selected as the cutter blade type.
•
Please see Section 3.8, "Setting the Cutting Conditions" for details on THICK mode settings.
Summary of Contents for FC2250 Series
Page 1: ...USER S MANUAL MANUAL NO FC2250 UM 151 FC2250 SERIES CUTTING PRO...
Page 105: ...5 29 Chapter 5 FUNCTION SETTINGS AND OPERATIONS Cutting Plotting Conditions List...
Page 111: ...CHAPTER 6 TROUBLESHOOTING PRODUCT SUMMARY 6 1 Troubleshooting 6 2 Error Messages...
Page 121: ...CHAPTER 8 SPECIFICATIONS PRODUCT SUMMARY 8 1 Main Specifications 8 2 External Dimensions...
Page 130: ......


