background image


1 / 40 

Instructions for 

start-up, operation and maintenance 


on 

on XXL 


Small wastewater treatment  

systems 


Control unit version KL24plus 


The points described in these in-
structions must be observed in all 
cases. Failure to do so shall invali-
date the warranty. For any addi-
tional items purchased through 
GRAF, you will receive separate 
installation instructions in the 
transport packaging.  

The components must be checked 
for any damage before the system 
is transferred to the pit. 

You will receive separate instruc-
tions for installation of the system. 


Be sure to read before starting 
up! 


Contents 

1.


General information 

2


2.


Safety 

3


3.


Description of function 

6


4.


Control unit 

8


5.


Start-up 

18


6.


Level measurement 

19


7.


Operation and maintenance 

22


8.


Fault messages and rectification 

28


9.


EC conformity declaration 

31


10.


Technical data 

32


11.


Template for weekly / monthly check notes 

34


12.


Maintenance log for GRAF small wastewater 
treatment systems 

37


13.


Notes 

39


Summary of Contents for one2clean+ XXL

Page 1: ...sport packaging The components must be checked for any damage before the system is transferred to the pit You will receive separate instruc tions for installation of the system Be sure to read before starting up Contents 1 General information 2 2 Safety 3 3 Description of function 6 4 Control unit 8 5 Start up 18 6 Level measurement 19 7 Operation and maintenance 22 8 Fault messages and rectificat...

Page 2: ...rovided on the following pages To meet official cleaning requirements it is essential that the system is operated in accordance with our operating and maintenance instructions You will find these instructions on the following pages We also ask you to read the following information carefully The External control cabinets should be located as much in the shade as possible to prevent them from overhe...

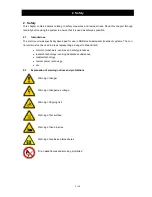
Page 3: ...er treatment systems The con trol unit must not be used in areas representing a danger to life and limb control of machinery vehicles and safety processes research technology involving hazardous substances medical technology nuclear power technology etc Explanation of warning notices and prohibitions 2 2 Warning of danger Warning of dangerous voltage Warning of tripping risk Warning of hot surface...

Page 4: ... be avoided Before the se substances may be used the instructions for use on the packaging must be read and followed 7 If the use of personal protective equipment safety shoes protective glasses gloves ear defenders etc is prescribed ensure that they are used Defective or damaged protective equipment must be immediately replaced with fully functional equipment 8 Work on electrical equipment may on...

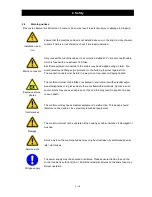
Page 5: ...ent a tripping hazard Explosive atmos pheres The control unit must not be fitted or activated in environments with potential explo sive atmospheres or in places where there are flammable materials Sparks in such environments may cause an explosion or fire and this may result in physical injuries or even death Interferences The control unit may cause medical equipment to malfunction This device sho...

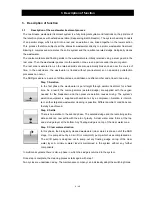
Page 6: ...a day Step 1 Aeration In the first phase the wastewater is put straight through aerobic treatment for a fixed time As a result the microorganisms aerated sludge are supplied with the oxygen needed for the breakdown and then pressure aeration causes mixing The system s aeration equipment is supplied with ambient air by a compressor Aeration is intermit tent so that targeted wastewater cleaning is p...

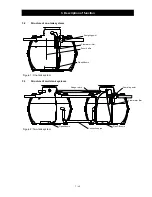
Page 7: ...k systems 3 2 Figure 1 One tank system Structure of multi tank systems 3 3 Figure 2 Two tank system Sampling point Clear water lifter Scum baffle Pipediffusors Sampling point Clear water lifter Pipe Diffusors Pipediffusors Sludge return Connection pipe ...

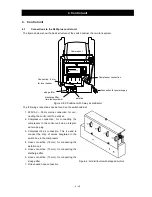
Page 8: ...pressor to the control unit via an integrat ed two pin plug 3 Compressor s air connection This is used to connect the strip of valves integrated in the switch box to the compressor 4 Hose connection 19 mm for connecting the aeration unit 5 Hose connection 13 mm for connecting the discharge lifter 6 Hose connection 13 mm for connecting the sludge lifter 7 One unused hose connection Figure 4 Air dis...

Page 9: ...he control unit is already correctly connected to the corresponding connection on the air distributor valve block A distinction is made between three different air distributor variants 1 4 way air distributor 4 separate valves Y1 Y4 2 3 way air distributor 3 separate valves Y2 Y4 and 3 2 way air distributor 2 separate valves Y3 and Y4 To allow you to correctly connect up at a later date the connec...

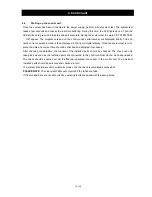
Page 10: ...splay Once the system test is com plete the date and current time should be checked and adjusted if necessary After checking the date time the function of the installed parts should be checked The check can only take place as soon as the installed parts are connected to the control cabinet via the air hoses needed The check should be carried out via the Manual operation menu item in the control un...

Page 11: ...Control programs The control unit switches the outputs for air compressors and valves at specific times The times are defined by the set sequence tables In accordance with the sequence table selected a complete cleaning cycle is started at each start time Setting holiday times at operator level enables all cleaning cycles to be suppressed for the set time peri od Only a holiday cycle with greatly ...

Page 12: ...it Process undertaken Denitrification Aeration is activated intermittently the aerated sludge is briefly mixed There are long pauses in between reaction times Aeration Aeration is activated the system is aerated at intervals Settling phase Rest phase the aerated sludge settles Discharge phase Discharge lifter is activated the clear water is pumped into the discharge Sludge removal Sludge lifter is...

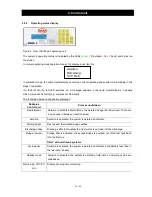
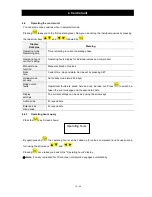
Page 13: ...e day and date Can be set by pressing SET Holiday mode set date Set holiday mode max 90 days Read out old faults Operational faults are saved here and can be read out Press to switch be tween the error message and the associated date Display settings The current settings can be viewed using the arrow keys Action code For specialists Enter service menu code For specialists 4 6 1 Operating hours que...

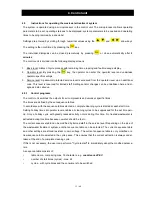
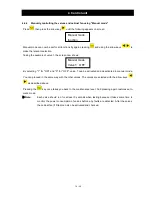
Page 14: ...FF valve 1 can be activated and deactivated in manual mode You can proceed in the same way with the other valves The valves are selected with the arrow keys as described above Pressing the key once takes you back to the maintenance level And pressing again restores auto matic mode Note Each valve should run for at least 5 seconds when testing because it takes some time to monitor the power consump...

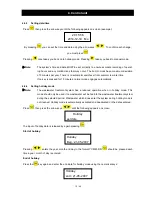
Page 15: ...ically 4 6 4 Setting holiday mode Note The wastewater treatment system has a reduced operation when in holiday mode This mode should only be used if no wastewater will be fed into the wastewater treatment system during the selected period Wastewater which does enter the system during holiday mode is not cleaned Holiday mode is automatically activated and deactivated on the dates entered Press then...

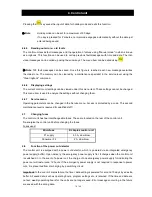
Page 16: ...rs can be changed in the Service menu Access is protected by a code This second maintenance level is reserved for qualified staff Changing fuses 4 7 The control unit has two interchangeable fuses These are located on the rear of the control unit De energise the control unit before changing the fuses Fuses used Microfuse KL24plus control unit F1 supply 6 3 A slow blow Consumer F2 2 A slow blow Func...

Page 17: ...ive flashing signals and one beep repeat at intervals of 5 seconds for around 12 hours if the emergency power supply is fully charged The device cannot be switched off when in this state When the mains voltage is restored the device is returned to the monitoring status and the control unit continues from where it left off without any keys having to be pressed The fault message disappears automatic...

Page 18: ...5 2 The system must be filled with water for the test run The system must be filled to at least 10 cm above the minimum water level so that the lifter s intake connection is covered with water The test run is undertaken by the system s control unit This requires the system to be switched on after filling via the two pin plug The system is now ready and runs fully automatically System test When the...

Page 19: ...reached the system automatical ly goes into cycle pause for the set interval Only enough oxygen to maintain the biological components is then pumped into the system The water level continues to be measured during the cycle pause at set intervals Should sufficient wastewater have again flowed into the system after a certain time the control unit switches to the normal cleaning cycle once the set le...

Page 20: ...e set for the system to function correctly Please carefully work through the following points in order Service menu Go to Service menu press the key and enter the general service code X X X when prompted to do so Level measurement Use the arrow keys to select Level measurement and confirm with the key Level start from 000 cm Enter the water level from which a cleaning cycle is to start Confirm thi...

Page 21: ...manually activated in manual operation for checking purposes This requires the level measurement to be activated under Manual mode using the key The control unit automatically takes a measurement once switched on After the measurement is complete the meas ured level appears in the display ...

Page 22: ... discharged from swimming pools large volumes of blood If discharging larger volumes of grease or plant based oils we would recommend pre cleaning the wastewater containing the greases oils in a grease separator upstream of the wastewater treatment sys tem caution faeces must not be allowed to enter the grease separator The table below contains a list of substances which must not be disposed of in...

Page 23: ...stewater Local collection point Panty liners Cause blockages non degradable plastic films blight watercourses Dustbin Cooking oil Cause deposits and pipe blockages Local collection points Food waste Cause blockages attract rats Dustbin Wallpaper paste Causes blockages Local collection point Textiles e g nylon tights cleaning cloths handkerchiefs etc Block pipes may paralyse a pump station Used tex...

Page 24: ...aning work e g remove deposits Check the structural condition of the system Check sufficient aeration and ventilation Analysis of the aeration basin Even aeration pattern bubbles Oxygen concentration O2 l 2 mg if necessary adapt the compressor operating times Sludge as proportion of volume SV30 if the sludge makes up more than 900 ml l sludge removal is required The maintenance work undertaken any...

Page 25: ...3 and may be multiplied by the dilution factor of 2 3 or 4 The diluted sample in which the value first falls below 250 ml l is used to determine the sludge volume Implementation recommendation 1 Series of measurements The 1st measurement cylinder is filled up to the 1000 ml mark with the sludge sample This sam ple is the undiluted sludge volume If SV30 250 ml l this value is representative At the ...

Page 26: ...e 7 Sludge volume measurement with undiluted aerated sludge sample Figure 8 Sludge volume measurement with 1 2 diluted aerated sludge sample 1000 ml 250 ml 30 min 670 ml water from PN 330 ml aerated sludge 233 ml dilution factor of 3 30 min ...

Page 27: ...e cover 2 Remove the deposits on the water surface and on all visible surfaces baffle sample container siphon 3 Wash down the visible surfaces 4 Insert the suction hose into the wastewater treatment tank until it reaches the floor CAUTION air admittance valves on the ground must not be damaged Aspirate until about 30 cm of wastewater and sludge remain in the wastewater treatment system ...

Page 28: ...se Winding defective Valve jammed due to obstruction Cable break Check the valve in manual mode Check the microfuse of the consumers F2 Check the valve for possible smoke resi due Unscrew the valve from the metal bar check it for dirt and remove dirt see Maintenance Instructions in the Appen dix Fault Valve 2 Fault Valve 3 Fault Valve 4 Fault UV module UV module does not work Check the UV module a...

Page 29: ... message is displayed Fault Power failure Power failure Plant switched off via maintenance switch No voltage on the switch cabinet FI fuse has blown Wait for power to return Switch plant on via maintenance switch Check supply to the switch cabinet Locate cause for triggering the RCCB and correct it possible cause solenoid valve defective Fault Modem Batteries in the module are not yet fully charge...

Page 30: ...ntact maintenance company The plant emits odours the treated wastewater is cloudy or discoloured Too little air is supplied to the plant One sided aeration due to defective membrane unit Have aeration time increased by service company Verify aeration diagram contact maintenance company Aeration diagram is one sided and large isolated bubbles are rising Membrane unit defective Aerator unit is leaki...

Page 31: ...es and changes to Directive 95 16 EC 2006 95 EC Directive of the Council relating to electrical equipment designed for use within cer tain voltage limits The following harmonised standards were applied EN 60204 1 Electrical equipment of machines Part 1 General requirements EN ISO 13849 1 Safety of machinery Safety related parts of control systems Part 1 General principles for design This EC declar...

Page 32: ...uring the output currents o Operating error message display with LED green red o Operating temperature range 0 C 55 C o Permissible temperature range without operation 20 C 85 C o Relative air humidity 10 95 no condensation o Degree of protection IP54 o 14 keys control unit o Display Graphic display with 128x32 pixels Outputs o 230 VAC 50 Hz compressor standard o 4 x 24 VDC stepped motors for comp...

Page 33: ...10 Technical data 33 40 Circuit diagrams 10 2 10 2 1 Circuit diagram for KL24plus control unit in EPP cabinet ...

Page 34: ...check notes for systems requiring maintenance twice a year the parameters should be noted monthly Date of check Sludge leaking Cloudi ness discol ouration Sup ply discharg e blocked Air filter checked Operating hours counter Yes No Yes No Yes No Yes No Valve 1 Valve 2 Valve 3 Total ...

Page 35: ...s requiring maintenance twice a year the parameters should be noted monthly Date of check Sludge leaking Cloudi ness discol ouration Sup ply discharg e blocked Air filter checked Operating hours counter Yes No Yes No Yes No Yes No Valve 1 Valve 2 Valve 3 Total ...

Page 36: ...s requiring maintenance twice a year the parameters should be noted monthly Date of check Sludge leaking Cloudi ness discol ouration Sup ply discharg e blocked Air filter checked Operating hours counter Yes No Yes No Yes No Yes No Valve 1 Valve 2 Valve 3 Total ...

Page 37: ...nt NG Emptying needed Function check of system parts important to operation Aeration valve 1 blue Discharge lifter valve 2 black Excess sludge lifter valve 3 white Power cut indicator Air inlet aeration moderate intensive circulation clearly visible Aerator pattern aeration fine bubbles even Comments Sludge accumulator buffer Sludge height cm Floating sludge height cm The operator should arrange f...

Page 38: ...olouring none weak strong beige brown Cloudiness none weak strong opaque Floating matter none a little a lot Dry substance Activated sludge kg SOL m Ptotal ml l Substances that can settle ml l pH BOD5 ml l COD ml l NH4 N ml l Ntot ml l Additional comments Operating log available Maintenance noted in the log Programming modified Fault rectified Additional comments To be arranged by the operator The...

Page 39: ...13 Notes 39 40 13 Notes ...

Page 40: ...13 Notes 40 40 www graf info 2017 10 ...

Reviews: