background image

Troubleshooting 

26

3A7649A

Troubleshooting

Disconnect power and relieve pressure 

before disassembling or repairing. See 

Pressure Relief Procedure

, page 10.

Sprayer Diagnostics

844-241-9499

Problem

Cause

Solution

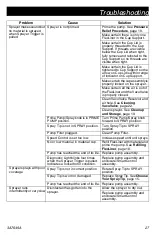
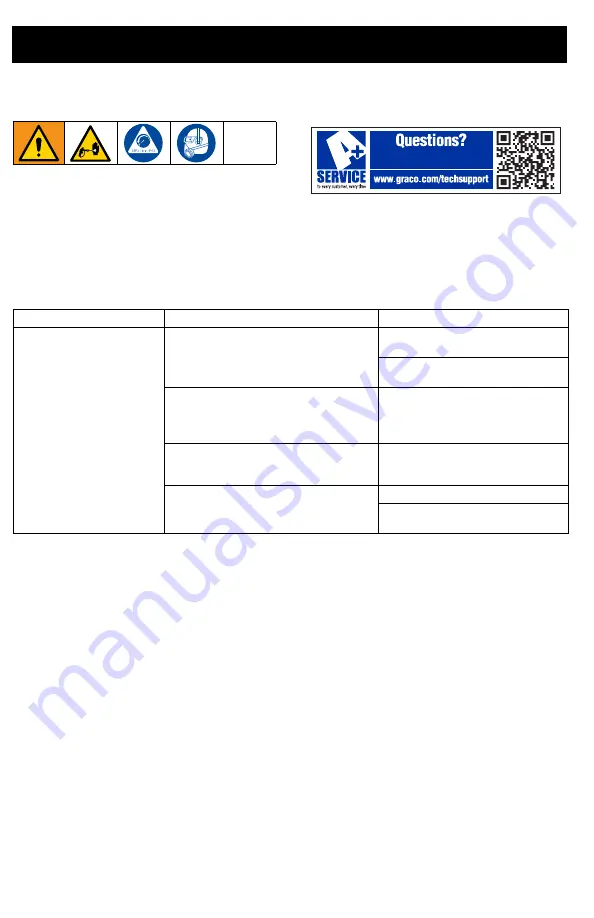
Sprayer makes no sound 

when Sprayer Trigger is 

pulled

Diagnostic Light blinks two times 

when Sprayer Trigger is pulled. 

Indicates incorrect voltage.

Replace Battery with a charged 

Battery.
Replace Enclosure/ 

SmartControl assembly.

Diagnostic Light blinks three times 

when Sprayer Trigger is pulled. 

Indicates Battery temperature is too 

hot or cold.

Allow Battery to cool down or 

warm up to room temperature.

Diagnostic Light blinks four times 

when Sprayer Trigger is pulled. 

Indicates locked rotor condition.

Replace pump assembly and 

enclosure/SmartControl 

assembly.

Diagnostic Light does not blink when 

Sprayer Trigger is pulled. Indicates 

Battery is not installed or is damaged.

Install or replace Battery.
Replace Enclosure/ 

SmartControl assembly.

Summary of Contents for SaniSpray HP 20

Page 1: ...mportant Medical Information Read the medical alert card provided with the sprayer It contains injection injury treatment information for a doctor Keep it with you when operating the equipment Operation Repair Parts SaniSpray HP 20 Cordless Airless Handheld Use only genuine Graco replacement parts The use of non Graco replacement parts may void warranty WARNING CHEMICAL HAZARD To prevent serious i...

Page 2: ... 15 Choose Your Spray Tip 15 Starting Your Spray and Adjusting Pressure 16 Clear Tip Clogs 17 Refilling FlexLiner 18 Cleanup and Storage 19 Cleaning Sprayer 19 Cleaning VacuValve 22 Static Grounding Instructions 23 Maintenance 24 Cleaning Outlet Valves 24 Recycling and Disposal 25 End of Product Life 25 Troubleshooting 26 Parts 29 Technical Specifications 30 California Proposition 65 30 Graco Limi...

Page 3: ...aniSpray HP 20 Cordless Airless Handheld is compatible with the following DEWALT batteries DCB200 DCB201 DCB203 DCB204 DCB205 DCB207 DCB230 Model Sprayer Name Charger Voltage Tip Family Tip Size 25R791 SaniSpray HP 20 Cordless Airless Handheld 120V LPxxx 0 013 0 019 in 0 33 0 48 mm ...

Page 4: ...safety warnings in this manual NON ALCOHOL This type of disinfectant contains active ingredients such as aldehydes phenols quaternary ammonium compounds sodium hypochlorite bleach peroxyacetic acid hydrogen peroxide and hypochlorous acid Your sprayer is compatible with this type of material Before using your disinfectant sprayer read this manual for complete instructions on proper use and safety w...

Page 5: ...use an extension cord suitable for outdoor use Use of a cord suitable for outdoor use reduces the risk of electric shock If operating a power tool in a damp location is unavoidable use a residual current device RCD protected supply Use of an RCD reduces the risk of electric shock Personal Safety Stay alert watch what you are doing and use common sense when operating a power tool Do not use a power...

Page 6: ...children and do not allow persons unfamiliar with the power tool or these instructions to operate the power tool Power tools are dangerous in the hands of untrained users Maintain power tools Check for misalignment or binding of moving parts breakage of parts and any other condition that may affect the power tool s operation If damaged have the power tool repaired before use Many accidents are cau...

Page 7: ... try to stop leaks with any part of the body Always use the spray tip guard Do not spray without spray tip guard in place Use only Graco spray tips Use caution when cleaning and changing spray tips In the case where the spray tip clogs while spraying follow the Pressure Relief Procedure page 10 for turning off the unit and relieving the pressure before removing the spray tip to clean Equipment mai...

Page 8: ...ooting and balance at all times Stay alert and watch what you are doing Do not operate the unit when fatigued or under the influence of drugs or alcohol Always replace cracked broken or missing parts immediately with genuine Graco parts See Parts page 29 Do not alter or modify equipment Alterations or modifications may void agency approvals and create safety hazards Use only in dry locations Do no...

Page 9: ...exLiner C Cup Support D VacuValve Cap E VacuValve Air Hole F VacuValve Reservoir G Pump Filter H Battery Shield J Prime Pump Spray Knob K Battery L Sprayer Trigger M Speed Control ProControl II N Spray Tip Reverse A Clean RAC P Spray Tip Guard T Diagnostic Light ...

Page 10: ... see this symbol 1 Remove Battery from the sprayer Replace and charge Battery only in a well ventilated area and away from flammable or combustible materials including disinfectants Do not operate sprayer with the Battery Shield open NOTICE The sprayer is equipped with a non removable Battery Shield to protect the Battery duringsprayingof disinfectants AttemptingtoremovetheBatteryShieldwill result...

Page 11: ...sing for the first time See Static Grounding Instructions page 23 for additional information when using disinfectants with alcohol active ingredients or other flammable disinfectants 1 Install a FlexLiner into the Cup Support 2 Fill FlexLiner with warm water 3 Firmly tighten the Cup Lid onto the Cup Support to achieve an airtight seal 4 Install the cup assembly onto the sprayer as follows a Align ...

Page 12: ... position Rotate Spray Tip 180 degrees to UNCLOG position 9 While holding the sprayer upside down point the sprayer into a waste bucket Pull the Sprayer Trigger for 30 seconds 10 Pour any remaining water out of FlexLiner into waste bucket 11 Sprayer is now flushed and ready for use See Starting a New Job page 13 IMPORTANT The motor has a built in feature to protect itself from overuse If the motor...

Page 13: ...n the inside of the top of the Cup Lid will help ensure an airtight seal 5 Verify Pump Filter is installed and clean 6 Installthecupassemblyontothesprayer as follows a Align VacuValve Cap on the Cup Lid with the Prime Pump Spray Knob b Push cup assembly onto the sprayer Twist to lock When spraying flammable or combustible disinfectants Move entire sprayer to a well ventilated area and away from fl...

Page 14: ... to squeeze the FlexLiner close the VacuValve Cap 8 Fill the pump with disinfectant as follows a Install Battery onto the sprayer b Point the sprayer into a waste bucket and pull the Sprayer Trigger for 5 10 seconds Disinfectant will not spray but recirculate through the pump and back to the cup c Repeat step 7 to evacuate additional air that was circulated out of the pump and into the cup during ...

Page 15: ...d C 3 Insert Spray Tip into Spray Tip Guard Verify Spray Tip is forward in the SPRAY position 4 Screw Spray Tip Guard assembly onto sprayer and hand tighten Use only disinfectants approved for spray application Fumes from disinfectants with alcohol active ingredients or from other flammable disinfectants can explode or ignite Sprayer generates sparks To prevent fumes from exploding or igniting Kee...

Page 16: ...y gone gently squeeze the bottom of the FlexLiner to push the last of the disinfectant up to the Cup Lid If sprayer does not spray try the steps below Make certain there is only one FlexLiner in Cup Support It is possible for two liners to nest tightly together and appear as only one Make certain the Cup Lid is properly threaded to the Cup Support If threads are visible below the Cup Lid when tigh...

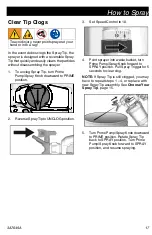
Page 17: ...peed Control to 10 4 Point sprayer into waste bucket turn Prime Pump Spray Knob forward to SPRAY position Pull Spray Trigger for 5 seconds to clear clog NOTE If Spray Tip is still clogged you may have to repeat steps 1 4 or replace with new Spray Tip assembly See Choose Your Spray Tip page 15 5 Turn Prime Pump Spray Knob downward to PRIME position Rotate Spray Tip back to SPRAY position Turn Prime...

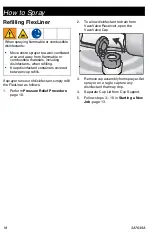
Page 18: ...ve Cap 3 Removecupassemblyfromsprayer Set sprayer on a rag to capture any disinfectant that may drip 4 Separate Cup Lid from Cup Support 5 Follow steps 3 10 in Starting a New Job page 13 When spraying flammable or combustible disinfectants Move entire sprayer to a well ventilated area and away from flammable or combustible materials including disinfectants when refilling Keep disinfectant containe...

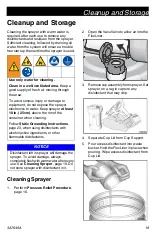
Page 19: ... Pour excess disinfectant into waste bucket Hold the FlexLiner in place when pouring Wipe excess disinfectant from Cup Lid Use only water for cleaning Clean in a well ventilated area Keep a good supply of fresh air moving through the area To avoid serious injury or damage to equipment do not expose the sprayer electronics to water Keep sprayer at least 10 in 25 cm above the rim of the container wh...

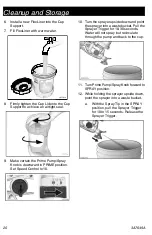
Page 20: ...Speed Control to 10 10 Turn the sprayer upside down and point the sprayer into a waste bucket Pull the Sprayer Trigger for 10 30 seconds Water will not spray but recirculate through the pump and back to the cup 11 TurnPrimePump SprayKnobforwardto SPRAY position 12 While holding the sprayer upside down point the sprayer into a waste bucket a With the Spray Tip in the SPRAY position pull the Sprayer...

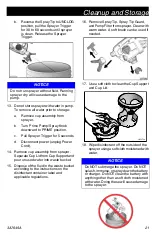
Page 21: ...t 15 Dispose of the fluid in the waste bucket according to the instructions on the disinfectant container label and applicable regulations 16 Remove Spray Tip Spray Tip Guard andPumpFilterfromsprayer Cleanwith warm water A soft brush can be used if needed 17 Use a soft cloth to clean the Cup Support and Cup Lid 18 Wipe disinfectant off the outside of the sprayer using a soft cloth moistened with w...

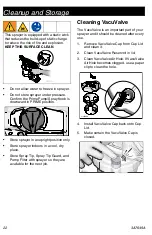
Page 22: ...ing VacuValve The VacuValve is an important part of your sprayer and it should be cleaned after every use 1 Remove VacuValve Cap from Cup Lid and clean it 2 Clean VacuValve Reservoir in lid 3 Clean VacuValve Air Hole If VacuValve Air Hole becomes clogged use a paper clip to clean the hole 4 Install VacuValve Cap back onto Cup Lid 5 Make certain the VacuValve Cap is closed This sprayer is equipped ...

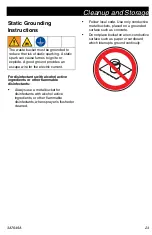
Page 23: ...isinfectants when sprayer is flushed or cleaned Follow local code Use only conductive metal buckets placed on a grounded surface such as concrete Do not place bucket on a non conductive surface such as paper or cardboard which interrupts ground continuity The waste bucket must be grounded to reduce the risk of static sparking A static spark can cause fumes to ignite or explode A good ground provid...

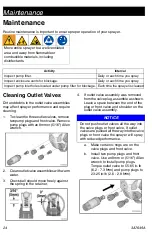
Page 24: ...he outlet valve assembly a Make certain o rings are on the valve plugs and front valve b Install two pump plugs and front valve Use an 8mm or 5 16 Allen wrench to install pump plugs Torque outlet valve to 55 65 in lb 6 2 7 3 N m and pump plugs to 23 25 in lb 2 6 2 8 N m Move entire sprayer to a well ventilated area and away from flammable or combustible materials including disinfectants Activity I...

Page 25: ...ocedure page 10 Drain and dispose of fluids according to applicable regulations Refer to the material manufacturer s Safety Data Sheet Remove motors batteries circuit boards LCDs liquid crystal displays and other electronic components Recycle according to applicable regulations Donotdisposeofelectroniccomponents with household or commercial waste Deliver remaining product to a recycling facility ...

Page 26: ... with a charged Battery Replace Enclosure SmartControl assembly Diagnostic Light blinks three times when Sprayer Trigger is pulled Indicates Battery temperature is too hot or cold Allow Battery to cool down or warm up to room temperature Diagnostic Light blinks four times when Sprayer Trigger is pulled Indicates locked rotor condition Replace pump assembly and enclosure SmartControl assembly Diagn...

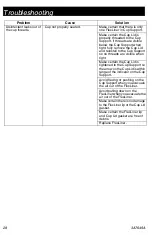
Page 27: ...mp Spray knob is in PRIME PUMP position Turn Prime Pump Spray knob forward to SPRAY position Spray Tip is not in SPRAY position Turn Spray Tip to SPRAY position Pump Filter plugged Clean Pump Filter Speed Control is set too low Increase speed until unit sprays No or low material in material cup Refill FlexLiner with material and prime the pump See Refilling FlexLiner page 18 Pump has reached the e...

Page 28: ...rt so no threads are visible when tight Make certain the Cup Lid is tightened to the Cup Support so the arrow on the Cup Lid is within range of the indicator on the Cup Support Avoid flexing or pushing on the Cup Support when you evacuate the air out of the FlexLiner Avoid pulling down on the FlexLinerwhenyouevacuate the air out of the FlexLiner Make certain there is no damage to the FlexLiner lip...

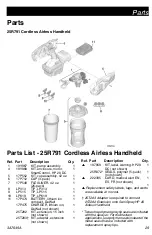
Page 29: ...GER lithium ion DeWalt not shown 1 25T282 KIT extension 15 inch not shown 1 25T283 KIT adapter extension not shown 1 197969 KIT label warning HP20 DC not shown 1 25R872 SEALS polymer 5 pack not shown 1 222385 CARD medical alert EN ES FR not shown 1 1 Replacement safety labels tags and cards are available at no cost 25T283 Adapter is required to connect 25T282 Extension onto SaniSpray HP 20 Airless...

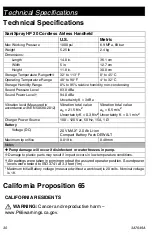
Page 30: ...rdance with EN 50580 2012 Vibration total value ah 21 5 ft s2 Uncertainty K 0 3 ft s2 Vibration total value ah 6 5 m s2 Uncertainty K 0 1 m s2 Charger Power Source 100 120 Vac 50 Hz 15A 1 Ø Battery Voltage DC 20 V MAX 2 0 Ah Li ion Compact Battery Pack DEWALT Maximum tip orifice 0 019 in 0 48 mm Notes Pump damage will occur if disinfectant or water freezes in pump Damage to plastic parts may resul...

Page 31: ...ING BUT NOT LIMITED TO WARRANTY OF MERCHANTABILITY OR WARRANTY OF FITNESS FOR A PARTICULAR PURPOSE Graco s sole obligation and buyer s sole remedy for any breach of warranty shall be as set forth above The buyer agrees that no other remedy including but not limited to incidental or consequential damages for lost profits lost sales injury to person or property or any other incidental or consequenti...

Page 32: ...ntains English MM 3A7649 Graco Headquarters Minneapolis International Offices Belgium China Japan Korea GRACO INC AND SUBSIDIARIES P O BOX 1441 MINNEAPOLIS MN 55440 1441 USA Copyright 2020 Graco Inc All Graco manufacturing locations are registered to ISO 9001 www graco com Revision A May 2020 Graco Information For the latest information about Graco products visit www graco com For patent informati...

Reviews: