


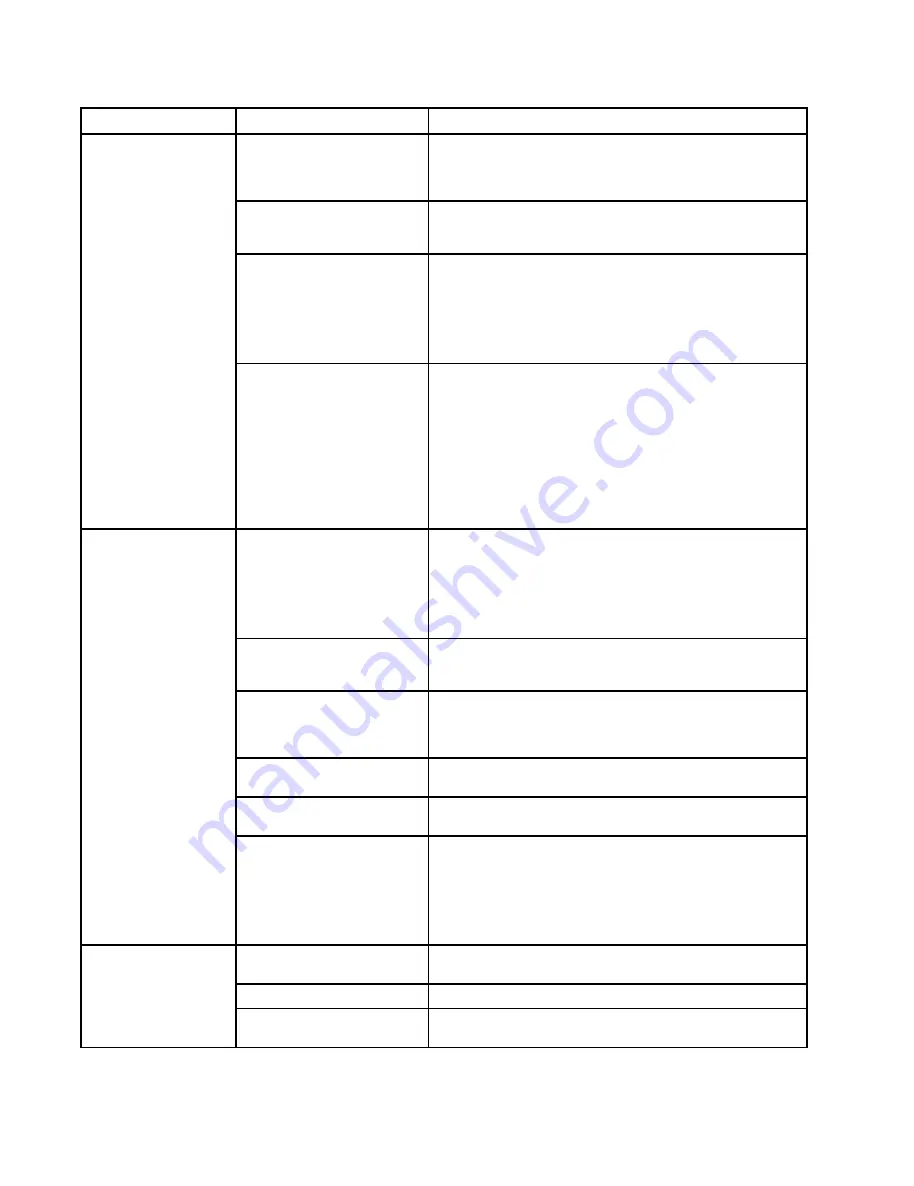
Troubleshooting
Problem
Problem
Problem
Cause
Cause
Cause
Solution
Solution
Solution
The supply air pressure is
fluctuating
Make sure the compressor meets minimum flow
requirements and is operating properly. See
Technical Specifications, page 67
for more information on
flow requirements.
The main air regulator is
malfunctioning or is stuck
open.
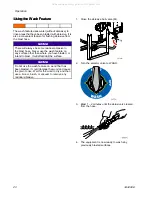
Disassemble the main air regulator and check for
obstructions. Replace or repair parts as necessary (see
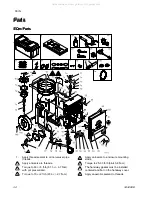
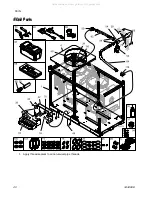
Enclosure Box Parts, page 50
).
The electric blast control
circuit is malfunctioning.
Inspect the hose cable for damaged or shorted partially
open wiring. Check the 3A fuse and replace if necessary.
Check for loose wire connections on the recessed plugs on
the control box (P) and all external cables. Check continuity
through the electric blast control switch (B) (the switch is
normally open). If all above items are functional, replace the
4-way solenoid valve.
While the blast control
switch (B) is engaged,
the blast air flow is
fluctuating.
The pneumatic blast control
circuit is malfunctioning.
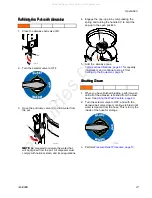
Actuate the blast control switch (B) and check for proper spool
valve actuation in the 4-way valve. If no actuation occurs,
check the blast control switch by disconnecting the yellow
tube at the enclosure male quick disconnect and engage the
control switch. If only a little air comes from the fitting, check
the twin-line hose for damage or crimping and check the
pneumatic blast control filter. If the twin-line and filter are
clean, replace the pneumatic blast control switch. If the switch
is functioning, make sure the yellow tubing inside the control
box is properly connected and clear any obstructions. If all
above items are functional, replace the 4-way solenoid valve.
The air supply is inadequate.
Make sure the air compressor is capable of supplying
the minimum air flow requirement for your system (see
Technical Specifications, page 67
). Make sure the air inlet
pressure gauge reads 100-175 psi (6.8–12 bar, 0.68–1.2
MPa). If the gauge does not read 100–175 psi, check the air
compressor for proper setup. Make sure the air inlet filters
are clean and replace if necessary.
The blast hose was not
properly cleaned out after
previous use.
See
Shutting Down, page 21
.
The abrasive metering valve
setting is too high for the blast
pressure and/or abrasive
type.
See
Setting the Abrasive Metering Valve, page 17
.
The pot does not have a
sufficient amount of abrasive.
Refill the pot with abrasive (see
Refilling the Pot with Abrasive, page 21
).
There is an obstruction in the
nozzle
Remove the nozzle and inspect for blockage, buildup, or
damage. Replace if necessary.
The blast spray
pattern is sputtering
or irregular.
There is an obstruction inside
the pot or inside the abrasive
hose between the pot and the
enclosure.
Perform
Draining the Pot, page 22
, followed by
Pressure Relief Procedure, page 10
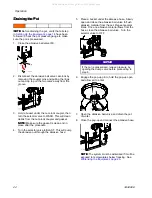
. With the abrasive
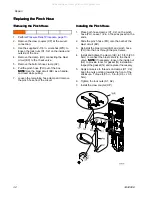
hose disconnected, inspect the interior of the pinch hose
for obstructions or debris and replace if necessary (see
Replacing the Pinch Hose, page 32
). Remove the tri-clamp
from the bottom of pot. Inspect the bottom of the pot and
abrasive hose for obstructions or debris.
There is not enough water in
abrasive mixture.
See
Using the Water Dose Meter, page 24
(an upgrade kit is
available for non-Elite models).
The blast pressure too high.
Decrease the blast pressure and re-evaluate the dust levels.
Too much dust occurs
during blasting.
The abrasive is too fine for the
application.
Try a coarser or harder abrasive if possible.
28
3A3489E
All manuals and user guides at all-guides.com