background image

Operation

313347C

3

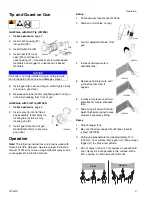
Tip and Guard on Gun

AA30 Gun with RAC Tip (257096)

1.

Relieve pressure, page 2.

2.

Insert seat housing (27) 
into guard (29).

3.

Insert SwitchTip (28).

4.

Insert seal (27b) over 
seat (27a) and insert in 
seat housing (27). Use black seal for water-based 
materials and orange for solvent and oil-based 
materials.

5.

Install guard (6) over end of gun. Hand tighten firmly 
to ensure a good seal.

6.

Replace seat (33a) and/or retighten guard nut if you 
notice fluid leaking from front of gun.

AA30 Gun with Flat Tip (257380)

1.

Relieve pressure, page 2.

2.

Insert spray tip into flat tip air 
cap assembly. Insert spray tip 
locating tab (A) into air cap 
locating slot (B).

3.

Install guard over end of gun. 
Hand tighten firmly to ensure a 
good seal.

Operation

Note: The following instructions are for guns used with 
Graco FinishPro Sprayers. See the sprayer instruction 
manual 313316. If you are using a different sprayer, see 
your equipment instruction manual.

Setup

1.

Prime sprayer. See manual 313316.

2.

Slide air on/off valve on (up).

3.

Turn air adjustment valve off at 
gun.

4.

Increase fluid pressure to 
eliminate tails.

5.

Decrease fluid pressure until 
just before tails start to 
appear.

6.

Increase air pressure with air 
adjustment valve to eliminate 
tails.

7.

Slide air on/off valve off (down) 
when finished spraying to save 
proper air pressure setting.

Spray

1.

Unlock trigger lock. 

2.

Be sure the arrow shaped tip (B) faces forward 
(spray) (257096).

3.

Hold gun perpendicular and approximately 12 in. 
(304 mm) from surface. Move gun first, then pull gun 
trigger (D) to spray a test pattern.

4.

Do not spray in an arc. This causes an uneven fluid 
coat. Spray in a path parallel to the surface, with a 
50% overlap, to obtain an even fluid coat.

NOTICE

If air cap is not fully installed on gun, fluid pressure 
can force paint into air line and damage sprayer.

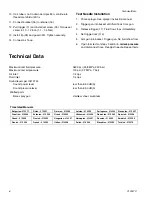
27a

29

 28

27

27b

ti8249a

A

B

ti13263a

ti12855a

ti13321a

ti13279a

ti13280a

ti13281a

WRONG

RIGHT

Summary of Contents for 257096

Page 1: ...mes are present Ground all equipment in the work area See Ground ing instructions Use only grounded hoses Hold gun firmly to side of grounded pail when trigger ing into pail If there is static sparking or you feel a shock stop operation immediately Do not use equipment until you identify and correct the problem Keep a working fire extinguisher in the work area EQUIPMENT MISUSE HAZARD Misuse can ca...

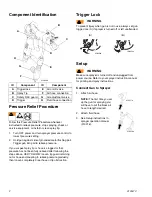
Page 2: ...n loosen completely Clear hose or tip obstruction Trigger Lock To prevent injury when gun is not in use always set gun trigger lock A if sprayer is turned off or left unattended Setup Make sure sprayer is turned off and unplugged from power source Refer to your sprayer instruction manual for priming and spray instructions Connect Gun to Sprayer 1 Attach air hose NOTE The first time you set up the ...

Page 3: ...al 313316 If you are using a different sprayer see your equipment instruction manual Setup 1 Prime sprayer See manual 313316 2 Slide air on off valve on up 3 Turn air adjustment valve off at gun 4 Increase fluid pressure to eliminate tails 5 Decrease fluid pressure until just before tails start to appear 6 Increase air pressure with air adjustment valve to eliminate tails 7 Slide air on off valve ...

Page 4: ...ull gun trigger and flush gun with solvent until all traces of fluid are removed from gun passages 6 Turn sprayer function selection switch to OFF 7 Relieve pressure page 2 8 Disconnect fluid supply hose from gun 9 If it is necessary to remove diffuser 5 to clean follow Needle Replacement Removal procedure steps 1 through 6 10 Dip soft bristle brush into a compatible solvent Do not use a wire brus...

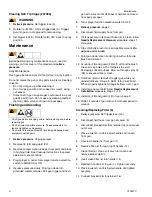
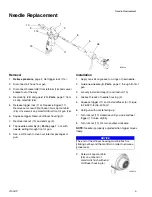
Page 5: ... brush to clean out internal passages of gun Installation 1 Apply non silicon grease to o rings of new needle 2 Guide new needle 8 Parts page 7 through front of gun 3 Loosely install end cap 9 and locknut 10 4 Grease threads of needle housing 3 5 Squeeze trigger 11 and install diffuser 5 Torque to 26 32 ft lb 36 40 N m 6 Hold gun with nozzle facing up 7 Turn locknut 10 clockwise until you see and ...

Page 6: ...s 3 and or 5 relieve pressure and disconnect hose Readjust needle Repeat tests Technical Data Maximum inlet fluid pressure 3600 psi 24 8 MPa 240 bar Maximum inlet air pressure 100 psi 0 7 MPa 7 bar Air inlet 1 4 nps Fluid inlet 1 4 nps Sound levels per ISO 3744 Sound power level less than 65 0 dB A Sound pressure level less than 65 0 dB A Wetted parts Bare spray gun stainless steel aluminum Transl...

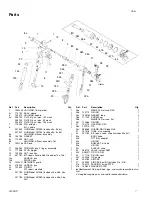
Page 7: ...HANDLE gun 1 14b SWIVEL gun 1 16 15W291 RETAINER guard 1 22 278003 HANDLE gun 1 24 122530 O RING 1 26 KIT repair manifold 1 257783 GUN Model 257096 includes 26a 26b 26c 26d 257784 GUN Model 257380 includes 26c 26d 26e 26f 26a MANIFOLD air cap RAC 1 26b 120775 O RING 1 26c 15W160 GASKET tube 2 26d 111102 SCREW set 1 26e MANIFOLD air cap flat 1 26f 122486 O RING 1 27 15J770 HOUSING RAC 1 28 FFT210 T...

Page 8: ... no other remedy including but not limited to incidental or consequential damages for lost profits lost sales injury to person or property or any other incidental or consequential loss shall be available Any action for breach of warranty must be brought within two 2 years of the date of sale GRACO MAKES NO WARRANTY AND DISCLAIMS ALL IMPLIED WARRANTIES OF MERCHANTABILITY AND FITNESS FOR A PARTICULA...

Reviews: