Gigabyte H310M HD3 2.0 User Manual Download Page 19

BIOS (Basic Input and Output System) records hardware parameters of the system in the CMOS on the 

motherboard. Its major functions include conducting the Power-On Self-Test (POST) during system startup, 

saving system parameters and loading operating system, etc. BIOS includes a BIOS Setup program that allows 

the user to modify basic system configuration settings or to activate certain system features.

When the power is turned off, the battery on the motherboard supplies the necessary power to the CMOS to 

keep the configuration values in the CMOS.

To access the BIOS Setup program, press the <Delete> key during the POST when the power is turned on.

To upgrade the BIOS, use either the GIGABYTE Q-Flash or @BIOS utility.


Q-Flash allows the user to quickly and easily upgrade or back up BIOS without entering the operating system.


@BIOS is a Windows-based utility that searches and downloads the latest version of BIOS from the Internet 

and updates the BIOS.

Chapter 2  BIOS Setup


Because BIOS flashing is potentially risky, if you do not encounter problems using the current 

version of BIOS, it is recommended that you not flash the BIOS. To flash the BIOS, do it with 

caution. Inadequate BIOS flashing may result in system malfunction.


It is recommended that you not alter the default settings (unless you need to) to prevent system 

instability or other unexpected results. Inadequately altering the settings may result in system's 

failure to boot. If this occurs, try to clear the CMOS values and reset the board to default values. 

(Refer to the "Load Optimized Defaults" section in this chapter or introductions of the battery/clear 

CMOS jumper in Chapter 1 for how to clear the CMOS values.)

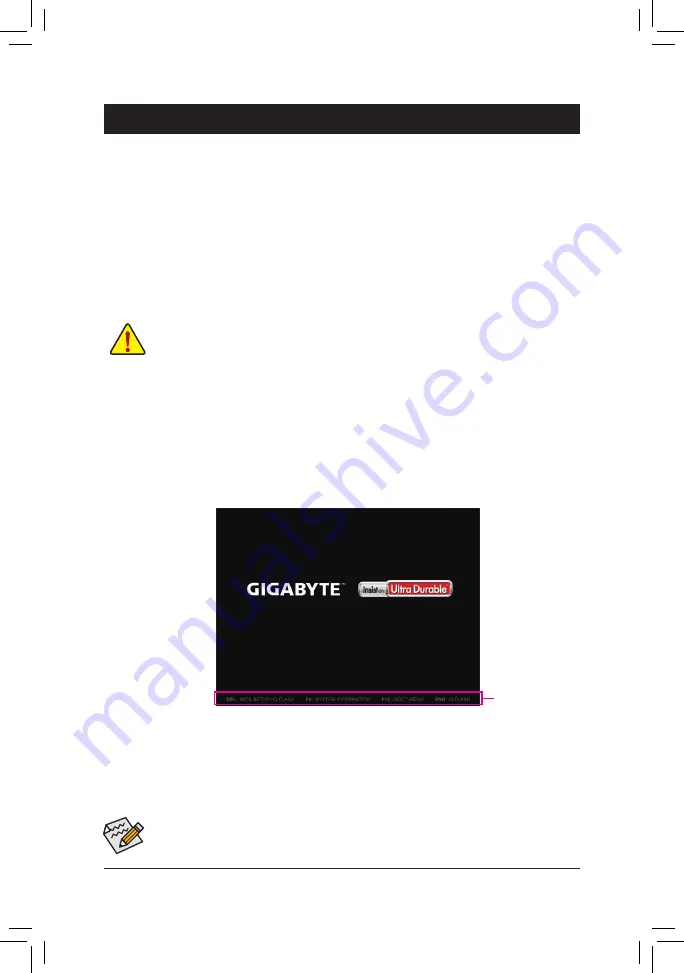
2-1  Startup Screen

The following startup Logo screen will appear when the computer boots.

(Sample BIOS Version: F1a)

Function Keys


When the system is not stable as usual, select the 

Load Optimized Defaults

 item to set your system to its defaults.


The BIOS Setup menus described in this chapter are for reference only and may differ by BIOS version.

There are two different BIOS modes as follows and you can use the <F2> key to switch between the two modes.

The Classic Setup mode provides detailed BIOS settings. You can press the arrow keys on your keyboard to move 

among the items and press <Enter> to accept or enter a sub-menu. Or you can use your mouse to select the 

item you want. Easy Mode allows users to quickly view their current system information or to make adjustments 

for optimum performance. In Easy Mode, you can use your mouse to move through configuration items.

- 19 -

Summary of Contents for H310M HD3 2.0

Page 1: ...lease visit GIGABYTE s website To reduce the impacts on global warming the packaging materials of this product are recyclable and reusable GIGABYTE works with you to protect the environment H310M HD3...

Page 2: ...may be reproduced copied translated transmitted or published in any form or by any means without GIGABYTE s prior written permission In order to assist in the use of this product carefully read the Us...

Page 3: ...9 1 4 Installing the Memory 9 1 5 Installing an Expansion Card 10 1 6 Back Panel Connectors 10 1 7 Internal Connectors 12 Chapter 2 BIOS Setup 19 2 1 Startup Screen 19 2 2 The Main Menu 20 2 3 M I T 2...

Page 4: ...5 5 H310M HD3 2 0 motherboard 5 5 Motherboard driver disk 5 5 Two SATA cables 5 5 User s Manual 5 5 I O Shield KB_MS CPU_FAN SYS_FAN LGA1151 ATX H310M HD3 2 0 F_AUDIO AUDIO BAT ATX_12V_2X4 Intel H310...

Page 5: ...metal object to eliminate static electricity Prior to installing the motherboard please have it on top of an antistatic pad or within an electrostatic shielding container Before connecting or unplugg...

Page 6: ...resolution of 1920x1200 60 Hz 1 x DVI D port supporting a maximum resolution of 1920x1200 60 Hz The DVI D port does not support D Sub connection by adapter 1 x HDMI port supporting a maximum resoluti...

Page 7: ...module only 1 x Clear CMOS jumper Back Panel Connectors 1 x PS 2 keyboard port 1 x PS 2 mouse port 1 x D Sub port 1 x DVI D port 1 x serial port 1 x HDMI port 2 x USB 3 1 Gen 1 ports 2 x USB 2 0 1 1...

Page 8: ...B Blocker Support for Q Flash Support for Xpress Install Bundled Software Norton Internet Security OEM version Realtek 8118 Gaming LAN Bandwidth Control Utility Operating System Support for Windows 10...

Page 9: ...mory hard drive etc Installing the CPU Locate the alignment keys on the motherboard CPU socket and the notches on the CPU Do not remove the CPU socket cover before inserting the CPU It may pop off fro...

Page 10: ...resolutions supported depend on the monitor being used Connect a monitor that supports D Sub connection to this port DVI D Port Note The DVI D port conforms to the DVI D specification and supports a...

Page 11: ...ker Out a a a a Mic In Center Subwoofer Speaker Out a a Front Panel Line Out Side Speaker Out a To configure 7 1 channel audio you have to use an HD front panel audio module and enable the multi chann...

Page 12: ...nd your computer Unplug the power cord from the power outlet to prevent damage to the devices After installing the device and before turning on the computer make sure the device cable has been securel...

Page 13: ...lled The power connector possesses a foolproof design Connect the power supply cable to the power connector in the correct orientation The 12V power connector mainly supplies power to the CPU If the 1...

Page 14: ...for the M 2 SSD to be installed and then install the mounting clip first Step 2 Slide the M 2 SSD into the connector at an angle Step 3 Press the M 2 SSD down and then secure it by pressing the clip...

Page 15: ...he chassis front panel The LED is on when the hard drive is reading or writing data RES Reset Switch Connects to the reset switch on the chassis front panel Press the reset switch to restart the compu...

Page 16: ...h USB header can provide two USB ports via an optional USB bracket For purchasing the optional USB bracket please contact the local dealer Pin No Definition Pin No Definition 1 Power 5V 6 USB DY 2 Pow...

Page 17: ...model Contact the place of purchase or local dealer if you are not able to replace the battery by yourself or uncertain about the battery model When installing the battery note the orientation of the...

Page 18: ...iver to touch the two pins for a few seconds Always turn off your computer and unplug the power cord from the power outlet before clearing the CMOS values After system restart go to BIOS Setup to load...

Page 19: ...te BIOS flashing may result in system malfunction It is recommended that you not alter the default settings unless you need to to prevent system instability or other unexpected results Inadequately al...

Page 20: ...the previous BIOS settings for the current submenus F7 Load the Optimized BIOS default settings for the current submenus F8 Access the Q Flash utility F9 Display system information F10 Save all the ch...

Page 21: ...llows you to set the Graphics Slice Ratio Graphics UnSlice Ratio Note Allows you to set the Graphics UnSlice Ratio CPU Clock Ratio Allows you to alter the clock ratio for the installed CPU The adjusta...

Page 22: ...gy Intel Speed Shift Technology Note Enables or disables Intel Speed Shift Technology Enabling this feature allows the processor to ramp up its operating frequency more quickly and then improves the s...

Page 23: ...he BIOS automatically configure this setting Default Auto Race To Halt RTH Note 1 Energy Efficient Turbo Note 1 Enables or disables the CPU power saving related settings Voltage Optimization Allows yo...

Page 24: ...after the BIOS stage Default Auto Memory Enhancement Settings Provides several memory performance enhancement settings Normal basic performance Relax OC Enhanced Stability and Enhanced Performance Def...

Page 25: ...VR voltage control options PC Health Status Reset Case Open Status Disabled Keeps or clears the record of previous chassis intrusion status Default Enabled Clears the record of previous chassis intrus...

Page 26: ...atically detect the type of fan installed and sets the optimal control mode Default Voltage Voltage mode is recommended for a 3 pin fan PWM PWM mode is recommended for a 4 pin fan Fan Stop Enables or...

Page 27: ...IOS settings the User level only allows you to make changes to certain BIOS settings but not all System Language Selects the default language used by the BIOS System Date Sets the system date The date...

Page 28: ...emovable storage devices that support GPT format will be prefixed with UEFI string on the boot device list To boot from an operating system that supports GPT partitioning select the device prefixed wi...

Page 29: ...abled All PS 2 devices are functional in the operating system and during the POST Default This item is configurable only when Fast Boot is set to Enabled This function is disabled when Fast Boot is se...

Page 30: ...ust enter the administrator password or user password at system startup and when entering BIOS Setup Differing from the user password the administrator password allows you to make changes to all BIOS...

Page 31: ...than one advanced graphics card are installed and their drivers are not able to be launched when entering the operating system because of the limited 4 GB memory address space Default Disabled Intel...

Page 32: ...full legacy support for USB keyboards mice in MS DOS or in operating system that does not natively support USB devices Default Enabled Mass Storage Devices Displays a list of connected USB mass stora...

Page 33: ...Configures the SATA controllers to AHCI mode Advanced Host Controller Interface AHCI is an interface specification that allows the storage driver to enable advanced Serial ATA features such as Native...

Page 34: ...DVMT memory size of the onboard graphics Options are 128M 256M MAX Default 256M Audio Controller Enables or disables the onboard audio function Default Enabled If you wish to install a 3rd party add...

Page 35: ...able only when Platform Power Management is set to Enabled Default Disabled AC BACK Determines the state of the system after the return of power from an AC power loss Memory The system returns to its...

Page 36: ...en the system will be turned off instantly Default Delay 4 Sec Press and hold the power button for 4 seconds to turn off the system If the power button is pressed for less than 4 seconds the system wi...

Page 37: ...he device you select and select Yes to confirm Your system will restart automatically and boot from that device Save Profiles This function allows you to save the current BIOS settings to a profile Yo...

Page 38: ...Tap to choose what happens with this disc on the top right corner of the screen and select Run Run exe Or go to My Computer double click the optical drive and execute the Run exe program Xpress Instal...

Page 39: ...is on the product or on its packaging which indicates that this product must not be disposed of with other waste Instead the device should be taken to the waste collection centers for activation of th...

Page 40: ...912 4000 FAX 886 2 8912 4005 Tech and Non Tech Support Sales Marketing https esupport gigabyte com WEB address English https www gigabyte com WEB address Chinese https www gigabyte com tw GIGABYTE eSu...

Reviews: