- 33 -
System Hardware Installation
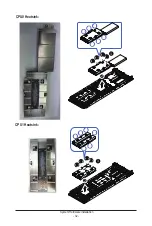
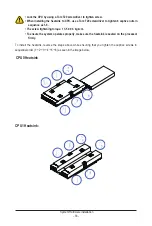
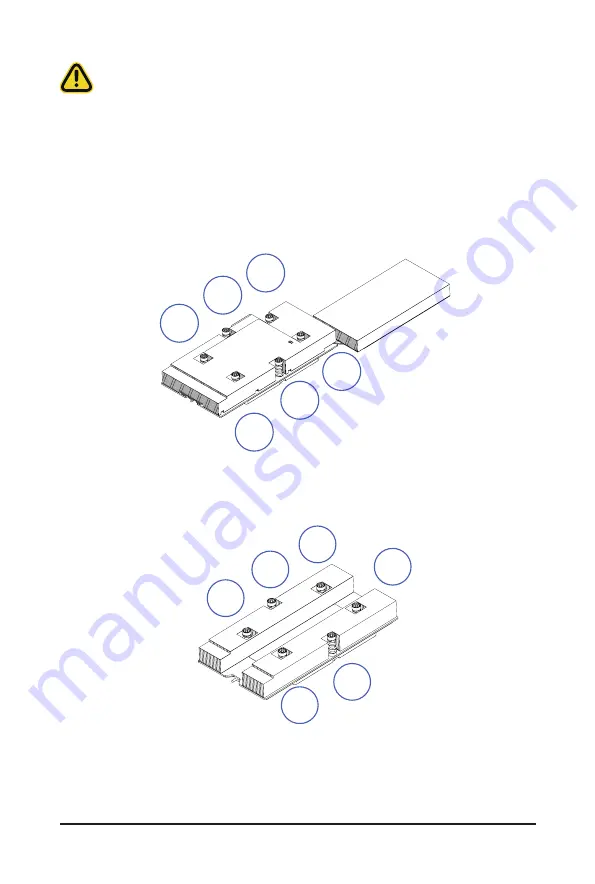
To install the heatsink, reverse the steps above while ensuring that you tighten the captive screws in
sequential order (1
g
2
g
3
g
4
g
5
g
6) as seen in the image below.
CPU0 Heatsink
CPU1 Heatsink:
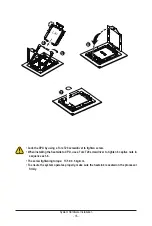
• Lock the CPU by using a Torx T20 screwdriver to tighten screw.
• When installing the heatsink to CPU, use a Torx T20 screwdriver to tighten 6 captive nuts in
sequence as 1-6.
• The screw tightening torque: 13.5 ± 0.5 kgf-cm.
• To ensure the system operates properly, make sure the heatsink is seated on the processor
firmly.
66
22
44
55
33
11
66
22
44
55
33
11
Summary of Contents for H273-Z82-AAN1
Page 10: ... 10 This page intentionally left blank ...
Page 41: ... 41 System Hardware Installation 8 7 5 6 ...
Page 60: ...BIOS Setup 60 When Boot Mode Select is set to Legacy in the Boot Boot Mode Select section ...
Page 72: ...BIOS Setup 72 5 2 8 PCI Subsystem Settings ...
Page 84: ...BIOS Setup 84 5 2 18 Intel R I350 Gigabit Network Connection ...
Page 90: ...BIOS Setup 90 5 3 1 CPU Common Options ...
Page 117: ...BIOS Setup 117 5 3 3 6 DDR Timing Configuration ...
Page 122: ...BIOS Setup 122 5 3 4 NBIO Common Options ...

