


System Hardware Installation
- 38 -
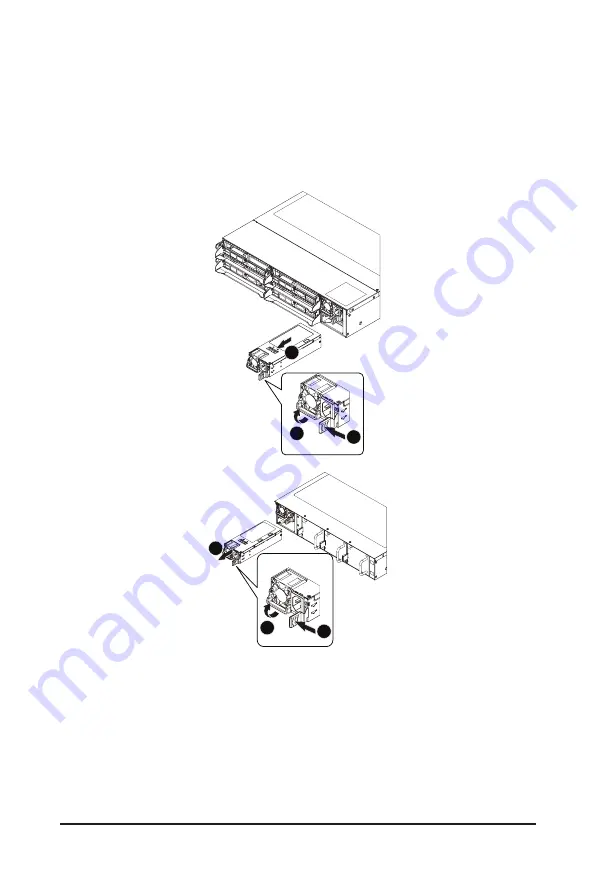
3-11 Replacing the Power Supply
Follow these instructions to replace the power supply:
1. Pull up the power supply handle and press the retaining clip on the right side of the power supply
along the direction of the arrow. At the same time, pull out the power supply by using its handle.
2.
Insert the replacement power supply firmly into the chassis. Connect the AC power cord to the
replacement power supply.
3
1
2
3
1
2
H242-Z10
H242-Z11
Summary of Contents for H242-Z10
Page 1: ...H242 Z10 H242 Z11 AMD EPYCTM 7002 series Processor Server User Manual Rev 1 0 ...
Page 10: ...This page left intentionally blankThis ...
Page 16: ... 16 Hardware Installation 1 3 System Block Diagram ...
Page 34: ...System Hardware Installation 34 4 3 5 1 2 ...
Page 40: ...System Hardware Installation 40 Middle Board Power NVMe ...
Page 42: ...System Hardware Installation 42 Middle Board Power NVMe ...
Page 43: ... 43 System Hardware Installation PMbus CMC ...
Page 44: ...System Hardware Installation 44 CMC Signal ...
Page 46: ...System Hardware Installation 46 Fan Power On Board SATA ...
Page 48: ...System Hardware Installation 48 NVMe PMBus ...
Page 49: ... 49 System Hardware Installation CMC CMC Signal ...
Page 50: ... 50 System Hardware Installation On Board SATA ...
Page 62: ...BIOS Setup 62 5 2 4 1 Serial Port 1 2 Configuration ...
Page 68: ...BIOS Setup 68 5 2 7 1 CPU 0 Information ...
Page 74: ...BIOS Setup 74 5 2 11 SATA Configuration ...
Page 79: ... 79 BIOS Setup 5 2 16 AVAGO MegaRAID Configuration Utility ...
Page 81: ... 81 BIOS Setup 5 2 17 Intel R I350 Gigabit Network Connection ...
Page 83: ... 83 BIOS Setup 5 2 18 VLAN Configuration ...
Page 94: ...BIOS Setup 94 5 3 3 3 NVDIMM ...