


- 29 -
System Hardware Installation
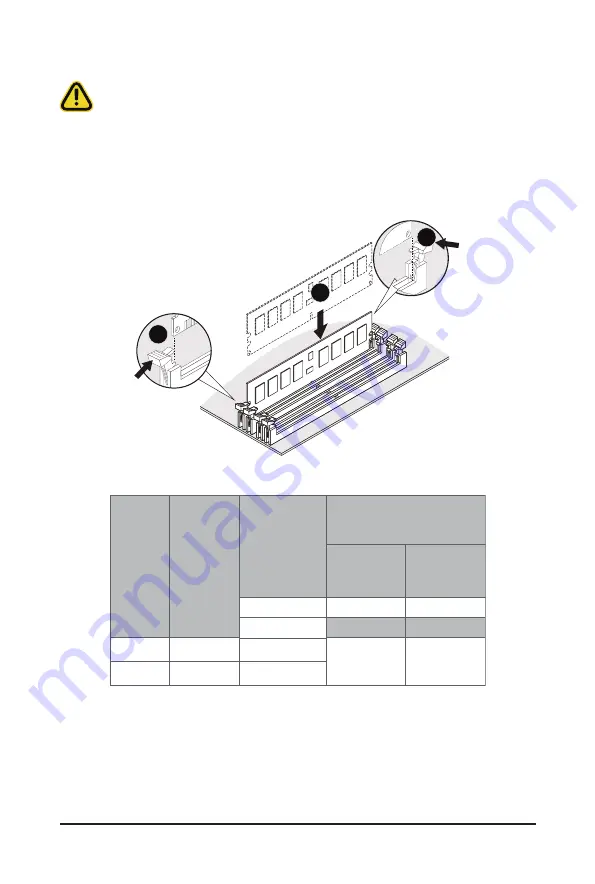
3-4-2 Installing a Memory
Before installing a memory module, make sure to turn off the computer and unplug the power
cord from the power outlet to prevent damage to the memory module.
Be sure to install DDR4 DIMMs on this motherboard.
Follow these instructions to install the Memory:
1. Insert the DIMM memory module vertically into the DIMM slot, and push it down.
2. Close the plastic clip at both edges of the DIMM slots to lock the DIMM module.
3. Reverse the installation steps when you want to remove the DIMM module.
1
2
2
3-4-3 DIMM Population Table
DIMM
Capacity
(GB)
1 Slot per
Channel
2 Slots per
Channel
8Gb
DIMM Density
Speed (MT/s); Voltage (V)
Slot Per Channel (SPC)
DIMM Per Channel (DPC)
1DPC
1.2V
3200
2DPC
1.2V
3200
Ranks Per
DIMM and
Data Width
16GB
16GB
Type
RDIMM
RDIMM
SRx4
DRx8
Summary of Contents for G242-P33
Page 14: ...Hardware Installation 14 1 3 System Block Diagram 1 3 1 G242 P33 ...
Page 15: ... 15 Hardware Installation 1 3 2 G242 P34 ...
Page 16: ...Hardware Installation 16 This page intentionally left blank ...
Page 27: ... 27 System Hardware Installation 4 2 3 1 6 ...
Page 41: ... 41 System Hardware Installation ...
Page 42: ...System Hardware Installation 42 GPU Signal Cable ...
Page 45: ... 45 System Hardware Installation System Main Power Cable MB Bo om Power Connector ...
Page 48: ...System Hardware Installation 48 GPU Signal Cable MB Bo om Power Connector ...
Page 50: ...System Hardware Installation 50 This page intentionally left blank ...
Page 54: ...Motherboard Components 54 This page intentionally left blank ...
Page 65: ... 65 BIOS Setup 5 2 6 PCI Subsystem Settings ...
Page 69: ... 69 BIOS Setup 5 2 6 2 PCI Express GEN 2 Settings ...
Page 79: ... 79 BIOS Setup 5 2 14 Intel R I350 Gigabit Network Connection ...