- 22 -
System Hardware Installation
3-1 Removing and Installing the Chassis Cover
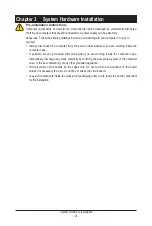
Before you remove or install the chassis top cover
• Make sure the system is not turned on or connected to AC power.
Follow these instructions to remove/install the chassis cover:
1. Remove the screws on both sides of the back chassis cover. (
Note: For safe shipping,
installation screws are added and should be removed before deployment/putting it in the
server cabinet.
)
2. Remove the screw securing the back chassis cover.
3. Push button to unlock the handle.
4. Pull the grip handle to open the panel cover.
5. Slide the back chassis cover towards the rear and remove the chassis cover in the direction
indicated.
6. Remove the screw securing the middle chassis cover.
7. Slide the middle chassis cover towards the rear and remove the chassis cover in the direction
indicated.
8. To reinstall the chassis cover reverse steps 2-7.
3
4
2
5
1
1
6
6
6
6
7
Summary of Contents for R182-P91
Page 1: ...R182 P91 Ampere Altra Max ARM Server 1U 12 Bay Server User Manual Rev 1 0 ...
Page 14: ... 14 Hardware Installation 1 3 System Block Diagram ...
Page 37: ... 37 System Hardware Installation ATX Power Cable SlimLine SAS to SATA Cable SL_SAS0 SL_SAS1 ...
Page 55: ... 55 BIOS Setup 5 2 6 PCI Subsystem Settings ...
Page 69: ... 69 BIOS Setup 5 2 15 Intel R I350 Gigabit Network Connection ...
Page 78: ... 78 BIOS Setup 5 3 3 Memory Slot Information ...


