Start-Up
***The LFGI should be certified and venting options should be installed before operation.
***
1. Ensure the LFGI is plugged into a functioning outlet.
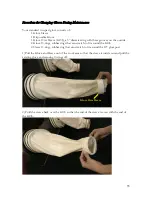
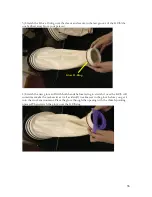
2. Install Sleeves and Gloves. Please refer to the Appendix on this topic.
3. Inspect Sleeves and Gloves. Please refer to the Appendix on this topic. Any damage must be
replaced prior to start-up.
4. Open the viewing panel and inspect under the work tray. Ensure there is nothing below the
sliding work trays. Remove any foreign objects from the work area.
5. Clean the inside of the airlock. Please refer to the Appendix on this topic.
6. Ensure both airlock doors are latched.
7. Push the silver end of the electrical outlet into the receptacle located above the airlock and
tighten the retaining ring.
8. Clean inside the work area rigorously. Please refer to the Appendix on this topic.
9. Ensure the stoppers for the trash tubes and sharps are seated in place.
10. Close the work area latches and lock, if so desired. (Note the location of the key if
removed)
11. Wipe down the outside of the LFGI. Please refer to the Appendix on this topic.
12. Ensure the prefilter is seated properly in its frame at the top of the unit. You should not see
it above the steel frame.
13. Turn on the work area light and watch for its operation.
14. Turn on the main blower switch. The low pressure alarm will sound until adequate pressure
is achieved. Gloves should move into the work area if the unit is under negative pressure
and out of the work area if under positive pressure.
Start-up time is 10 minutes minimum to achieve ISO Class 5 cleanliness.
15. Push the Airlock Purge button and ensure the accompanying red light illuminates. Purge
time is factory set at 1 minute.
21
Summary of Contents for LFGI-3USP
Page 1: ...Laminar Flow LFGI CAI or CACI User Manual ...
Page 33: ...33 ...
Page 51: ...SECTION IV UNIT DIAGRAM Made in the USA and available for purchase on the GSA 51 ...
Page 55: ...55 ...
Page 59: ...59 ...
Page 63: ...Fig 2 Air recycle plenum connection tip removed 63 ...
Page 85: ... 863 248 2800 www sensocon com 20 Installation and Operation Manual Series A3 A4 ...


