background image

English


Chapter 1: Introduction 

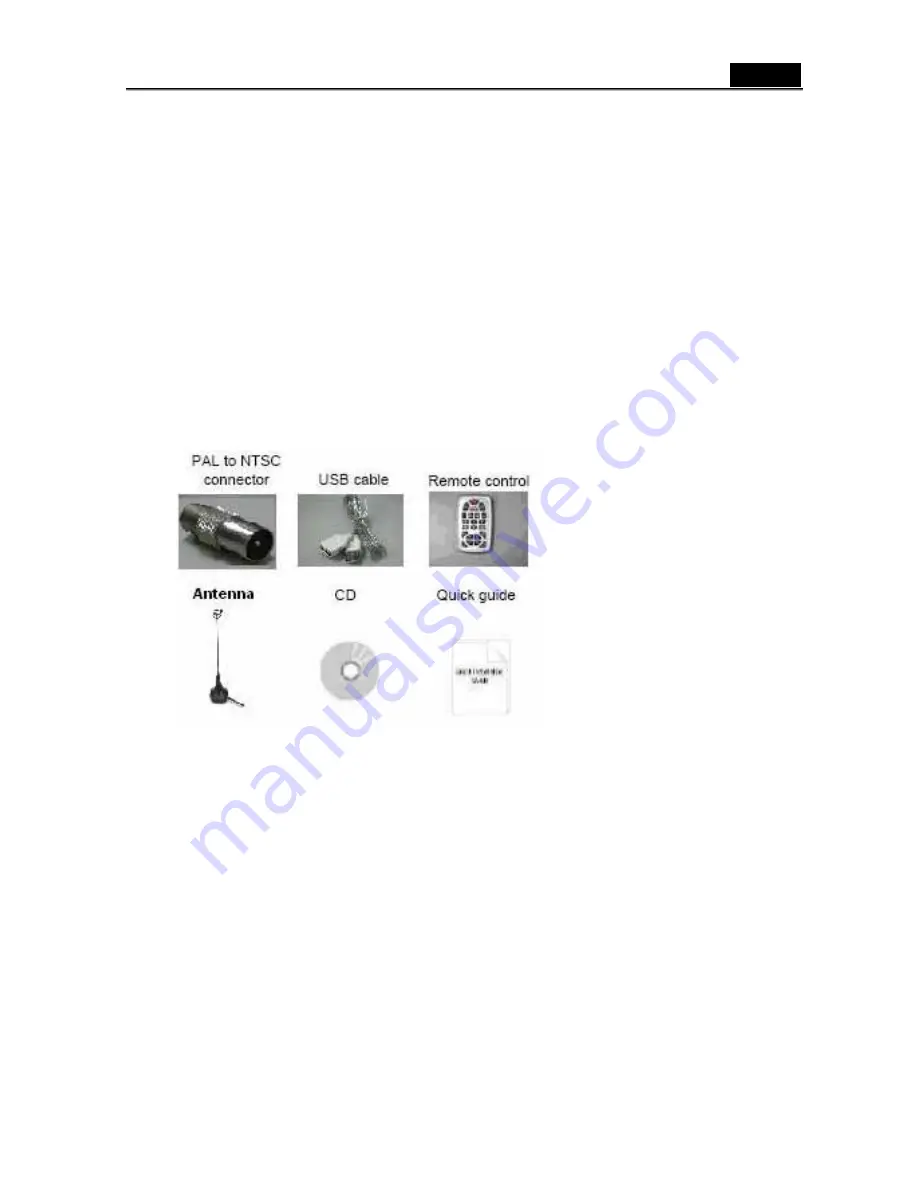
1.1 Package Contents 

Upon receiving your TVGo DVB-D02, please make sure the following items are included in 
the 

package. 

z

 TVGo 

DVB-D02 

z

  CD of Installation Software 

z

  Quick Installation Guide 

z

 USB 

cable 

z

 Antenna 

z

  PAL to NTSC connector 

z

 Remote 

control 


1.2 System Requirements 

z


IBM PC or compatible 

z


Intel Pentium 4 2.0GB MHz /

 equivalent AMD Athlon ™ CPU

 or better processor   

z


One available USB2.0 port.


z

  Minimum 256 MB memory of RAM or more 

z


Minimum 100 MB hard disk space available 

z


1024x768 graphic card, DirectX R 9.0c or above compatible graphic card

 or higher 

z


Microsoft Windows XP HOME/PRO EDITION /XP 64bit 

z

 CD-ROM 

drive 

z

  Hard Disk: 5400 RPM or above (7200 RPM preferred)   


1


Summary of Contents for TVGo DVB-D02

Page 1: ...SC connector z Remote control 1 2 System Requirements z IBM PC or compatible z Intel Pentium 4 2 0GB MHz equivalent AMD Athlon CPU or better processor z One available USB2 0 port z Minimum 256 MB memory of RAM or more z Minimum 100 MB hard disk space available z 1024x768 graphic card DirectX R 9 0c or above compatible graphic card or higher z Microsoft Windows XP HOME PRO EDITION XP 64bit z CD ROM...

Page 2: ...w the steps below 1 Connect the TV antenna cable to the connector 2 Connect the Device to PC USB Hub 2 2 Device Driver Installation for Windows XP 1 Once you connect the TV box just follow the messages to finish the driver installation 2 Found new hardware window will pop up on Windows XP desktop automatically 2 ...

Page 3: ... cancel automatically after installation of a new device 4 Choose Install from a list or specific location Advanced Click Next button 5 Check the include the location in the search and type in D Driver D is your CD ROM Drive Click Next to install the device driver 3 ...

Page 4: ...English 6 Click Continue Anyway button and finish the installation 7 Click Finish button 4 ...

Page 5: ...2 3 Install the TVGo DVB D02 utility software 1 Click Setup Utility to begin the software installation 2 Click Next button to start the installation 3 Click Next button or choose setup folder for installation 5 ...

Page 6: ...English 4 Then click Finish to complete the installation of TVGo DVB D02 Box 5 Click OK button to reboot the PC 6 ...

Page 7: ...ing the TVGo DVB D02 for the first time Click Start on Windows Taskbar and then select Programs TVGo DVB D02 1 Click Start on Windows Taskbar and then select Programs TVGo DVB D02 2 Click the AP TVGo DVB D02 3 Then the scanning device will start 7 ...

Page 8: ...r TVGo DVB DO2 is fixed you have to set up the country or region right the first time you launch TVGo DVB DO2 Click Next button to continue 2 Select your signal source either analog or digital This section shows step by step to set up analog TV Go to step 10 if you select DVB T as signal source 3 Click Next button 8 ...

Page 9: ...English 4 Select the correct region from the list and click Next button 5 Select the input signal source and click Finish 6 Click OK button to start channel searching 9 ...

Page 10: ...English 7 Available channel information will be shown on the list 8 Click the OK button to finish the auto searching 9 Click the Finish button 10 ...

Page 11: ...English 10 The following shows the process how to set up DVB T Select DVB T and click Next button to continue 11 Click the Next button 12 Select the correct region from the list Then click Search 11 ...

Page 12: ...English 13 Click the OK button to start channel searching 14 Click the Finish button to finish the set up process 15 Click the Finish button to complete the process 12 ...

Page 13: ...English 3 2 Changing between DVB T and Analog Enter the Setting function and go to Device Click Video Source to change between DVB T and Analog Click Search icon to search TV channel 13 ...

Page 14: ...ute 5 Search TV channel Click to search available TV channel 6 Double click for full screen display 6 Double click to full screen display 3 Channel Control 2 Channel List 4 Volume Control 1 TV wall display 5 Search TV Channel 3 4 Recorder Video Click Record button to start recording video You can use the control panel or setting the table to set the video format You can set it to following format ...

Page 15: ...CD HiDVD 3 5 Snapshot Image Click the Snapshot button to capture still image Click the Setting button to setup the image format The USB TV Super Mini Hybrid supports BMP and JPEG image format Please choose your desired format 15 ...

Page 16: ...anel click the right button on the video window and select Control Panel to restore the display Setting Click to pop up the setting dialog To test the video playback refer to Sec 3 8 Browse Image To launch image browse window and browse the snapshot or saved image in your computer For detailed operation refer to Sec 3 7 Step Backward To step backward play video Step Forward To step forward play vi...

Page 17: ...to Sec 3 8 Play List Click to pop up sub panel below main panel This shows the default list of the record file under the record directory from which you can select the needed item to play 3 7 Browse Image Click the Browse Image to retrieve the saved pictures You can use the Browse Image software to control picture zoom in out or rename Use the toolbar for these functions Refresh To renew display s...

Page 18: ...t Width Magnifies image to fit width of screen or window Fit Height Magnifies image to fit height of screen or window Lock Locks the viewer at the current magnificent level 3 8 Playback Setting Fix ratio lock screen size Adjust window size to fit video at startup modify screen size to fit video automatically Hide control panel for full screen hide control panel when full screen mode selected Hide ...

Page 19: ... to change picture save location Options select Rename after snapshot to rename image right after snapshot Auto delete invalid files remove invalid files Scroll listbox to make playing item visible highlight current playing file automatically Run drag file at once automatically plays the video file that you drag into playlist window 19 ...

Page 20: ...XP Open Close TV Software Record TV program Change screen size to original window size or return Capture current screen and save 0 9 Number 0 9 Switch to the next channel Switch to the previous channel Enlarge sound volume Reduce sound volume 20 ...

Page 21: ...ish Decode channel inputting available Click to start Time shift feature click once more time to play recorded show Go back to the last channel Switch input signal source between TV Composite and S video 21 ...

Reviews: