Installation
Manual
Montageanleitung
Instructions de montage
Istruzioni per il montaggio
Page 1: ...Installation Manual Montageanleitung Instructions de montage Istruzioni per il montaggio ...
Page 2: ...struction 2 x 1 2 or 2 x 3 8 Gypsum green board Cement board Tile backer board Ceramic tile surface Warranty Limited lifetime warranty on tank and carrier 10 year warranty on fill valve and flush valve Product Data Installation Requirements Installation To install Geberit Monolith a 2 x 6 or 2 x 4 wood frame or metal frame construction is required Studs must be placed where Geberit Monolith will b...
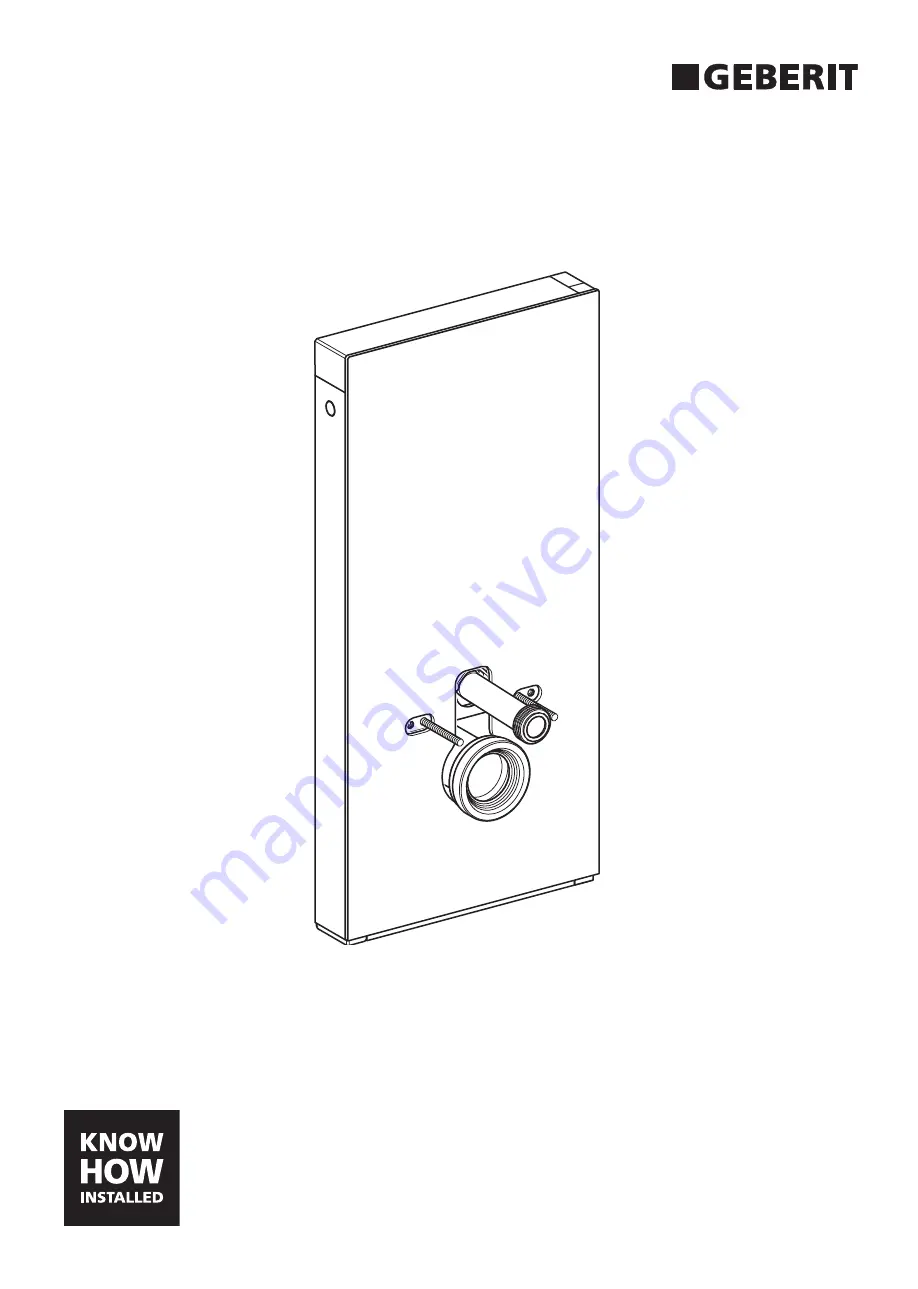
Page 3: ...coupling supplied X 8 Top view 2 x 4 wall Hole through floor minimum dimensions 3 square 1 to center of 3 PVC and 90 degree elbow Top view 2 x 6 wall Hole through floor minimum dimensions 3 square 3 to center of 3 PVC and 90 degree elbow Water supply installation 1 Stub out water supply line Angle stop valve to be installed later Top view FF Front view 18 1 For copper supply 5 1 Water supply Alterna...
Page 4: ...construction 2 Attach supplied angle valve Outlet of valve must point to 6 o clock position Option 1 Tile wall see page 4 Option 2 Painted wall see page 6 FF 17 25 33 41 43 2 2 x 4 to ceiling OR 1 2 x 6 to ceiling with centers as shown 8 5 Option 1 Tile wall 1 2 215 81 2 215 81 2 91 353 4 0 F F 5 3 4 5 3 4 21 4 ø 3 8 1 4 1 4 13 mm ...
Page 5: ... 3 4 1 T 20 Be sure this mark is lined up at elevation X It should also be equal to center of drainage elbow 5 Fine leveling adjustment Raise or lower sides as needed CAUTION Do not overtighten 6 X 3 8 3 8 3 8 3 8 5 mm 13 mm ...
Page 6: ...01 04 2012 7 CAUTION Do not overtighten 8 To complete the installaton continue on page 8 ø 3 8 13 mm Option 2 Painted wall 1 2 81 2 81 2 81 2 81 2 353 4 353 4 F F F F 5 3 4 5 3 4 21 4 ø 3 8 ø 11 64 1 4 1 4 13 mm ...
Page 7: ...2 US 3 4 1 T 20 Be sure this mark is lined up at elevation X It should also be equal to center of drainage elbow 5 Fine leveling adjustment Raise or lower sides as needed CAUTION Do not overtighten 6 X 1 4 1 4 13 mm 13 mm ...
Page 8: ...8 D54139 001 04 2012 7 CAUTION Do not overtighten 8 ø 11 64 13 mm Common installation steps tile and painted wall CAUTION Do not overtighten 1 CAUTION Do not overtighten 2 1 2 3 13 mm 13 mm ...
Page 9: ...9 D54139 001 04 2012 US 3 4 H1 H2 H1 H2 1 1 2 5 CAUTION Do not forget sealing washer 6 3 2 1 1 ...
Page 10: ...D54139 001 04 2012 7 8 For water supply on right filling valve can remain in position as supplied For water supply on left filling valve must be repositioned see next steps 5 00 00 45 9 10 2 1 2 4 3 1 1 2 ...
Page 11: ...11 D54139 001 04 2012 US 11 12 T1 7 3 1 2 T1 Use ceramic or data sheet to find dimension T1 Larger diameter end Smaller diameter end 13 14 Hand tight 1 4 turn ...
Page 12: ...39 001 04 2012 CAUTION Check that inserts are fully unlocked before inserting into Geberit Monolith 15 1 3 2 16 17 Glass must have even offset all around A A A A A A A A 1 16 1 16 1 1 1 2 180 A A A A 1 1 PH 3 ...
Page 13: ...13 D54139 001 04 2012 US 18 19 20 1 1 2 3 21 22 A A A A B B A A A A A A B B A A A A B B 3 4 1 T2 T2 X T2 T3 X 1 8 2 T3 T3 ...
Page 14: ...14 D54139 001 04 2012 23 1 2 3 24 1 2 3 ...
Page 15: ...15 D54139 001 04 2012 US 25 26 27 19 mm 1 5 Click 28 29 2 1 ...
Page 16: ...00 Clearwater Drive Des Plaines IL 60018 5999 Phone 847 803 5000 Fax 847 803 5454 For Technical Assistance 800 TEC TRUE 800 832 8783 www geberit us Geberit International AG Schachenstrasse 77 CH 8645 Jona dokumentation geberit com www geberit com ...