Revision A
Transport Pro
5-7
2012659-042
Maintenance: Battery
1. Insert the battery into the battery charger.
2. Wait approximately three minutes for the
RUN
LED to illuminate. If
it does not illuminate, follow this procedure.
a. Remove the battery from the battery charger.
b. Insert the battery into the battery charger and let the battery
charge for two to three minutes. The
FAIL
LED will flash.
c. When the
FAIL
LED stops flashing or both the
RUN
and
CONDITION
LED illuminate, remove the battery from the
battery charger.
d. After a few seconds, insert the battery in the battery charger.
The RUN and CONDITION LEDs will flash for five to ten
seconds. If the FAIL LED illuminates, remove and reinsert the
battery.
e. When the RUN and CONDITION LEDs remain illuminated for
one minute, the battery is “awake”.
NOTE
You may have to repeat these steps more than once for a battery
that has been sleep for a long time.
3. Charge the battery.
Internal
GE recommends using the Cadex SMart Two+ Charger to wake up a
battery. To wake up a battery inside the monitor, follow this procedure.
1. Connect the external power supply to the DC power connector on the
monitor.
2. Connect the external power supply to an electrical outlet.
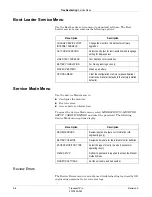
3. Access the Boot Loader program.
4. Select
Wake Up Battery
.
5. Insert the asleep battery in battery slot A.
6. Select Wake Up Lithium Ion Battery in SLOT A. This applies a
current to the battery for up to 210 seconds.
7. When the message “Battery awake, run main code to charge”
displays, reboot the monitor.
8. Charge the battery.
If the battery does not charge, repeat the procedure.
NOTE
The monitor will not charge a battery while in the Boot Loader
program.
Summary of Contents for Transport Pro
Page 1: ...Transport Pro Patient Monitor Service Manual Software Version 2 2024579 018 Revision A ...
Page 9: ...Revision A Transport Pro 1 1 2012659 042 1 Introduction ...
Page 12: ...1 4 Transport Pro Revision A 2012659 042 Introduction Safety Message Definitions ...
Page 13: ...Revision A Transport Pro 2 1 2012659 042 2 Equipment Overview ...
Page 28: ...2 16 Transport Pro Revision A 2012659 042 Equipment Overview Theory of Operation ...
Page 29: ...Revision A Transport Pro 3 1 2012659 042 3 Installation ...
Page 33: ...Revision A Transport Pro 4 1 2012659 042 4 Configuration ...
Page 38: ...4 6 Transport Pro Revision A 2012659 042 Configuration Monitor Settings ...
Page 39: ...Revision A Transport Pro 5 1 2012659 042 5 Maintenance ...
Page 47: ...Revision A Transport Pro 6 1 2012659 042 6 Troubleshooting ...
Page 57: ...Revision A Transport Pro 7 1 2012659 042 7 Ordering Parts ...
Page 59: ...Revision A Transport Pro 7 3 2012659 042 Ordering Parts Exploded View Exploded View 622A ...
Page 62: ...7 6 Transport Pro Revision A 2012659 042 Ordering Parts Hardware ...
Page 63: ...Revision A Transport Pro 8 1 2012659 042 8 Disassembly ...
Page 83: ...Revision A Transport Pro 9 1 2012659 042 9 Checkout ...
Page 97: ...Revision A Transport Pro A 1 2012659 042 A Technical Specifications ...
Page 100: ...A 4 Transport Pro Revision A 2012659 042 Technical Specifications External Power Supply ...
Page 101: ...Revision A Transport Pro B 1 2012659 042 B Electromagnetic Compatibility ...
Page 109: ......


