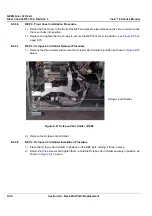
GE M
EDICAL
S
YSTEMS
D
IRECTION
2392751-100, R
EVISION
3
V
IVID
™ 4 S
ERVICE
M
ANUAL
8-48
Section 8-5 - Back End Parts Replacement
8-5-2
Back End Processor Replacement Procedure
8-5-2-1
Tools
Use the appropriate flat and Phillips-type screw drivers and a wire cutter, as indicated in the Back End
Processor replacement procedure.
8-5-2-2
Preparation
•
Presets
Note: Important:
When replacing Vivid™ 4 BT00 BEP, Presets cannot be loaded or transferred
into the new BEP. Make sure an Application specialist arrives on site to set new presets.
•
Full Incremental Backup
Note: Important:
If it is necessary to transfer archive information into the new BEP, please
perform a full incremental backup of the archive onto MO or CD
before replacing BEP
.
Note:
If the BEP is to be replaced, remember to perform a full incremental back-up of the Archive and
User Presets - refer to the
Software Installation/Upgrade Procedure
1.) While the Vivid™ 4 system is powered ON, press Archive.
2.) Press
Utility
and select
Backup
.
3.) Start full incremental backup onto the removable media.
4.) When the backup procedure is completed, the yellow portion of the ”pie” chart will be 0%.
8-5-2-3
Back End Processor Removal Procedure
1) Shut down the Vivid™ 4
ultrasound unit, as described in
.
2) Remove the Vivid™ 4 left and right side covers, as described in the
Note:
If the BEP only needs to be opened, remove only the
left
side cover.
3) Remove the rear cover, as described in the
4) Remove the BEP2, as follows:
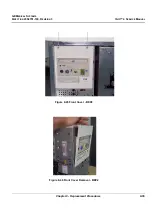
a.) Remove the two screws of
upper
BEP bracket, see
b.) Remove the screws of the
lower
left and
right
BEP brackets (
).
c.) Disconnect all the cables from rear of the BEP, leaving the HASP key (option plug) connected.
Note:
When replacing the BEP, the HASP key must be moved to the new BEP. You will need to
connect the HASP key to the parallel port. Make sure you perform a full incremental
back-up of the Archive and User Presets before replacing the BEP - refer to the

