background image

GEAppliances.com

49-90390   GE 06/16/10

W

as

he

rs

Safety Instructions

 ............................. 2, 3

Operating Instructions

Control Panels ..................................................... 4

Control Settings ..............................................5 , 6

Features .............................................................6–9

Loading and Using the Washer ........... 9, 10

Cleaning the Washer ............................. 11–13

Installation Instructions

 ........... 14–19

Preparing to Install Your Washer ............. 14

Location of Your Washer ............................. 15

Rough-In Dimensions .................................... 15

Unpacking Your Washer .............................. 16

Electrical Requirements................................ 16

Grounding Requirements ............................ 16

Water Supply Requirements ...................... 17

Drain Requirements ....................................... 17

Installing the Washer .............................17-18

Replacement Parts ......................................... 18

Adaptive Vibration Control .......................... 19

Troubleshooting Tips

 ................... 20–23

Consumer Support 

Warranty ............................................................ 25

Service Telephone Numbers ..................... 26

Owner’s Manual & 

Installation Instructions

Write the model and serial  

numbers here:
Model #  _________________
Serial # __________________

You can find them on a label on the 

side of the washer.

As an 

E

nErgy

 S

tar

®

 partner, 

GE has determined that this  

product meets the 

E

nErgy

 S

tar

®


guidelines for energy efficiency.

GFWH2400

GFWH2405

GFWS3500

GFWS3505

GFWS3600

GFWS3605

Summary of Contents for GFWH2405MV

Page 1: ...uirements 16 Water Supply Requirements 17 Drain Requirements 17 Installing the Washer 17 18 Replacement Parts 18 Adaptive Vibration Control 19 Troubleshooting Tips 20 23 Consumer Support Warranty 25 Service Telephone Numbers 26 Owner s Manual Installation Instructions Write the model and serial numbers here Model _ _________________ Serial ___________________ You can find them on a label on the si...

Page 2: ...is connected to the hot water system This simple procedure will allow any built up hydrogen gas to escape Since the gas is flammable do not smoke or use an open flame or appliance during this process n Install or store where it will not be exposed to temperatures below freezing or exposed to the weather which could cause permanent damage and invalidate the warranty n Properly ground washer to conf...

Page 3: ...es NOT disconnect the appliance from the power supply n Never attempt to operate this appliance if it is damaged malfunctioning partially disassembled or has missing or broken parts including a damaged cord or plug n Do not slam the washer door closed Do not try to force the door open when locked LOCKED indicator ON This could result in damage to the washer n The washer is equipped with an electri...

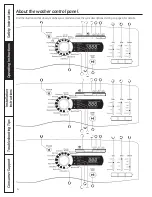
Page 4: ...es your model and see the cycle descriptions starting on page 6 for details Consumer Support Troubleshooting Tips Operating Instructions Safety Instructions Installation Instructions 1 2 3 4 5 7 11 12 14 10 8 9 6 13 1 2 3 4 5 7 11 12 13 10 8 9 6 1 2 3 4 5 6 7 11 12 13 10 8 9 ...

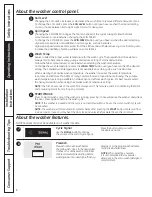
Page 5: ...ght to normal soil Provides gentle tumbling and soak during wash and rinse HANDWASH For items labeled hand washable with light soils Provides gentle rocking to mimic the handwashing action WASHABLE WOOL some models For the washing of machine washable wool products provided that they are washed according to the instructions on the garment label When selecting this cycle you must use a detergent sui...

Page 6: ...d in home laundry The sanitize wash temperature is only available on Stain Wash and Whites wash cycles For best results select the heavy soil setting when using the Sanitize wash temperature setting NOTE The first 10 seconds of the wash fill is always cold This feature assists in conditioning the fabric and preventing stains from setting on garments START PAUSE Press to start a wash cycle If the w...

Page 7: ...n NOTE The POWER button can still be used when the machine is locked MY CYCLE on some models To save a favorite cycle set the desired settings for wash cycle soil level spin speed and wash temp settings and hold down the MY CYCLE button for 3 seconds A beep will sound to indicate the cycle has been saved To use your custom cycle press the MY CYCLE button before washing a load To change the saved c...

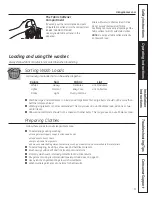
Page 8: ...it is flush to the bottom of the compartment It is not an issue if the detergent leaks past the insert to the back of the compartment n Detergent usage may need to be adjusted for water temperature water hardness size and soil level of the load Avoid using too much detergent in your washer as it can lead to oversudsing detergent residue being left on the clothes and could extend wash times n Do no...

Page 9: ...rs Empty all items from pockets Remove nonwashable garment accessories such as ornaments and nonwashable trim materials n To avoid tangling tie strings draw ties and belt like materials n Brush away surface dirt and lint treat spots and stains n Promptly wash wet or stained garments to maximize results n Mix garments using recommended maximum load sizes on page 10 n Use nylon mesh garment bags to ...

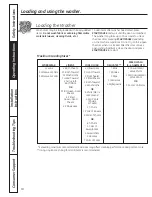
Page 10: ...shcloths 7 Hand Towels 2 Terrycloth Bath Mats OR 2 Flat Queen Sized Sheets 2 Fitted Queen Sized Sheets 4 Pillowcases MIXED LOAD 4 Pillowcases 2 Hand Towels 2 Flat Sheets 2 Fitted Sheets 2 Bath Towels 4 Washcloths OR 6 Shirts Men s or Women s 4 Pair Pants Khakis or Twills 5 T Shirts 7 Pairs of Boxers 4 Pairs of Shorts OR 6 T Shirts 4 Pairs of Sweatpants 4 Sweatshirts 2 Hoodies 7 Pairs of Socks DELI...

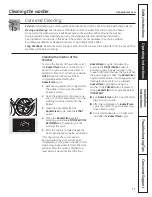
Page 11: ...ot flood the floor BasketClean may be interrupted by pressing the START PAUSE button in between cycles A power outage in the house might also interrupt the cycle When the power supply is back the BasketClean cycle resumes where it had stopped When interrupted be sure to run a complete BasketClean cycle before using the washer If the POWER button is pressed during BasketClean the cycle will be lost...

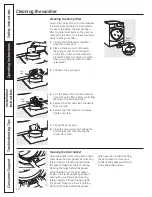
Page 12: ...l articles to pass to the pump The washer has a filter to capture lost items so they are not dumped to the drain To retrieve lost items clean out the pump filter 1 Using a small flathead screwdriver open the access door 2 Place a shallow pan or dish under the pump access door and towels on the floor in front of the washer to protect the floor It is normal to catch about a cup of water when the fil...

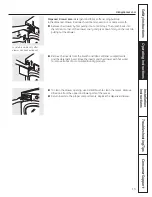
Page 13: ... the drawer cavity and press down firmly on the lock tab pulling out the drawer n Remove the inserts from the bleach and fabric softener compartments and the detergent insert Rinse the inserts and the drawer with hot water to remove traces of accumulated laundry products n To clean the drawer opening use a small brush to clean the recess Remove all residue from the upper and lower parts of the rec...

Page 14: ...rly grounded and installed as described in these Installation Instructions Do not install or store the appliance in an area where it will be exposed to water weather See the Location of Your Washer section NOTE This appliance must be properly grounded and electrical service to the washer must conform with local codes and ordinances and the latest edition of the National Electrical Code ANSI NFPA 7...

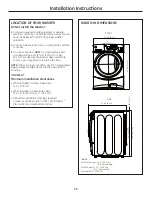
Page 15: ...r NOTE If floor is in poor condition use 3 4 impregnated plywood sheet solidly attached to the existing floor covering IMPORTANT Minimum Installation Clearances When installed in alcove Sides Rear Top 0 0 cm When installed in closet Sides Rear Top 0 0 cm Front 1 2 54 cm Closet door ventilation openings required 2 louvers each 60 square in 387 cm2 located 3 7 6 cm from top and bottom of door ROUGH ...

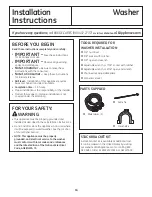
Page 16: ...ed and grounded 15 amp branch circuit fused with 15 amp time delay fuse or circuit breaker POWER SUPPLY 2 wire with ground 120 volt single phase 60 Hz alternating current OUTLET RECEPTACLE Properly grounded 3 prong receptacle to be located so the power supply cord is accessible when the washer is in an installed position Read these instructions completely and carefully WARNING Improper connection ...

Page 17: ...lush the water lines and remove particles that might clog up the water valve screens 2 Remove the inlet hoses from the plastic bag 3 90 elbow end Carefully connect the inlet hose marked HOT to the outside H outlet of the water valve Tighten by hand then tighten another 2 3 turn with pliers Carefully connect the other inlet hose to the inside C outlet of the water valve Tighten by hand then tighten...

Page 18: ...ING THE WASHER cont 8 Plug the power cord into a grounded outlet NOTE Check to be sure the power is off at the circuit breaker fuse box before plugging the power cord into an outlet 9 Turn on the power at the circuit breaker fuse box 10 Read the rest of this Owner s Manual It contains valuable and helpful information that will save you time and money 11 Before starting the washer check to make sur...

Page 19: ...t range of floor types Follow the procedure below to enable more specific adaptive settings Your washer can be returned quickly and easily to the DEFAULT configuration at any time using the same procedure ADAPTIVE VIBRATION CONTROL Floor Type Selection 1 With the unit powered off press and hold EXTRA RINSE and SPIN buttons simultaneously for 3 seconds 2 Rotate the cycle knob and select FL1 FL2 FL3...

Page 20: ...ng is left in this seal and can cause a small leak If this area is wet you have oversudsing condition Use less detergent Make sure hose connections are tight at washer and faucets and make sure end of drain hose is correctly inserted in and secured to drain facility Check household plumbing You may need to call a plumber Powder soap may cause clogs inside the dispenser and cause water to leak out ...

Page 21: ... clean the Pump Filter No power washer not working or dead Washer is unplugged Water supply is turned off Circuit breaker fuse is tripped blown Automatic self system checks Make sure cord is plugged securely into a working outlet Turn both hot and cold faucets fully on Check house circuit breakers fuses Replace fuses or reset breaker Washer should have separate outlet First time the washer is plug...

Page 22: ... If fabric label states wash separately unstable dyes may be indicated Colored spots Incorrect use of fabric softener Dye transfer Check fabric softener package for instructions and follow directions for using dispenser Sort whites or lightly colored items from dark colors Promptly remove wash load from washer Water temperature is incorrect Water supply is improperly connected House water heater i...

Page 23: ... seated Never put detergent above max line It is normal operation to see detergent leak on door gasket about 20 seconds after filling the dispenser Improper dispensing of softener or bleach Dispenser clogged Softener or bleach is filled above the max line Softener or bleach cap issue Monthly clean the dispenser drawer to remove buildup of chemicals Make sure to have the correct amount of softener ...

Page 24: ...24 Notes ...
Page 25: ...General n Service trips to your home to teach you how to use the product n Improper installation delivery or maintenance n Failure of the product if it is abused misused or used for other than the intended purpose or used commercially n Damage after delivery n Replacement of house fuses or resetting of circuit breakers n Damage to the product caused by accident fire floods or acts of God n Inciden...

Page 26: ...hat are available while your warranty is still in effect You can purchase it on line anytime or call 800 626 2224 during normal business hours GE Consumer Home Services will still be there after your warranty expires Parts and Accessories GEAppliances com Individuals qualified to service their own appliances can have parts or accessories sent directly to their homes VISA MasterCard and Discover ca...

Page 27: ...erra 16 Requisitos de suministro de agua 17 Requisitos de desagüe 17 Instalación de la lavadora 17 18 Piezas de repuesto 18 Control de vibración adaptativo 19 Consejos para la solución de problemas 20 23 Consumer Support Garantía EE UU 25 Servicio al consumidor 26 Owner s Manual Installation Instructions Write the model and serial numbers here Model _ _________________ Serial ___________________ Y...

Page 28: ...caliente Este sencillo procedimiento le permitirá liberar todo el gas hidrógeno acumulado Debido a que el gas es inflamable no fume ni utilice ninguna llama o electrodoméstico durante el proceso n Instale o almacene la lavadora en un lugar donde no esté expuesta a temperaturas bajo cero ni a las inclemencias climáticas ya que esto puede provocar daños irreversibles e invalidar la garantía n Conect...

Page 29: ...ente desmontada le faltan piezas o algunas están rotas incluidos el cable o el enchufe n No cierre la puerta bruscamente No intente forzar la puerta para abrirla cuando esté bloqueada el indicador LOCKED Bloqueada está ENCENDIDO Puede dañar la lavadora n La lavadora está equipada con un sistema de protección de sobrecargas eléctricas El motor se detendrá si se recalienta La lavadora se iniciará de...

Page 30: ...les vea las descripciones de ciclo que comienzan en la página 5 1 2 3 4 5 7 11 12 14 10 8 9 6 13 1 2 3 4 5 7 11 12 13 10 8 9 6 1 2 3 4 5 6 7 11 12 13 10 8 9 Servicio al consumidor Consejos para la soluciÛn de problemas Instrucciones de funcionamiento Instrucciones de seguridad Instrucciones de instalaciÛn ...

Page 31: ... poca o normal suciedad Proporciona una limpieza y un remojo suaves durante el lavado y el enjuagado LAVADO A MANO Para prendas en las que se indique que se pueden lavar a mano con poca suciedad La ropa se sacude con ligereza a fin de imitar la acción del lavado a mano LANAS LAVABLES algunos modelos Para lavar aquellos productos de lana lavables a máquina siempre y cuando se realice de acuerdo con...

Page 32: ...os La temperatura de esterilización está disponible exclusivamente en los ciclos de Stain Wash Lavado de manchas y Whites Wash Lavado de prrendas blancas Para obtener mejores resultados seleccione la configuración de suciedad excesiva cuando utilice la opción de temperatura de Esterilización NOTA Los 10 primeros segundos de la toma de agua siempre está fría Esta función permite acondicionar el tej...

Page 33: ...ntenga pulsado el botón MY CYCLE Mi ciclo durante 3 segundos Sonará un pitido para indicar que el ciclo se ha guardado Para utilizar el ciclo personalizado pulse el botón MY CYCLE Mi ciclo antes de lavar una carga Para cambiar el ciclo guardado establezca los valores deseados y mantenga pulsado el botón MY CYCLE Mi ciclo durante 3 segundos NOTA Al utilizar MY CYCLE Mi ciclo no se pueden modificar ...

Page 34: ...líquido se vaciará en el tambor de la lavadora a medida que se añada n Es posible que haya que ajustar el uso de detergente a la temperatura del agua a la dureza de la misma al tamaño y al nivel de suciedad de la carga Evite utilizar demasiado detergente en la lavadora ya que puede producir demasiado jabón y dejar restos en las prendas Agregue el prelavado en esta ubicación Dispositivo de inserció...

Page 35: ...les como adornos y materiales de ribetes no lavables n Para evitar los enredos ate los cordones hebillas y materiales tipo cinturón n Limpie suciedad y pelusas superficiales con un cepillo trate las manchas n Lave rápidamente las prendas húmedas o manchadas para maximizar los resultados n Mezcle las prendas utilizando los tamaños máximos recomendados de carga en la página 10 n Utilice bolsas para ...

Page 36: ...s 10 toallas de baño 12 toallitas 7 toallas de mano 2 alfombras de baño de toalla O 2 sábanas rectas tamaño Queen 2 sábanas ajustables tamaño Queen 4 fundas de almohada CARGA MIXTA 4 fundas de almohada 2 toallas de mano 2 sábanas rectas 2 sábanas ajustables 2 toallas de baño 4 toallitas O 6 camisas de hombre o de mujer 4 pantalones Khakis o de sarga 5 camisetas 7 boxers 4 shorts O 6 camisetas 4 pa...

Page 37: ...ciclos Un corte de energía en el hogar también puede interrumpir el ciclo Cuando se reanuda el servicio eléctrico el ciclo BasketClean continúa desde el punto en el que se había detenido Cuando se interrumpe asegúrese de realizar un ciclo completo de BasketClean antes de utilizar la lavadora Si se presiona el botón POWER encendido durante BasketClean el ciclo se perderá IMPORTANTE n Haga funcionar...

Page 38: ...la bomba La lavadora cuenta con un filtro para capturar los elementos perdidos para que no caigan en el drenaje Para recuperar los elementos perdidos limpie el filtro de la bomba 1 Utilizando un destornillador de lados planos abra la puerta de acceso 2 Coloque una bandeja o plato poco profundos bajo la puerta de acceso y toallas en el piso frente a la lavadora para proteger el piso Es normal que s...

Page 39: ...eza del detergente Lave las piezas y el depósito con agua caliente para eliminar los restos de productos de limpieza acumulados n Para limpiar la abertura del depósito utilice un cepillo pequeño a fin de limpiar los huecos Retire todos los restos de las partes superior e inferior del hueco n Vuelva a colocar las piezas en los compartimentos correspondientes Introduzca de nuevo el depósito de deter...

Page 40: ...on trinquete de 3 8 o Llave de boca de 3 8 o Llave inglesa o toma de corriente con trinquete de 7 16 o Llave inglesa o llave de boca de 9 16 o Alicates ajustables Channel lock o Nivel de carpintero o Tuberías de agua 2 PIEZAS INCLUIDAS o Abrazadera de cable o Guía de tuberías KIT DE SOPORTE DE APILADO Un kit de soporte de apilado se encuentra disponible a un costo adicional Puede solicitarse en lo...

Page 41: ...e contrachapado bien fija al revestimiento existente en el suelo IMPORTANTE Distancias mínimas de separación para la instalación Cuando se instale en alcoba costados parte trasera parte superior 0 0 cm Cuando se instale en un armario costados parte trasera parte superior 0 0 cm parte delantera 1 2 54 cm Aberturas de ventilación necesarias en la puerta del armario 2 listones cada uno de 60 pulgadas...

Page 42: ...circuito derivado de 15 amperios individual correctamente polarizado y conectado a tierra con interruptor o fusible de retardo de 15 amperios ALIMENTACIÓN ELÉCTRICA corriente alterna de 60 Hz monofásica de 120 voltios con conexión a tierra bifilar RECEPTÁCULO DE SALIDA receptáculo correctamente conectado a tierra con 3 clavijas situado de forma que se pueda acceder al cable de alimentación cuando ...

Page 43: ... puedan obstruir los filtros de la válvula de agua 2 Saque las tuberías de entrada de la bolsa de plástico 3 Extremo acodado de 90 Conecte con cuidado la tubería de entrada marcada con HOT Caliente a la salida H exterior de la válvula de agua Apriete con la mano y a continuación apriete 2 3 de vuelta con los alicates Conecte con cuidado la otra tubería de entrada a la salida C interior de la válvu...

Page 44: ...cable de alimentación en una salida de conexión a tierra NOTA Asegúrese de que la alimentación está cortada en un interruptor caja de fusibles antes de enchufar el cable de alimentación a una toma de corriente 9 Conecte la alimentación a un interruptor caja de fusibles 10 Lea el resto del Manual del propietario Contiene información valiosa y útil que supondrá un ahorro de tiempo y dinero 11 Antes ...

Page 45: ... para activar configuraciones adaptativas más específicas Su lavadora puede volverse rápida y fácilmente a la configuración DEFAULT predeterminada en cualquier momento utilizando el mismo procedimiento CONTROL DE VIBRACIÓN ADAPTATIVO SELECCIÓN DE TIPO DE PISO 1 Con la unidad apagada presione y sostenga los botones EXTRA RINSE enjuague extra y SPIN centrifugado al mismo tiempo durante 3 segundos 2 ...

Page 46: ...de la vivienda esté obstruida Dispensador tapado Uso incorrecto del detergente Fisura en el dispositivo de suministro de jabón Revise que la junta esté colocada en su sitio y que no se haya roto Los objetos dejados en los bolsillos podrían lcausar daños a la lavadora clavos tornillos lápices bolígrafos El agua podría gotear de la puerta cuando la misma está abierta Esto forma parte del funcionamie...

Page 47: ...cida de manera demasiado profunda en el drenaje El temporizador agrega 3 minutos al ciclo la máquina ha distribuido la carga once o quince veces Esto forma parte del funcionamiento normal No debe hacer nada la máquina terminará el ciclo de lavado Para obtener información sobre la limpieza del Filtro de la Bomba lea la página 12 Enderece la tubería de desagüe y asegúrese de que la lavadora no está ...

Page 48: ...cia una prolongación en el tiempo estimado de lavado Cantidad de agua insuficiente Esto es normal Las lavadoras horizontales no requieren que el tubo se llene de agua como sí ocurre con las lavadoras con carga superior La lavadora se detiene o se debe reiniciar o la puerta de la lavadora lavadora está bloqueada y no se abre Obstrucción de la bomba Para obtener información sobre la limpieza del Fil...

Page 49: ...tamente El calentador de agua de la vivienda no se ha ajustado correctamente Asegúrese de que las tuberías están conectadas a las tomas correctas Asegúrese de que el calentador de agua de la vivienda suministre agua a 120 140 F 48 60 C Pequeña variación del color metálico Esto es normal Debido a las propiedades metálicas de la pintura utilizada con este producto único pueden ocurrir pequeñas varia...

Page 50: ... suavizante o blanqueador El dispositivo de suministro se debe limpiar en forma mensual a fin de eliminar la acumulación de químicos Asegúrese de que la cantidad de suavizante o blanqueador sea correcta Asegúrese que la tapa del suavizante y del blanqueador para el dispositivo de suministro estén ajustadas o no funcionarán Servicio al consumidor Consejos para la soluciÛn de problemas Instrucciones...

Page 51: ...trarle cómo utilizar el producto n Instalación envío o mantenimiento incorrectos n Fallas del producto por manipulación uso incorrecto o distinto al destinado o previsto comercialmente n Daños tras la entrega n Sustitución de los fusibles de la vivienda o restablecimiento de los interruptores n Daños causados por accidentes incendios inundaciones o fenómenos naturales n Daños emergentes o fortuito...

Page 52: ...arla en línea en cualquier momento o llamar al 800 626 2224 durante horas normales de oficina GE Consumer Home Services estará aún ahí cuando su garantía termine Piezas y accesorios GEAppliances com Aquellos individuos con la calificación necesaria para reparar sus propios electrodomésticos pueden pedir que se les manden las piezas o accesorios directamente a sus hogares aceptamos las tarjetas VIS...

Reviews: