GE Appliances
Louisville, Kentucky 40225
31-9256
Technical Service Guide
June 2016
CDT835SxJ0xx CDT865SxJ0xx PDF820SxJ0xxPDT825SxJ0xxPDT845SxJ0xxPDT846SxJ0xxPDT855SxJ0xx
ZDT915SxJ0xx ZDT975SxJ0xx
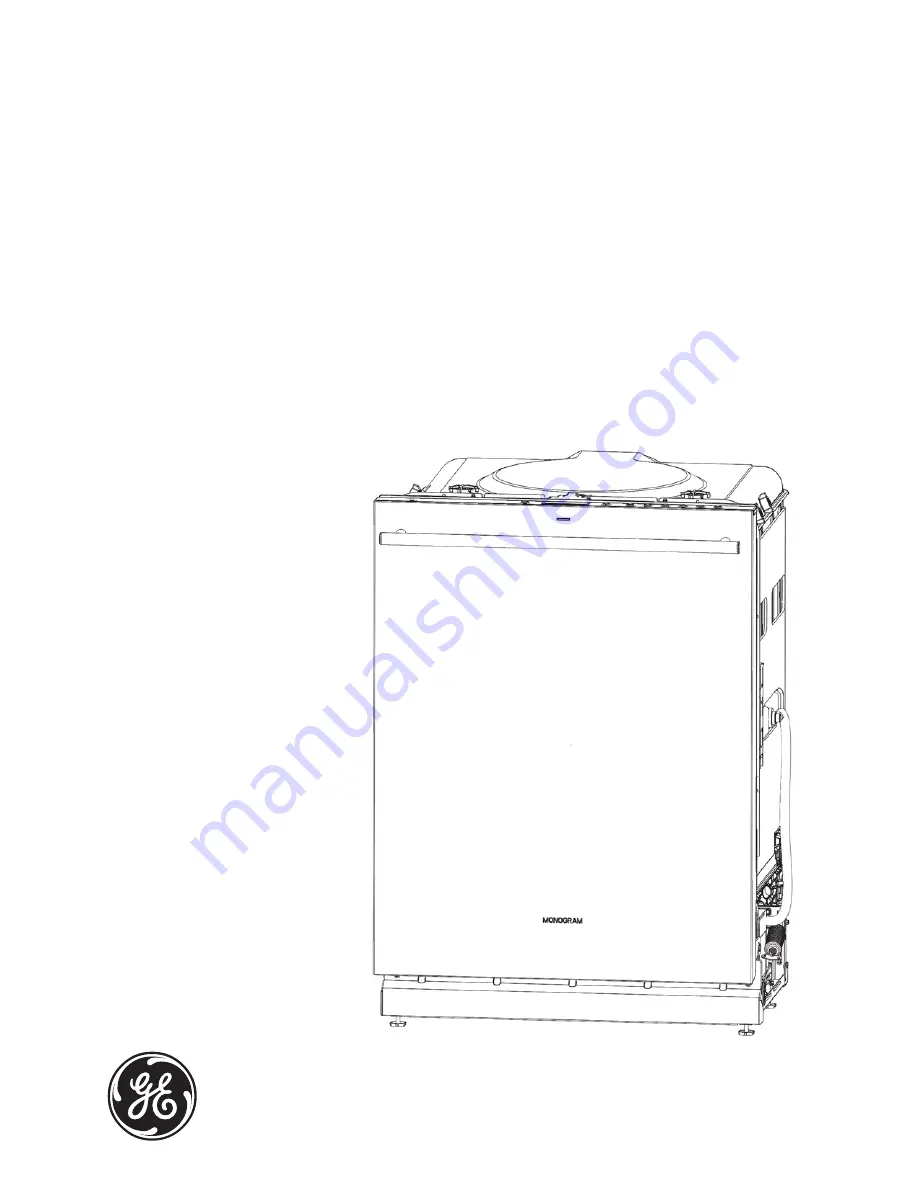
2016 Stainless Steel Tub Dishwasher
Page 1: ...e Kentucky 40225 31 9256 Technical Service Guide June 2016 GE Appliances CDT835SxJ0xx CDT865SxJ0xx PDF820SxJ0xx PDT825SxJ0xx PDT845SxJ0xx PDT846SxJ0xx PDT855SxJ0xx ZDT915SxJ0xx ZDT975SxJ0xx 2016 Stainless Steel Tub Dishwasher ...
Page 2: ... To avoid personal injury disconnect power before servicing this product If electrical power is required for diagnosis or test purposes disconnect the power immediately after performing the necessary checks RECONNECT ALL GROUNDING DEVICES If grounding wires screws straps clips nuts or washers used to complete a path to ground are removed for service they must be returned to their original position...
Page 3: ... 10 Target Temperatures 11 Cycle Details 12 Troubleshooting 13 Flashing Lights 13 Will Not Start 13 Component Locator Views 14 Tub and Structure 19 Tub Trim 19 Toe Kick 19 Junction Box and House Wiring Connection 19 Level Legs 20 Door Balance System 20 Hinges 20 Door Springs and Cables 20 Tub Gasket 22 Latch System 23 Latch Switch Diagnosis 23 Upper Rack 24 Lower Rack 26 Third Rack some models 27 ...
Page 4: ... Dispenser 38 Floor Protect Pan 39 Sump Module 41 Sump Gasket 43 Installing Sump Module 43 Electronic Controls 44 Consumer Error Mode 44 On the Main Control Board CSM 46 Service Mode 47 Diagnosing Electronic Control Boards 48 Main Control Diagnostics 48 UI Diagnostics 50 Inverter Control Board 51 Inverter and Motor Diagnostics 52 WiFi Connect 56 Tub Lighting 58 Fill System 59 Water Level 59 Diagno...
Page 5: ...ray Arm 78 Clean Sweep Jets Middle Spray Arm Model PDT846SSJ only 78 Middle Conduit 78 Bottle Wash System 80 Upper Spray System 80 Silverware Wash 81 Drain System 82 Diagnostics Single Speed Motor CDT835S PDF829S and PDT825S 83 Diagnostics Variable Speed Drain Motor 83 Dry System 85 Heat Element Removal 87 Tub TCO PDF820S PDT825S and CDT835S 87 9HQWLQJ LUÀRZ 87 Power Dry Forced Air 88 Schematics 9...
Page 6: ...shoes for all repairs Steel Toed Work Boot Electrically Rated Glove and Dyneema Cut Resistant Glove Keeper Dyneema Cut Resistant Glove Plano Type Safety Glasses Prescription Safety Glasses Safety Glasses must be ANSI Z87 1 2003 compliant Brazing Glasses Cut Resistant Sleeve s Step 1 Plan and Prepare Step 4 Apply LOTO device and lock Step 2 Shut down the appliance Step 5 Control discharge stored en...
Page 7: ...Model and Serial Tag Mini Manual Brand H Hotpoint G GE P Profile C Café Z Monogram L Lowes D Adora S Sears A Americana Z D T 9 7 5 S S J 0 S S Configuration D Built In P Portable Feature Package 0 99 Engineering Digit 0 9 Interior Material H Hybrid Plastic Tub SS Inner Door P Plastic Tub Inner Door S Stainless Tub Inner Door Model Year Color WW White CC Bisque BB Black II Panel Ready SA Silver Met...
Page 8: ...cle virtually eliminating the need for soaking or pre rinsing dishes Power Dry Fan Piranha hard food disposer 80 Recyclability 3URGXFW 6SHFL FDWLRQV Approximate Shipping Weight lb 125 pounds depending on model Height w Legs Retracted in 33 3 8 Height w Legs Extended in 34 5 8 Overall Width in 23 3 4 Overall Depth in 24 1 4 and 5 16 nut driver R2 Quadrex bit 20 and 25 Torx bits 2 Phillips head scre...
Page 9: ... 20 ml Flood Switch 13 5 VDC 42 amp Turbidity Sensor 5 VDC to LED 10K ohms Tub Lighting Top 12 14 VDC Side 19 22 VDC OHFWULFDO 6SHFL FDWLRQV AC Voltage Single Speed Circulation Pump 120 VAC 8 amp 3 8 LRA 8 GPM 5 PSI Single Speed Drain Pump 120 VAC 27 ohms 65 amp 70 second cycle Main Control Input 120 VAC Output 120 VAC and Output 5 13 5 VDC Tub TCO 120 VAC 210 F 10 F Manual Reset Models with hidde...
Page 10: ...KH UVW SUHZDVK VHJPHQW of the cycle Operation and Cycle Information 4 Pass Exposed Heater Algorithm Dry Cycle Normal with Heated Dry Time minutes Calrod Description 6 Calrod on 28 DOURG 3XOVH PLQXWH RQ PLQXWH RȺ 14 DOURG RȺ RRO RZQ Normal with Temp Boost or Sani Selected 6 Calrod on 58 DOURG 3XOVH PLQXWH RQ PLQXWH RȺ Heated Dry Element Algorithm Exposed Heater Models Rinse 15 minutes Express 30 51...
Page 11: ...ature Limits Cycle PW4 MW PR1 FR FR w Dry Rinse Express 120 135 135 140 160 Light 125 130 135 135 eWash 120 125 125 Normal 125 140 160 Auto 130 140 160 Heavy 130 135 130 145 160 7DUJHW WHPSHUDWXUHV DUH VHW LQ WKH FRQWURO WR DFKLHYH SHDN SHUIRUPDQFH 3URSHU WHPSHUDWXUH FDQ EH DȺHFWHG by low temperature incoming water heater not operational and installation The dishwasher will achieve these goals if ...
Page 12: ...pty 60 15 Empty 65 16 Empty 65 16 Empty 65 30 Empty 65 30 Empty 65 30 Empty Final Rinse Fill sec Circ min Drain 60LSA 120USA No ON 60 13 Empty 60 15 Empty 60 15 Empty 60 30 Empty 60 30 Empty 60 30 Empty 7KH EHORZ WDEOH GHWDLOV OO DQG GUDLQ WLPHV ZKLFK GHSHQG RQ HLWKHU D IXOO RU SDUWLDO GUDLQ W SURYLGHV WKH circulation time in each segment but does not include dry cycles NOTES Maximum segment param...
Page 13: ...cs are covered in this service guide This troubleshooting section is an overview of diagnostic capabilities of the electronic control The control features allow retrieval of error codes operation of loads in service mode and further diagnostics of the electronic controls are possible with the use of the Service LED on the main control board Details on Consumer Error Mode and Service Mode as well a...
Page 14: ...nce may vary throughout this service guide Some models do not have all features shown or may be GLȺHUHQW GHSHQGLQJ WKH PRGHO QXPEHU Latch Assembly Front Console Vent Indicator LED s Buttons Pocket Handle Outer Door Panel Buttons Top Control Console Status LED Handle Outer Door Panel ...
Page 15: ... Box Water Valve Sump Floor Protect Pan Insulation Toe Kick Panel Toe Kick Screws Tub Trim Third Rack Mounting Hardware High Drain Loop Hose Fill Hose Fill Funnel 2ȺVHW HJ Hinge Arm Balance Cable Balance Roller Balance Spring Continued next page ...
Page 16: ...om Continued next page Floor Protection Pan Junction Box Main Control Box Level Leg Sump Water Valve Fill Hose High Drain Loop Hose Tub TCO Heater Mounting Nuts Heater Mounting Nuts High Drain Loop Floor Protect Pan ...
Page 17: ...Continued next page Vent Caps Ultra Fine Filter Fine Filter Sump Gasket Diverter Flood Float Sump Flood Switch Turbidity Sensor Sump Latch Cam Circulation Pump Sump Sump Latch Cam Flood Switch Diverter Drain Pump Sump Latch Cam ...
Page 18: ... 18 Inside Tub Trim Third Rack Upper Rack Main Conduit Silverware Basket Lower Rack Detergent Module Door Strike ...
Page 19: ... Drain System sections of this service guide Tub Trim Toe Kick The toe kick is a decorative panel covering the machine area of the dishwasher The panel provides a safety barrier closing the front of the dishwasher machine compartment The toe kick prevents injury from electrical components under the dishwasher To remove the panel remove two 1 4 in hex head screws and pull the panel away from the di...
Page 20: ...ise the dishwasher turn the level legs counter clockwise If a level leg will not keep the dishwasher level because the support rail is stripped the dishwasher may be repaired by using two WR01X10044 nuts and WD12X10417 leveling leg if needed Rear level legs have the optional location to repair Place one nut on the leg and install the new leg onto the dishwasher damaged frame Use the bottom nut to ...
Page 21: ...y be needed to balance the door during operation If only one spring is being attached to the cable the spring hook should be inserted into the middle hole on the cable and the other end of the spring should be hooked over the lowest adjustment hole on the rear tub bracket as shown below and in the next column If multiple springs are required on one or both sides to balance the door the spring hook...
Page 22: ...nd closing Tub Gasket Tub Gasket Removal Pull the gasket from the retainer area Tub Gasket Installation 1 The center of the gasket has a mark which is placed pointing to the inside of the dishwasher This position will orient the gasket wiper to face the inside of the dishwasher and to the inner door 2 Start by placing the mark down and align it with the tub latch Push the gasket into the track wor...
Page 23: ...pproximately 6 to 8 inches 3 Remove two screws R2 Robertson Carpenters Bit or 2 Phillips screwdriver 4 Disconnect the wiring to the switch The door switches are rated at 13 5 VDC The door latch switches open and close the line and neutral break relays on the main control The latch assembly is located on top of the tub A strike on the door activates the switches and the latch assembly holds the doo...
Page 24: ...OH EUDFNHW WR VOLGH RȺ WKH rack bracket Full Extension Rails Removal 1 Extend to the full outward position 2 Push up on the right side track lever and down on the left side lever 3 3XOO WKH UDFN RȺ RI WKH LQQHU WUDFN When reinstalling the rack guide the tracks onto the rails and push it all the way in to lock it in place Rails The rails are attached to the stainless steel tub and are a non replace...
Page 25: ...ry Bracket The bracket is snapped onto the rack and can be removed by pressing in on 4 tabs to release and sliding the bracket to the front of the rack then SLYRWLQJ WKH EUDFNHW RȺ RI WKH UDFN Bottle Wash Components To remove the Bottle Wash Components 1 Remove the cover by releasing the clip at the bottom and slide the cover to the right 2 Disconnect the hose ...
Page 26: ...he cover to unclip the center tabs 7KH UROOHUV ZLOO VOLGH RȺ WKH EUDFNHW DQG WKH EUDFNHW shaded grey in the image below is pushed to the rear of the rack to remove Left Side Right Side 7KH OHIW DQG ULJKW EUDFNHWV DQG FRYHUV DUH GLȺHUHQW part numbers and are marked L or R left or right on the inside to insure proper installation Silverware Baskets All models have a silverware basket clipped to the ...
Page 27: ... WKH UDLOV The rails may be removed by releasing the rear end cap Push the tab and remove the endcap Third Rack some models Third Rack Brackets To remove the brackets the dishwasher must be removed from installation 1 Remove the basket and frame 2 Remove two 1 4 in hex head screws 3 Remove two mounting nuts 4 Remove the bracket from inside the dishwasher Third Rack Rail Rollers are secured to the ...
Page 28: ...4 in hex head screw Lift the bracket up to disengage from the slide The bracket has a seal attached and available with the bracket Monogram Third Rack ZDT975S has a two tray basket system with full extension rails Monogram Third Rack Removal 1 Pull the third rack and track system to its full outward extension There are four locking pegs on the tub mounted slides 2 Lift the frame from the slides at...
Page 29: ...or lights The door also houses the detergent module bottom door seal and a passive venting system see the Dry System section in this service guide Door Removal 1 Remove power to the dishwasher then close and latch the door 2 Remove the toe kick and insulation if applicable 3 Disconnect the door wire harness at the bottom of the main control cover 4 Release the wire clip holding the harness to the ...
Page 30: ... reconnecting may require the dishwasher to be removed from the installation The cable seated correctly into the clip is shown below 9 Repeat steps 5 through 8 on the opposite side 10 Standing in front of the dishwasher open the door a few inches then lift the door and hinge DUPV RȺ RI WKH RȺVHW OHJ NOTE When installing the door onto the dishwasher make sure the hinge pins are located on the hinge...
Page 31: ... panel 7 Support the vent conduit while lifting the inner door from the outer door panel The inner door vent cover must be removed to remove the power vent conduit and fan Insert two SRFNHW VW OH ÀDW EODGH VFUHZGULYHUV LQWR WKH YHQW then turn counter clockwise to remove To Separate the Door 1 Remove the door 2 Place the door with the outer door facing down on a protective surface 3 Remove two 1 4 ...
Page 32: ...er door panel engaged with the attach tabs of the inner door 4 Reinstall the screws and reinstall the door The Front Control Console is held in place by four tabs on the pocket handle Outer door has cutouts to receive inner door tabs Front Control Console Front Control Console Removal 1 Remove the door and separate the inner and outer door panels 2 Push down on the pocket handle then lift up and a...
Page 33: ...ve four 1 4 in hex head screws at the top of the light pipe The light pipe and buttons may now be removed The pocket handle is attached to the inner door panel The front control console must be removed as previously described in Front Control Console Removal Remove six 1 4 in hex head screws The pocket handle is also clipped to the top attachment strip of SS inner doors Top Cover Console Buttons L...
Page 34: ... with tabs A small screwdriver may be needed to VWDUW WKH UVW WDE 6 7KH OLJKW SLSH PD EH ÀH HG E WZLVWLQJ WR release the remaining tabs four each side 7 With the light pipe removed the UI may be lifted out of the bottom cover When replacing UI control boards the new UI RDUG PXVW EH FRQ JXUHG DV SHU LQVWUXFWLRQV included with the replacement If the personality is not set by using the four jumpers t...
Page 35: ...n the event the cover is loose or must be removed The tabs are likely to break on removal New Top Cover Installation 1 The top cover is secured with sixteen tabs and the console has cutouts or slots to allow the top cover to click lock together 2 Position the tabs on the cover into the slots on the console 3 Press the top and console securely together and slide the parts to engage the tabs into th...
Page 36: ...door panels Side Attachment Strip s Removal 1 Remove and separate the inner and outer door panels 2 Remove the front control console or top control panel 3 Remove the two T15 Torx screws on the side attach strips 4 Slide the strip inward to remove To Remove the Top Attachment Strip the Door 6WULNH PXVW EH UHPRYHG UVW VHH WRS RI SDJH ULJKW side The top attach strip may now be removed by sliding the...
Page 37: ...ver 2 Disconnect the wire harness from the fan to the UI control 3 Remove the 1 4 in hex head screw If alignment causes a binding on the tab it can be removed the purpose for the tab is to aid assembly in the factory The vent cover provides the main attachment for the venting assembly 4 The vent conduit fan and the duct are removed as an assembly NOTE Vent fan and diagnostics may be found in the D...
Page 38: ...ditions this will last approximately one month The module receives 13 5 VDC for 1 second to activate the detergent cup To activate the rinse aid the module receives 13 5 VDC for a period of 15 seconds A sensor is used to detect rinse aid level and advise the consumer when the level is low The rinse aid sensor is covered on the next page Diagnosing Detergent Module 1 Remove power then remove and se...
Page 39: ...Dishwashers This feature will hold 24 ounces of water on a level GLVKZDVKHU SURWHFWLQJ WKH FRQVXPHU V ÀRRU 7KH pan is held in place with 4 tabs Some models have a moisture sensor that will alert the consumer of a leak under the dishwasher and advise that they call for service If water is detected when the dishwasher is running a cycle the dishwasher enters a drain mode for up to 70 seconds and can...
Page 40: ... Disconnect power to the dishwasher 2 Remove the toe kick panel and insulation depending model 3 Slide the pan to the front of the dishwasher this will disengage the four tabs 4 7KH SDQ ZLOO GURS WR WKH ÀRRU DQG FDQ EH removed from under the dishwasher Floor Protect Pan Installation 1 Slide the pan under the dishwasher until the mounting tabs are close to engaging 2 Lift the pan upward until it co...
Page 41: ... of this service guide 6 5HPRYH WKH XOWUD QH OWHU D WZR YHQW FDSV E QH OWHU F PDLQ FRQGXLW G VLOYHUZDUH FRQGXLW H DQG ÀRRG ÀRDW I 7 Remove the main conduit see the Circulation System section of this service guide High Drain Loop Hose Disconnect Turbidity Sensor Harness Continued next page Sump Module 8 Loosen the high drain loop hose clamp 1 4 in hex head and remove the hose from the drain pump th...
Page 42: ...mp to the drain pump 3 has the hose molded to the drain pump 11 The sump latches below are shown in the release position Each latch has a stop point built in Turn the latches to a stop point when unlatching and latching 12 Push the sump from the bottom into the tub 13 Grasp the sump from inside using care NOT to XVH WKH ÀRRG VZLWFK DV D KDQGOH 7LOW DQG OLIW to bring the sump into the tub Bring the...
Page 43: ...ewdriver inserted into the ear of the clamp and move the handle back and forth to loosen the clamp The clamp can be removed and discarded when the component is removed Warning Using diagonal pliers to cut the clamps may cause damage to the hoses While inserting the sump assembly back into the tub use care to ensure that the sump assembly wiring and components are not pinched between the sump and t...
Page 44: ...the dishwasher It is supplied 120 VAC from the consumers home Outputs include 120 VAC to the heating element wash and drain motors The FRQWURO DOVR VXSSOLHV 9 WR WKH OO V VWHP GRRU switches turbidity sensor some models UI board and detergent module in the door The main control has a CSM Current Sense Module located on the control If the CSM detects a ground path the dishwasher will be non responsi...
Page 45: ... Failure Check turbidity sensor and harness F64 Inverter Error Received Check inverter and harness F65 Inverter No Water Detected Check inverter and harness F80 Absent Water Flow turbidity based Check turbidity sensor harness replace sensor F96 No Water In Tub turbidity based Check turbidity sensor harness replace sensor F97 Absent Heat Source Check heater and thermistor F98 Non draining Sump turb...
Page 46: ...HQ Service Mode is entered The cause of tripping is likely external to the board itself The board should only be replaced after all other diagnostic tests have been completed and all other potential causes have been ruled out Potential causes of current leakage to ground could be due to water leaking onto a live component a component malfunction or a fault within the wiring harness If water caused...
Page 47: ...PDT845SxJ0xx LED Blink Load to Control Timeout Notes 1 Drain Pump Attempts to empty Takes approximately 75 seconds from normal level 2 Water Valve WWHPSWV WR OO WR QRUPDO level Takes approximately 1 minute 3 Circulation Pump Runs for approximately 2 minutes pressing Start button will alternate lower spray arm to mid and upper spray systems there will be a one or eight second pause see Pressure Div...
Page 48: ...D Drain Circ Connector Personality Jumper Blink Pattern Meaning 1x per 3 seconds Dishwasher in not running a cycle select a cycle and press Start 2x per 3 seconds Dishwasher is in Delay Start and waiting to start a cycle The cycle will begin once the delay expires 3x per 3 seconds Dishwasher is running a cycle 4x per 3 seconds Dishwasher is paused close the door and press Start to resume the cycle...
Page 49: ... access ports in the control area and above the sump hoses to keep them from snagging on the ÀRRU 10 All ground screws must be reinstalled Remove two 1 4 in hex head screws J722 Door Connector RJ45 Connector Power Supply 1 L1 Line 2 Neutral 3 Earth Ground J701 1 2 3 Harness wire pinch potential areas Top Side of Main Control CDT835J PDT820J and PDT835J Only Bottom Side of Main Control WARNING GE F...
Page 50: ... voltage at the UI If volts are correct replace the UI I WKHUH LV QR RSHUDWLRQ GLVSOD RU V ZLOO QRW OLJKW Check for 120 VAC entering the machine control If no voltage is found or voltage disappears when Start button is pressed a house electrical fault is suspected Check the Service LED on the machine control for a ÀDVK SDWWHUQ 8VH WKH WDEOH EHORZ WR WUDQVODWH DQG repair using the Service LED as a ...
Page 51: ...proper heat transfer Should an inverter need to be replaced it will come as an assembly mounted to the mounting plate The inverter should not be removed from the mounting plate Checking for fault codes and using the Service Mode are both used to obtain main control errors and inverter errors Safety Diagnostics for variable speed wash and drain motors include the inverter Warning Caution must be us...
Page 52: ... inverter if all are OK F146 Circulation Pump Error Check harnessing replace circulation pump if needed F147 Drain Pump Error Check harnessing replace drain pump if needed F148 Open TCO in circulation or drain motor Check harness UHSODFH DȺHFWHG motor F149 Poor connection or harness to inverter Check connections and harness replace inverter if needed Inverter and Motor Diagnostics The main board i...
Page 53: ... shows the Service LED location J702 Motor connector J703 Heater connector J711 DC connector J723 is the connector for the Monogram Tub Lighting and the Moisture Sensor for more information on the moisture sensor see the Floor Protect Plan section of this service guide Inverter and Motor Diagnostics Circulation and or Drain Motor Will Not Operate Continued next page ...
Page 54: ...ck pin 6 red 11 12 ohms Shorted or open replace motor check connectors if OK replace inverter ÀDVKHV ZLWK VHFRQG SDXVH Open TCO in Circulation Motor check for continuity inverter connector SLQ EURZQ RUDQJH WR SLQ EOXH FRQ UPLQJ DQ RSHQ 7 2 Replace inverter if TCO is OK ÀDVKHV ZLWK VHFRQG SDXVH 5 RFNHG 5RWRU PSV GHWHFWHG PRWRU VSHFL F GHWHFWHG ZKHQ PRWRU is activated in service mode check for 1 Loo...
Page 55: ... TCO Drain Motor Windings Circulation Motor Windings TCO Circuit Circulation Motor TCO IRXU ÀDVK HUURU LQGLFDWHV DQ RSHQ 7 2 LQ RQH RI the motors Both motors will have to be checked LQGLYLGXDOO 7KH 7 2 V DUH LQ VHULHV ...
Page 56: ...is visible from the front by removing the toe kick panel Replacing the module requires that the dishwasher is removed from installation The Wi Fi Module LED may be seen by looking under the dishwasher with the toe kick panel and LQVXODWLRQ UHPRYHG 7KH ÀDVKHV GXULQJ WKH UVW PLQXWHV RI SRZHU XS DQG PD EH XVHG WR help diagnose connection concerns within the dishwasher Connection Instructions Wi Fi se...
Page 57: ...V RI SRZHU XS RI WKH GLVKZDVKHU The LED can be viewed by looking at the module from the front of the dishwasher with the toe kick and insulation removed It indicates the module is receiving operating voltage If the consumer has called the GE ConnectPlus Team and is unable to connect the GE ConnectPlus Team may determine that the module may need to be replaced If the PRGXOH LV UHSODFHG LQ WKH HOG W...
Page 58: ...ger than 15 minutes the OLJKW ZLOO WXUQ RȺ DXWRPDWLFDOO 7KH OLJKW DOJRULWKP will reset when the door is closed and then reopened There are four lights in the tub lighting system two on the top one on the left side and one on the right side The top two LED lights have a mounting nut above the tub and a light lens assembly which will come with a seal The left side is mounted with the connector at th...
Page 59: ...KH VXPS 7KH ÀRRG VZLWFK LV ORFDWHG RQ WKH ERWWRP RI WKH VXPS 7KH VZLWFK ZLOO RSHQ WKH OO FLUFXLW VKRXOG WKH OO OHYHO UHDFK D QHDU ÀRRG FRQGLWLRQ OO PRGHOV KDYH VLGH OO MHWV LQWURGXFLQJ ZDWHU IURP ERWK VLGHV RI WKH tub Components Minimum Water Level Fill System Flood Switch Water Level To check for proper water level place the dishwasher in Service Mode and run the Fill Test see the Service Mode se...
Page 60: ... 60 Diagnostics Strip Circuit ...
Page 61: ...the sump It ZLOO RSHQ WKH OO FLUFXLW VKRXOG ZDWHU UHDFK D QHDU ÀRRG FRQGLWLRQ Flood Switch Removal If the dishwasher is installed with the level legs extended the 1 4 in hex head screw may be removed without removing the sump 1 Remove power to the dishwasher 2 Remove the toe kick 3 5HPRYH WKH ÀRRU SURWHFWLRQ SDQ ZKHUH applicable See the Floor Protection Pan section of this service guide 4 6RPH LQV...
Page 62: ...HOV KDYH VLGH OO MHW DVVHPEOLHV ZKLFK VKRZHU WKH ORZHU UDFN IURP ERWK VLGHV GXULQJ WKH OO F FOH Q HOERZ WUDQVLWLRQV WKH OO KRVHV WR WKH DVVHPEO and secures the jets to the tub A seal is located on both the inside and the outside the tub The side jet assembly is the same part for both the left and right sides of the tub Orientation is LPSRUWDQW WR SURSHU RSHUDWLRQ I WKH VLGH OO MHW assembly restric...
Page 63: ...onsumer WKH ÀH LELOLW RI ZDVKLQJ LQ WKH ORZHU RU XSSHU UDFNV RQO 8VLQJ WKLV IHDWXUH ZLOO VKRUWHQ WKH F FOH WLPH E LOWUDWLRQ KDV EHHQ JUHDWO LPSURYHG WR DOORZ FOHDQ OWHUHG ZDWHU WR FLUFXODWH GXULQJ ZDVK 7KH QH DQG XOWUD QH OWHUV DUH FRQVXPHU UHPRYDEOH DQG FOHDQDEOH 7KH SDVV DOURG KHDWHU DOORZV IRU EHWWHU KHDWLQJ of water see Dry System section in this guide for more details 6SHFL FDWLRQV Circulatio...
Page 64: ...view of the lower spray arm 3 Enter Consumer Error Mode 4 Enter Service Mode 5 Open the dishwasher door all the way to 90 degrees 6 Place the WX05X20002 Clear Door into the tub opening starting at the bottom 7 WARNING To prevent any damage do not close the dishwasher door when the clear door is in use 8 The clear door has a latch strike When pushed into the latched position it will activate the do...
Page 65: ...and PDT835J Only A circulation and drain pump motors fuse is located on the main control board If found open while testing for no circulation pump or no drain operation the main control and circulation pump or drain pump must be replaced If 120 VAC is not found at MC J703 2 to J703 3 check the fuse at the points shown in the illustration below If an open circuit is seen replace the main control an...
Page 66: ...ation pump Filtration Good OWUDWLRQ LV NH WR JRRG ZDVK SHUIRUPDQFH 7KH 8OWUD QH OWHU LV FRQVXPHU UHPRYDEOH ZLWK D twist lock design The Owner s Manual advises the consumer to remove and clean every 60 days or more frequently depending on use Using brushes or VFRXULQJ SDGV ZLOO GDPDJH WKH OWHU 7KH 9HQW DSV DOORZ IRU DLU XQGHU WKH OWHU WR HVFDSH and prevent air locks in the wash and drain pumps They...
Page 67: ... follow Lockout Tagout LOTO 6 Step Process prior to beginning repair Hidden Heater A hidden heater allows for a cleaner appearance DQG PRUH HȻFLHQW ZDWHU KHDWLQJ V VWHP W DOVR ensures that hot water is circulated to optimize cleaning The hidden heater is non operational during the dry segment of the cycle When Power U LV VHOHFWHG WKH QDO ULQVH WHPSHUDWXUHV are raised to provide needed heat during ...
Page 68: ...ook for 10 to 15 ohms across the violet to white red wires If the circuit is open replace the complete pump motor assembly Voltage may also be checked with the main control in the service position With all connectors seated place in 6HUYLFH 0RGH OO ZLWK ZDWHU DQG UXQ the circulation pump to power the heater Check for 120 VAC at connector 703 across the violet to white red wires ...
Page 69: ... assembly The Diverter is the key component which allows lower water use by alternating water to the lower spray arm silverware wash mid upper spray system bottle wash mid spray arm and upper spray system or lower spray arm reverse bottle wash and upper spray system Operation The rotation of the power diverter is counter clockwise as viewed from the top The control will seek the lower primary as t...
Page 70: ...when the circulation motor stops and starts and the dishwasher has proper water level with a normal spray pattern on the zone that is working the diverter is mechanically inoperative and should be replaced A dishwasher that starts and stops every 3 to 10 seconds 3 to 5 seconds for single speed motors and 6 to 10 seconds for variable speed motors may indicate a bad sensor If the water changes wash ...
Page 71: ...e door 4 Remove the sump assembly 5 Remove three 1 4 in hex head screws securing the diverter to the sump 6 Loosen the clamp on the diverter inlet hose to the circulation pump Slide the diverter and hose from the circulation pump 7 Remove and discard the one time clamp Clamp Removal Tip Use a small screwdriver inserted into the ear of the clamp and move the handle back and forth to loosen the clam...
Page 72: ...nstallation Turbidity Sensor and Thermistor VOLTAGE RESISTANCE TEMPERATURE 95 20066 50 F 1 56 10450 75 F 2 25 5824 100 F 2 91 3411 125 F 3 48 2081 150 F 3 91 1330 175 F Operation The Turbidity Sensor measures the amount of VXVSHQGHG SDUWLFOHV RI WKH OWHUHG ZDVK ZDWHU 7KH sensor assembly contains a LED transmitter which emits light and a receptor similar to a photo cell which receives light The was...
Page 73: ... Calibration will not occur on demand Turbidity Sensor Diagnostics If the turbidity sensor fails open or shorted the FRQWURO ZLOO GHIDXOW WR WKH PD LPXP OOV DQG circulation time that the control is programmed for Use Consumer Error Mode to look for Turbidity Sensor Faults To check the thermistor access the Main Control see To Access Main Control Board section under Main Control Diagnostics Check r...
Page 74: ...r Spray System Middle Conduit Docking Crane Main Conduit Hose Cover Bottle Wash Hose Bottle Wash Manifold Bottle Wash Clips Middle Spray Arm some models Silverware Wash Manifold Silverware Wash Conduit Sump Lower Spray Arm some models ...
Page 75: ...se and counter clockwise during the main wash part of the cycle During the pre rinse and post rinse segments the arm turns clockwise only There are two designs of lower spray arms Cafe and 3UR OH PRGHOV KDYH WKH TXDG UHYHUVLQJ VSUD DUP Monogram models have a single blade appearance but do have reversing functionality The conduit is the same for all models see removal instructions Monogram Reversin...
Page 76: ... and spray arm Monogram models may have the hub tab locked in the spray arm tab or on the edge of the spray arm 3 Slide the conduit out of the diverter tab Spray Arm from Conduit Removal Reversing spray arms have a locking tab system to SUHYHQW VSUD DUPV IURP XQORFNLQJ DQG FRPLQJ RȺ during reverse action ...
Page 77: ...oval 1 Remove both the lower and upper racks 2 Remove the lower spray arm 3 Remove the mid spray arm docking port by releasing the tabs on each side of the docking cone The docking cone will remain attached to the main conduit 4 Push on the tab and pull up on the conduit to release from the diverter 5 Models PDF820S PDT825S and CDT835S GLVHQJDJH WKH KHDWHU FOLS DQG ÀH WKH PDLQ conduit to complete ...
Page 78: ...rm has 2 counter rotating components available as one part The base portion of the assembly has a counterclockwise rotation as viewed from above and has a paddle appearance shown as a shaded part The three wing appearance portion of the assembly rotates clockwise as viewed from above the spray arm is internally gear driven Clean Sweep Jets Middle Spray Arm Model PDT846SSJ only The three wing part ...
Page 79: ... mid spray arm The mid conduit is replaced as an assembly individual parts for the assembly are not available separately The middle conduit has a port on the right side to DOORZ ZDWHU ÀRZ WR WKH ERWWOH ZDVK IHDWXUH Cover Gasket Check Valve Main Conduit Body Bottle Wash Hose Cover Bottle Wash Supply Hose Mid Conduit Bottle Wash Port ...
Page 80: ...trol changes the wash algorithm The upper spray arm and bottle wash jets are cycled a longer time and 23 minutes is added to most cycles when selected Illustrations for the bottle wash system and removal may be found in the Middle Rack section of this guide Upper Spray System The upper sprayer provides a gentle shower down to the top rack The spray bracket is attached to the main conduit by means ...
Page 81: ...the tub and connects to the four port diverter using the same type of tab as the main conduit To remove the silverware conduit from the diverter push the tab and lift the conduit out of the diverter port It may be helpful to remove the lower spray arm conduit Using rinse aid or water on the diverter seals will aid installation Operation characteristics are discussed in the Pressure Diverter sectio...
Page 82: ...is 27 ohms RU UDLQ ZDWHU ZLOO EDFN ÀXVK WKH QH OWHU WKURXJK WKH FRDUVH OWHU DOORZLQJ IRRG SDUWLFOHV WR VHWWOH WKURXJK WKH ÀRRU SODWH DQG LQWR WKH GUDLQ pump It is normal for the drain pump to start and stop several times during each drain cycle this is normal To ensure proper drain the drain pump will pause several times in each drain cycle This is done to protect against air locks and allow for p...
Page 83: ...rip Circuit Diagnostics Variable Speed Drain Motor Diagnosing the variable speed drain motor involves the motor inverter circulation pump and main control These are all located in the Electronics Controls Inverter Control Board section of this service guide Continued next page ...
Page 84: ...vice guide 4 To remove the harness connector press in on the tab then pull to remove the connector 5 Loosen or remove the Drain Pump Hanger 6 Loosen the hose clamp and discard remove or replace the drain pump Mounting Screw Grommet Bracket Drain Pump Clamp 7 Use a new clamp included with a new pump or clamp kit WD35X10382 when reinstalling When reassembling position the hose properly onto the loca...
Page 85: ...options selected Boost wash options will change the time needed due to hotter temperatures in rinse for the options and cycle selected The table below represents a normal cycle with a Heated Dry option only selected 6SHFL FDWLRQV The Calrod Heating element is rated at 120 VAC Dry System Heat Element Heater Supports Heater Clip on Main Conduit Gasket Nut Tub TCO 4 Pass Heater Algorithm Dry Cycle No...
Page 86: ...REQUIRED to follow Lockout Tagout LOTO 6 Step Process prior to beginning repair Heating Element Dual wattage occurs due to the heat level in the element raising the resistance of the internal element As water quenches the heat on the case resistance lowers and wattage rises ...
Page 87: ...er be removed from its installation Element Removal Without Uninstalling the Dishwasher 1 Disconnect power to the dishwasher 2 Remove the lower rack 3 Remove the door seethe Door Removal section in this service guide 4 Remove the sump assembly see Sump Module Removal section in this service guide 5 Disconnect the two wire leads to the heater 6 Remove the two 15 16 in heater nuts 7 Remove the heate...
Page 88: ...cle is interrupted by opening the door the control will advise the consumer to press START and to close the door If the consumer does not open the door after the cycle is complete the fan will run another 90 minutes It will not restart if door is opened and closed and there will be no indication of this operation on the control display The total run time if door is not opened after the Clean light...
Page 89: ...tor The inner door can be placed back on the dishwasher and plugged in the door harness The dishwasher can be placed into Service Mode and the fan can be turned on Dry motors Power Dry and Monogram Max Dry will receive 12 14 VDC in Service Mode and can be checked at the UI board connector J402 two pin connector from red to black Monogram models run at 10k RPM all others run at 6k in Service Mode P...
Page 90: ... 90 Schematics CDT835SxJ0xx PDT825SxJ0xx and PDT835SxJ0xx ...
Page 91: ... 91 CDT835SxJ0xx PDT825SxJ0xx and PDT825SxJ0xx ...
Page 92: ... 92 ZDT915SxJ0xx and ZDT915SxJ0xx ...
Page 93: ...RANTIES Your sole and exclusive remedy is product repair as provided in this Limited DUUDQW Q LPSOLHG ZDUUDQWLHV LQFOXGLQJ WKH LPSOLHG ZDUUDQWLHV RI PHUFKDQWDELOLW RU WQHVV IRU D particular purpose are limited to one year or the shortest period allowed by law This warranty is extended to the original purchaser and any succeeding owner for products purchased in Canada for home use within Canada In ...
Page 94: ...e 32 33 Front Control UI 33 Full Extension Rails 24 H Heat Element 85 Hinges 20 35 hose 25 41 42 43 67 71 82 84 I Inner Door Panel 36 Inner Door Vent Cover 31 J Junction Box 19 L Latch Switch Diagnosis 23 Latch System 23 Level Legs 20 Light Pipe 33 34 Lower Rack 26 M Main Conduit 63 77 79 85 Main Control Board CSM 13 45 46 50 Main Control Diagnostics 13 48 72 73 Middle Conduit 78 Monogram Slide Ra...
Page 95: ... 95 Tub Trim 19 Turbidity Sensor 9 44 45 63 72 73 U UI Diagnostics 50 Upper Spray System 80 V Vent Parts 37 W Warranty 93 Water Level 59 Water Valve 9 47 59 62 ...