B
UTTONS
AND
C
ONTROLS
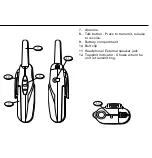
7.
Antenna
8.
Talk button - Press to transmit, release
to receive.
9.
Battery compartment
10. Belt clip
11. Headphone/ External speaker jack
12. Transmit indicator - Shows when the
unit is transmitting.
B
ATTERY
I
NSTALLATION
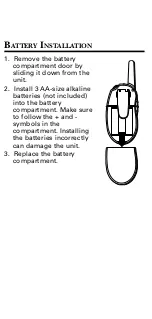
1. Remove the battery
compartment door by
sliding it down from the
unit.
2. Install 3 AA-size alkaline
batteries (not included)
into the battery
compartment. Make sure
to follow the + and -
symbols in the
compartment. Installing
the batteries incorrectly
can damage the unit.
3. Replace the battery
compartment.
12
11
7
8
9
10
B
ELT
C
LIP
I
NSTALLATION
AND
R
EMOVAL
•
To install the belt clip, line up the
grooves on the clip with the grooves on
the back of the unit. Push downward
until it snaps into place.
•
To remove the belt clip, release the snap
with your finger or a tool while firmly
pushing the clip upward.
U
SING
Y
OUR
F
AMILY
R
ADIO
1. Turn on power.
2. Set to desired channel.
3. Adjust volume to comfortable level.
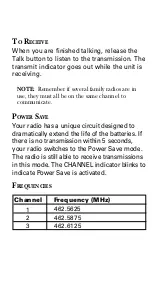
T
O
T
RANSMIT
Press the Talk button. Speak slowly and
clearly 2-3 inches from the microphone. To
avoid cutting off the first part of your
transmission, pause slightly after pressing
the Talk button before you start talking. The
transmit indicator comes on while the unit is
transmitting.
We bring good things to life.
Family Radio Service
User's Guide
35880
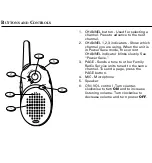
1.
CHANNEL button - Used for selecting a
channel. Press to advance to the next
channel.
2.
CHANNEL 1,2,3 indicators - Show which
channel you are using. When the unit is
in Power Save mode, the current
CHANNEL indicator blinks slowly. See
“Power Save.”
3.
PAGE - Sends a tone to other Family
Radio Service units tuned to the same
channel. To send a page, press the
PAGE button.
4.
MIC - Microphone
5.
Speaker
6.
ON / VOL
control
-Turn counter-
clockwise to turn
ON
and to increase
listening volume. Turn clockwise to
decrease volume and turn power
OFF
.
PAGE
1
2
3
C
H
A
N
NE
L
MIC
6
5
4
1
3
2


