59
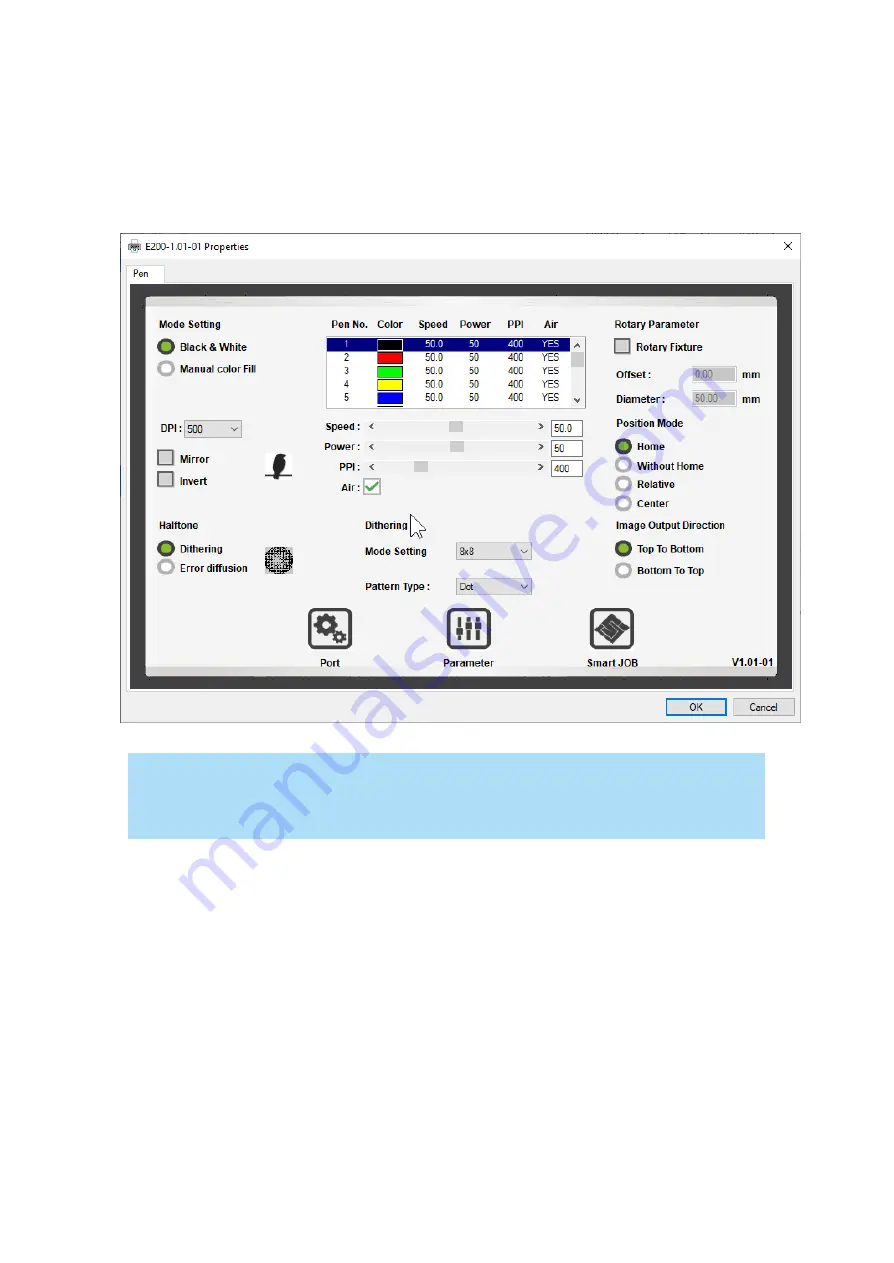
7.3.3 Using the LaserPro E200 Print Driver
Now after you have properly set the Page and Layout and Color Management of your graphics
software, you are ready to configure the details of your actual job through the LaserPro E200 Print
Driver. The LaserPro E200 print driver allows you to adjust your engraving / cutting options. After
you have setup your image, design, or text to be engraved in your software application, you can
access the LaserPro E200 print driver by going to FILE → PRINT → PROPERTIES.
NOTE
For this screenshot example, CorelDRAW was used as the software application.
The LaserPro E200 Print Driver for advanced users which enable to choose various engraving / cutting
options and settings
Summary of Contents for LaserPro E200 Series
Page 13: ...12 Chapter 2 Unpacking Unloading Unpacking...
Page 19: ...18 3 3 Right Profile View 3 4 Left Profile View...
Page 20: ...19 3 5 Rear View...
Page 21: ...20 3 6 Water Chiller Front View...
Page 22: ...21 3 7 Water Chiller Right View 3 8 Water Chiller Left View 3 9 Water Chiller Rear View...
Page 23: ...22 Chapter 4 Machine Setup Water Chiller Setup E200 Desktop Laser Engraver Setup...
Page 31: ...30 2 Click Next 3 Clip Launch SmartJOB and clip Finish...
Page 36: ...35 5 Choose the WiFi connection 6 WiFi Setting is complete...
Page 70: ...69 7 4 E200 Touch Panel Operation 7 4 1 Navigation Chart of E200 Touch Panel...
Page 81: ...80 Chapter 8 Optional Items Fume Extraction System Air Compressor Rotary Attachment...
Page 99: ...Chapter 10 Appendix GCC LaserPro E200 Specification Sheet...


