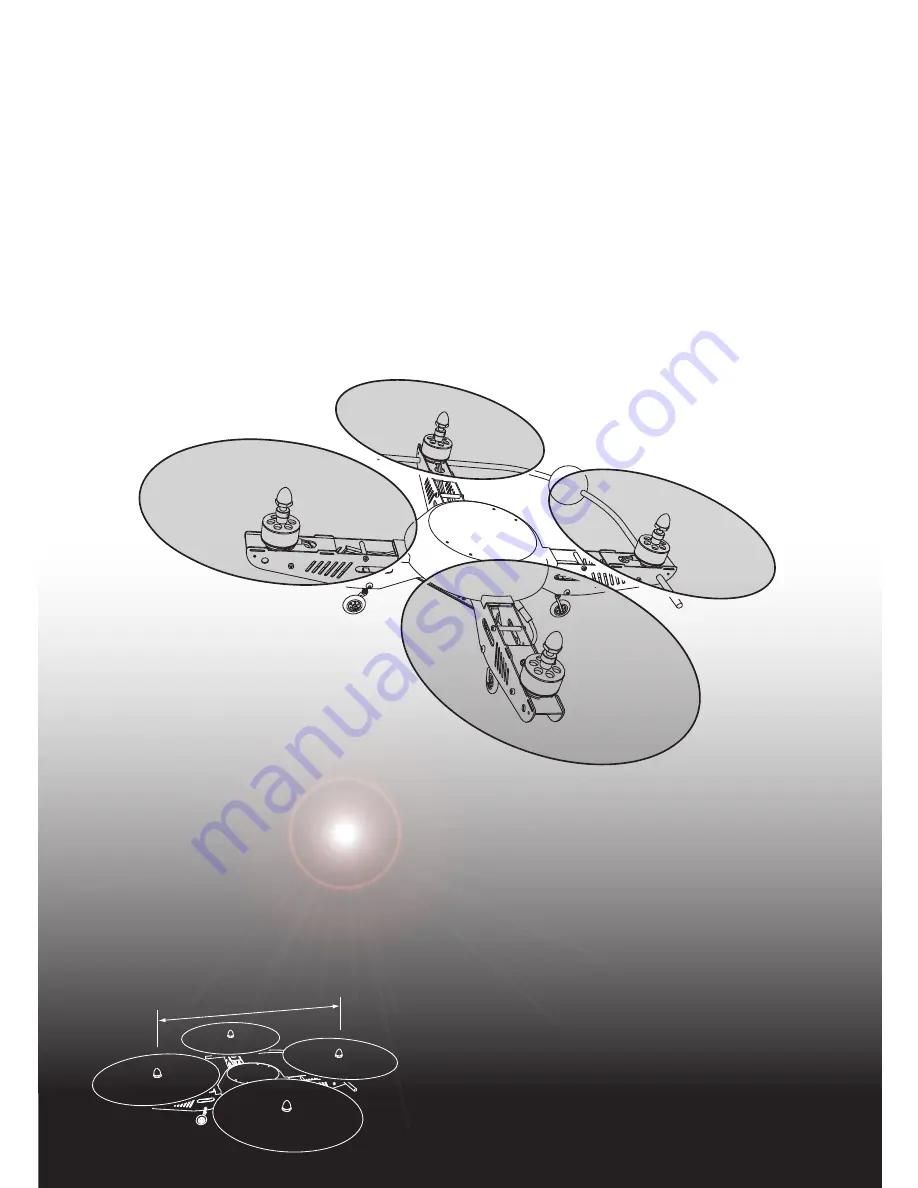
GAUI
330X
Quad-F
lyer
Max Flying Weight :
1100g
Weight : 400g
(without batt.)
8 inch Prop
Battery :2S~3S Lipo
330mm
4~5CH radio control system
Page 1: ...GAUI 330X Quad Flyer Max Flying Weight 1100g Weight 400g without batt 8 inch Prop Battery 2S 3S Lipo 330mm 4 5CH radio control system...
Page 2: ...embly Gear Set Assembly Main Frame Assembly ESC Installing Motor Installing Motor and ESC Wiring GU 344 Installing Receiver Installing Props Installing Windshield Assembly Nose Ball Assembly Setting E...
Page 3: ...GAUI TAI SHIH HOBBY CORPORATION X4 X16 X4 X4 X2 X4 X2 X4 X8 PM2X3 5X20 2 ASSEMBLY INSTRUCTION Touch Fastener Tape...
Page 4: ...ORPORATION P 1 CA P2X4X2 W2X5X0 4 Windshield Mount Assembly Insert the magnet into the hole of each Windshield Mount Use the CA to glue it at bottom side Assemble the gear set as shown in figure Gear...
Page 5: ...ssembly Assemble each Frame Extension as shown in figure Assembled IMPORTANT Make sure to assemble the Motor Mount correctly and the hole position shoule be the same as shown in figure Gear Set Windsh...
Page 6: ...re IMPORTANT Make sure to assemble the Central Mount correctly and the hole position shoule be the same as shown in figure Main Frame Assembly Assemble the Central Frame and 4 Frame Extensions as show...
Page 7: ...P 4 CA ESC ESC Main Frame Assembly After assembled the Central Frames and the Frame Extensions use the CA to glue them as shown in figure Install each ESC as shown in below pull out the signal pulg fr...
Page 8: ...r as shown in below tighten each motor onto motor mount with screws M3x3 Wiring the Motors and ESCs as shown in below Note that the colors of motor wires are different from various motor numbers inser...
Page 9: ...ATION P 6 75mm ESC Power Plug Wiring Power Plug Wiring Connect the plugs of ESCs to the 4 in 1 Power Connector After connected the pulgs put the connectors into the Central Frame Set and attach the To...
Page 10: ...om side of GU 344 GYRO make sure to use the sponge tapes which come with the gyro but not use different sponge tapes for instead Put each ESC signal plug in GU 344 correctly as shown in figure below A...
Page 11: ...44 GAIN Receiver Installing Put each signal plug of the GU 344 in receiver correctly as shown in figure below Bypass the plug with the Green Wire if using the 4CH transmitter the GAIN Value is able to...
Page 12: ...own in figure below make sure the marked side of each prop should be upward Props Installing For the rotating directions of Motors and Props the 1 and 3 motors run counterclockwise which should use 8A...
Page 13: ...HOBBY CORPORATION P 10 W3X8X1 CA Windshield Assembly Cut the Windshield and use the CA to glue the washers to the positions as shown in figure below Windshield Assembly The Windshield is able to be a...
Page 14: ...75mm 1 2 3 4 CA 1 4 Nose Ball Assembly Assemble the Nose Ball and plastic tube then install them to the position between Motor 1 and 4 Battery Installing Use the CA to glue the Nose Ball to the plasti...
Page 15: ...ose Directions refer to page 15 for setting the Nose Direction you need The GU 344 will change the Command Value of control sticks into the right figure below for beginners if the green wire plug is b...
Page 16: ...p position The figure indicates the THR control stick of the MODE 1 transmitter ESC Setting 3 Connect the battery to the 330X 4 After the battery was connected to the 330X the motor will come up with...
Page 17: ...for start Check Before First Flight Check the operating direction of each motor and prop on the ground to make sure the 330X is able to be controlled correctly by the transmitter set the transmitter...
Page 18: ...k and make sure the 330X rotates as shown in figure below Below figure indicates the RUD control stick of the MODE 1 transmitter Check Before First Flight MODE 1 MODE 1 Move the AIL stick rightward to...
Page 19: ...crease the GAIN VALUE properly to make it stable Refer to Page 12 for the Gain Value Setting Below figure indicates the THR control stick of the MODE 1 transmitter Nose Direction Setting Change the mo...
Page 20: ...5mm 8 Payload Carrying For payload carrying Camera or auxiliary Instruments it is recommended to use the below optional parts 210815 for mounting the payload Payload Carrying It is able to use 4pcs of...
Page 21: ...ption w Efficiency g w The payload above which includes the weight of battery the weight of 330X itself is about 400g The payload calculations and the battery options Ex If the 330X carries a HD Camer...
Page 22: ...Extension Set Central Frames Alu Fram Posts PM2x3 5x20 2 Alu Gear Post Wheel Set M2 Screw pack Adaptor and Spinner Set 8 Props 8A and 8B GUEC GM 400 BL Motor 400W kv1100 GUEC GE 070 ESC 7A with Conne...
Page 23: ......
Page 24: ...330X Quad Flyer GAUI TAI SHIH HOBBY CORPORATION TEL 886 2 86305567 FAX 886 2 26105567 Website www gaui com tw E mail gaui gaui com tw MADE IN TAIWAM ITEM NO 210000...