background image

Creating music CDs and video DVDs

103

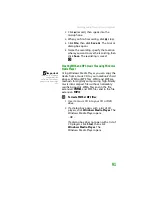
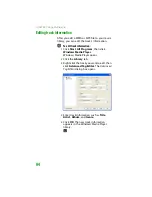
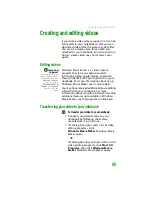
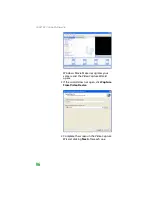
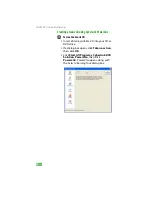
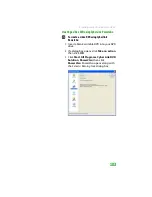
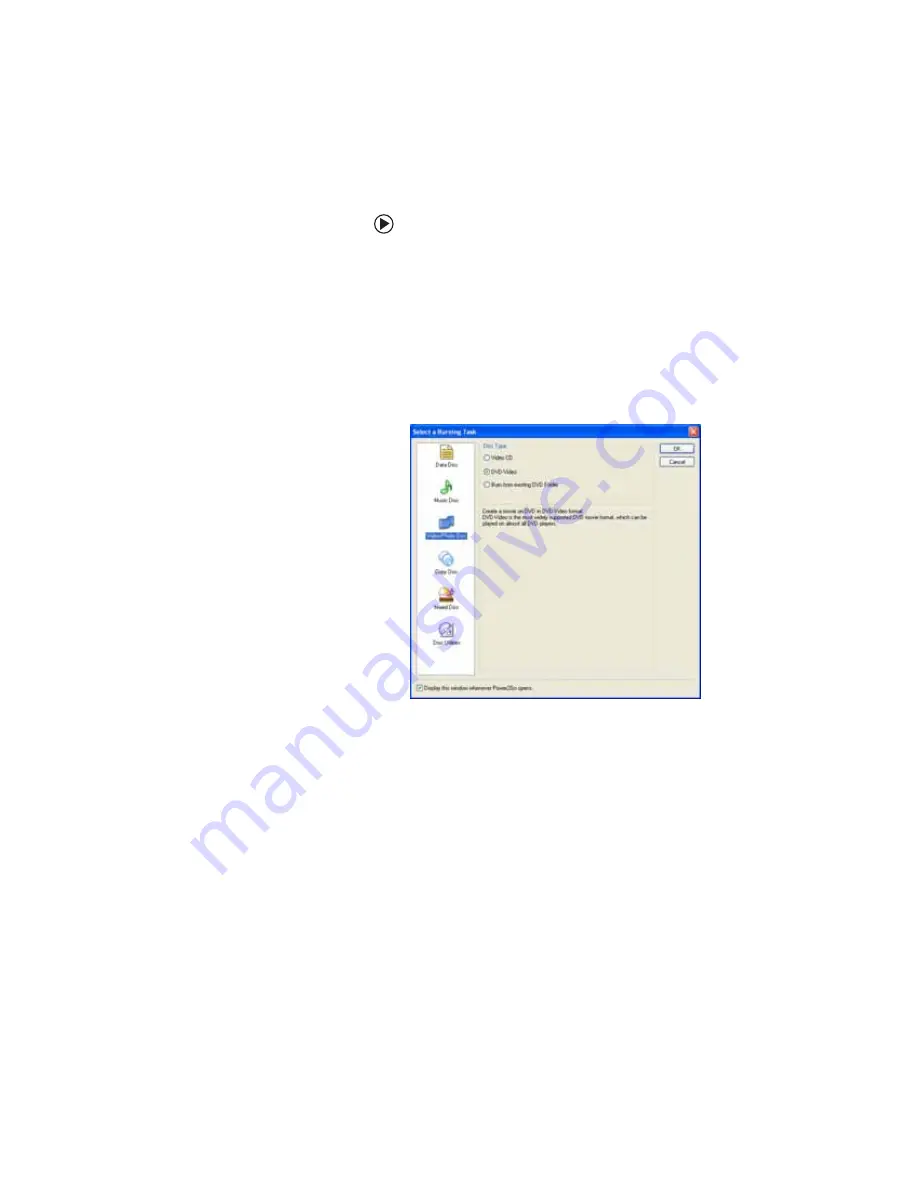
Creating a video DVD using CyberLink Power2Go

To create a video DVD using Cyberlink 
Power2Go:


1

Insert a blank, writable DVD into your DVD 
drive.

2

If a dialog box opens, click 

Take no action

then click 

OK

.

3

Click 

Start

All Programs

CyberLink DVD 

Solution

Power2Go

, then click 

Power2Go

. Power2Go opens along with 

the 

Select a Burning Task

 dialog box.

Summary of Contents for MX6452

Page 1: ...U S E R G U I D E P L A T I N U M E D I T I O N...

Page 2: ......

Page 3: ...g window items 13 Using Windows XP Tablet PC 2005 14 Using Tablet PC extensions 15 Working with files and folders 19 Viewing drives 19 Creating folders 20 Copying and moving files and folders 22 Delet...

Page 4: ...ning about the Internet 50 Setting up an Internet account 51 Accessing your Internet account 52 Using the World Wide Web 52 Connecting to a Web site 53 Downloading files 54 Using e mail 55 Sending e m...

Page 5: ...ying CDs or DVDs 87 Creating audio files and music libraries 90 Creating music files 90 Building a music library 93 Editing track information 94 Creating and editing videos 95 Editing videos 95 Transf...

Page 6: ...ks 130 Setting up your access point 130 Setting up your notebook 131 Testing your network 133 Sharing resources 134 Sharing drives and printers 134 Using the network 136 Viewing shared drives and fold...

Page 7: ...ktop 161 Changing the mouse touchpad or pointing device settings 162 Changing mouse settings 162 Changing touchpad or pointing device settings 164 Adjusting tablet and pen settings 166 Programming the...

Page 8: ...our Notebook 189 Packing your notebook 190 Traveling by air 190 Dial up modem 191 Radio frequency wireless connections 192 Files 192 Security 193 Power 194 Additional tips 194 Chapter 14 Troubleshooti...

Page 9: ...3 Pen tablet PC 223 Pointing device 223 Power 224 Printer 224 Sound 227 Status indicators 227 Touchpad or optional pointing device 227 Video 228 Telephone support 229 Before calling Gateway Customer C...

Page 10: ...Contents www gateway com viii...

Page 11: ...CHAPTER 1 1 GettingHelp Gateway Web site Help and Support BigFix Online help...

Page 12: ...er battery life experience This design provides you with maximum performance when plugged into AC power balanced with optimized battery life when on battery power Please read this manual carefully to...

Page 13: ...he most current drivers product specifications tutorials and personalized information about your notebook Visit the Gateway Support Web site at support gateway com Using Support The Support site is di...

Page 14: ...to view a list of all the products that Gateway supports Downloads Click Downloads to get the latest software updates for BIOS and driver upgrades By entering your serial number you get drivers specif...

Page 15: ...Help and Support Your notebook includes Help and Support an easily accessible collection of help information troubleshooters and automated support Use Help and Support to answer questions about Windo...

Page 16: ...cated in Help and Support and contain the words you entered in the Search box Microsoft Knowledge Base These topics are located on the Microsoft Web site and contain the words you entered in the Searc...

Page 17: ...ook may include BigFix BigFix monitors your notebook for problems and conflicts It automatically gathers information about the latest bugs security alerts and updates from BigFix sites on the Internet...

Page 18: ...ion online so you can research a topic or learn how to perform a task while you are using the program You can accessmostonlinehelp informationbyselecting a topic from a Help menu or by clicking a Help...

Page 19: ...CHAPTER 2 9 UsingWindows XP About the Windows desktop Identifying window items Using Windows XP Tablet PC 2005 Working with files and folders Searching for files Working with documents Shortcuts...

Page 20: ...ink of the desktop as your personalized work space where you open programs and perform other tasks Your desktop may be different from this example depending on how your notebook is set up The desktop...

Page 21: ...ndows and other programs and computer tools and utilities Click the Start button then open a file or program by clicking an item on the menu that opens The Recycle Bin is where files folders and progr...

Page 22: ...p and Support For more information about desktop icons click Start then click Help and Support Type the keyword desktop icons in the Search box then click the arrow You may want to add an icon shortcu...

Page 23: ...y Computer window Every program window looks a little different because each has its own menus icons and controls Most windows include these items Minimize Maximize Close Title bar Menu bar Window ite...

Page 24: ...Journal hand write documents then turn them into text or image files StickyNotes make a quick note with your pen or voice and drop it into another program Document annotation insert handwritten notes...

Page 25: ...e tip of the pen for example because someone else has used your tablet PC and adjusted it for their own use recalibrate it to your tapping patterns Recalibrate if you write with the opposite hand from...

Page 26: ...atching it out Windows interprets a scratchout as a delete command To erase draw a short wide Z You will find more information about gestures and gesture symbols as well as handwriting tips in the TIP...

Page 27: ...ens in a drawer to avoid prolonged pressure on the pen tip The pen has internal electronics so keep it dry and avoid contact with liquids Tablet Input Panel TIP Tap the Keyboard icon near the Start bu...

Page 28: ...or a Web form before using the writing pad or soft keyboard To adjust writing pad and keyboard settings taporclicktheToolsandOptions icon then tap or click Options For security and accuracy when enter...

Page 29: ...folders You can organize your files and programs to suit your preferences much like you would store information in a file cabinet You can store these files in folders and copy move and delete the inf...

Page 30: ...reating folders Help and Support For more information about creating files and folders click Start then click Help and Support Type the keyword creating files and folders in the Search box then click...

Page 31: ...click Show the contents of this drive 3 If you want to create a new folder inside an existing folder double click the existing folder If you do not see the contents of the drive or folder click Show t...

Page 32: ...you want the copy to go in the destination folder you paste it there When you cut and paste a file or folder you removethe fileor folderfrom its originallocation and place the file or folder on the W...

Page 33: ...folders you take them from the file cabinet and put them in a trash can Eventually the trash can is emptied In Windows you throw away files and folders by first moving them to the Windows trash can ca...

Page 34: ...box then click the arrow 1 Double click the Recycle Bin icon on the desktop The Recycle Bin window opens 2 Click File then click Empty Recycle Bin Windows asks you if you are sure that you want to em...

Page 35: ...2 Double click the drive or folder that you think contains the file or folder that you want to find If you do not see the contents of a folder click Show the contents of this drive or Show the conten...

Page 36: ...od in which it was created or modified You can also combine search criteria to refine searches Files and folders found using this utility can be opened copied cut renamed or deleted directly from the...

Page 37: ...of the name Search will list all files and folders of that name If you type part of the name Search will list all of the file and folder names containing the letters you typed 3 Click Search When the...

Page 38: ...a text document Working with documents Computer documents include word processing files spreadsheet files or other similar files The basic methods of creating saving opening and printing a document a...

Page 39: ...To create a new document 1 Click Start All Programs Accessories then click WordPad Microsoft WordPad starts and a blank document opens 2 Begin composing your document Use the menus and toolbar button...

Page 40: ...hen click the folder where you want to save the file If you do not see the folder you want browse through the folders listed below the Save in list 3 Type a new file name in the File name box 4 Click...

Page 41: ...ck Start then click Help and Support Type the keyword printing in the Search box then click the arrow To print a document you must have a printer connected to your notebook or have access to a network...

Page 42: ...folder text or graphic Click inside the folder or window where you want to paste the object then press CTRL V Select multipleitems in a list or window Click the first item press and hold down the CTR...

Page 43: ...CHAPTER 3 33 RecoveringYourSystem System recovery options Drivers and applications recovery Recovering your system...

Page 44: ...pplications recovery on page 35 tells you how to record or burn the Drivers and Applications Recovery discs Using a recovery disc that you have recorded is only one of several ways you can restore you...

Page 45: ...ediately create the recovery discs recommended or you can wait until later For more information on creating recovery discs see Creating drivers and applications recovery discs on page 35 For more info...

Page 46: ...sc not DVD RW or DVD RW discs 1 Make sure that you have blank discs ready Depending on the type of recordable drive your notebook has you need either several CD R discs or one DVD R or DVD R disc 2 Cl...

Page 47: ...ankdiscs then insert a blank disc into the recordable drive Important Use a permanent marker to label each disc Gateway Driver and Application Recovery As you remove each disc from the drive use the m...

Page 48: ...les to a network You can copy driver and application recovery files to a network location so you can burn unlimited sets of drivers and applications recovery discs from a different notebook that has a...

Page 49: ...cation you specified 4 When you see the message The Recovery ISO Image has been created successfully click OK You are done Tips Tricks Store your recovery ISO images in a folder that indicates which c...

Page 50: ...art with CD you will need blank CDs If the ISO filenames start with DVD you will need blank DVDs Important Use the correct type of blank disc for the recovery ISO file For example if the recovery ISO...

Page 51: ...o restore your notebook For more help you can find the Gateway Customer Care contact information on the label located on the bottom of your notebook If you have problems with your notebook and you nee...

Page 52: ...overy disc that you have created To recover specific drivers and software 1 Click Start All Programs System Recovery then click Application Driver Recovery The Application Recovery program opens OR Tu...

Page 53: ...ing Microsoft System Restore Before using Gateway System Recovery you should try Microsoft System Restore to determine whether you can restore your system to a previous condition Every time you instal...

Page 54: ...1 Press F1 The Microsoft Windows XP Help and Support Center opens 2 Click Undo changes to your computer with System Restore The Welcome to System Restore dialog box opens 3 Click Restore my computer t...

Page 55: ...t Selection dialog box opens 6 Make sure that you want to use the restore point you selected and read all notices on the screen 7 Click Next then follow the on screen instructions to finish the restor...

Page 56: ...Turn on or restart your notebook then press F11 while your notebook is starting 3 Insert the Operating System Recovery CD DVD when prompted The System Recovery program starts Caution The Full System R...

Page 57: ...System Restore Formatand Recover dialog box opens 6 Click Yes Files are restored to your hard drive When file recovery has finished the System Restore dialog box opens 7 Click Restart Your notebook r...

Page 58: ...CHAPTER 3 Recovering Your System 48...

Page 59: ...CHAPTER 4 49 UsingtheInternet Learning about the Internet Setting up an Internet account Using the World Wide Web Using e mail...

Page 60: ...rnet service provider ISP If you want to access the Internet you need A modem a device that connects your notebook to other computers or servers using a telephone DSL or cable television line Your not...

Page 61: ...fore you can view the information on the World Wide Web you need to set up an Internet account with an Internet service provider ISP To set up an ISP service or to transfer an existing account to this...

Page 62: ...de Web The World Wide Web is a multimedia window to the Internet that gives you access to millions of information sources Information on the Web comes to you on Web pages which are electronic document...

Page 63: ...row After you set up an account with an Internet service provider ISP you can access the many information sources on the World Wide Web To connect to a Web site 1 Connect to your Internet account 2 De...

Page 64: ...ownloading files in the Search box then click the arrow Downloading is the process of transferring files from a computer on the Internet to your notebook TodownloadfilesorprogramsfromaWebsite 1 Connec...

Page 65: ...An e mail address consists of a user name the symbol and the Internet domain name of the Internet service provider ISP or company that hosts that user Your e mail address is assigned when you sign up...

Page 66: ...ter which came with your notebook For more information see Protecting your notebook from viruses on page 174 Help and Support For general information about using e mail click Start then click Help and...

Page 67: ...CHAPTER 5 57 Protectingyournotebook Hardware security Data security Security updates Traveling securely...

Page 68: ...preventing your notebook from being stolen Attacha cable locktotheKensingtonlocksloton your notebook then wrap the cable lock to a solid object like a desk or table You can buy a cable lock at most e...

Page 69: ...atform Module TPM Tips Tricks Use the TPM userguide or the program s online help to get TPM up and running Your notebook may be Trusted Platform Module TPM 1 2 hardware ready TPM is a component of you...

Page 70: ...your notebook s BIOS setup utility Use a password that you can remember but that would be hard for someone else to guess Windows XP user accounts Help and Support For more information about Windows XP...

Page 71: ...hevirus definition update service You may have received a free limited time subscription to one of these services when you purchased your notebook Using the McAfee VirusScan program to check files and...

Page 72: ...brid attacks McAfee Personal Firewall Plus blocks unwanted inboundand outbound Internet traffic to prevent hacker attacks McAfee Privacy Service protects against online identity theft by blocking the...

Page 73: ...ith McAfee VirusScan McAfee Personal Firewall and McAfee Spamkiller turned on and McAfee Privacy Service turned off To turn on the Privacy Service as well as keep the other services turned on you must...

Page 74: ...cAfee SecurityCenter To start McAfee SecurityCenter Click Start All Programs McAfee then click McAfee Security Center McAfee SecurityCenter opens Scanning for and removing viruses To scan for viruses...

Page 75: ...r at least 30 seconds 3 Turn on your notebook and rescan for the virus Updating your virus definitions Important To update McAfee SecurityCenter after the subscription period expires you must extend y...

Page 76: ...ws XP Security Center click Start then click Help and Support Type the keyword security center in the Search box then click the arrow Windows Security Center helps protect your notebook through A fire...

Page 77: ...ick Help and Support Type the keyword Windows update in the Search box then click the arrow If a hacker finds a way to bypass the security features built into Windows XP Microsoft creates a high prior...

Page 78: ...se the Windows XP Security Center to schedule automatic updates Windows can routinely check for the latest important updates for your notebook and install them automatically To schedule automatic upda...

Page 79: ...ix Your notebook may include BigFix BigFix monitors your notebook for problems and conflicts It automatically gathers information about the latest bugs security alerts and updates from BigFix sites on...

Page 80: ...ts train stations or bus terminals Be ready to claim your notebook as soon as it passes through the x ray machine in security checkpoints Write down your notebook model number and serial number in cas...

Page 81: ...Installing a printer scanner digital camera or other peripheral device Viewing the display on a projector or monitor Viewing the display on a television Connecting a video camera to your notebook Usi...

Page 82: ...u use these ports to connect peripheral devices such as printers scanners and digital cameras to your notebook or port replicator IEEE 1394 and USB ports support plug and play and hot swapping which m...

Page 83: ...finished OR If Windows does not detect the printer go to the next step 5 Click Start then click Control Panel The Control Panel window opens If your Control Panel is in Category View click Printers a...

Page 84: ...an use your notebook for giving presentations by connecting an external monitor or projector to your monitor VGA port Your notebook supports simultaneous LCD and external display Simultaneous display...

Page 85: ...a projector or monitor 75 6 Click the Settings tab 7 Right click the second monitor icon labeled 2 then click Attached 8 Click Apply 9 Adjust properties such as Screen Resolution or Color Quality if...

Page 86: ...by copyright protection software Tips Tricks To see if your notebook supports FN F4 to control TV out see the poster or hardware guide The S Video out jack on your notebook or port replicator lets you...

Page 87: ...ck on your notebook see the poster or hardware guide For the location of the S Video out jack on an optional port replicator see the port replicator user guide 7 Click the Settings tab 8 Click Advance...

Page 88: ...eady enabled then click Apply To view your notebook display on a television for notebooks that support the F4 key to control the television feature 1 With your notebook off connect one end of a standa...

Page 89: ...ling internationally you may need to change the videostandard For example many televisions in Asia use PAL instead of NTSC To modify television settings 1 On the Multiple Monitors Properties dialog bo...

Page 90: ...es such as a video camera To connect your video camera to your notebook 1 Connect one end of the IEEE 1394 cable to your video camera 2 Connect the other end of the cable to the IEEE 1394 port or on y...

Page 91: ...a Adjusting the volume Playing music and movies Creating audio files and music libraries Creating and editing videos Creating music CDs and video DVDs Creating and copying data CDs and DVDs Advanced m...

Page 92: ...the right click Place volume icon in the task bar then click Apply You can use the Windows volume controls to adjust the overall volume and the volume of specific sound devices in your notebook To adj...

Page 93: ...Control Panel The Control Panel window opens If your Control Panel is in Category View click Sounds Speech and Audio Devices 2 Click Double click the Adjust the system volume or Sounds and Audio Devic...

Page 94: ...in the window click Options Properties the check box next to the audio device you want to adjust then click OK 5 Drag the volume level and balance sliders for the device you want to adjust For more i...

Page 95: ...mat used for your Windows system sounds To play a WAV audio file Sound Recorder 1 Click Start All Programs Accessories Entertainment then click Sound Recorder The Sound Recorder opens 2 ClickFile then...

Page 96: ...about using Windows Media Player click Help To play a file using Windows Media Player 1 Click Start All Programs then click Windows Media Player Windows Media Player opens 2 ClickFile thenclickOpen T...

Page 97: ...PowerDVD A standard Compact Disc CD holds an entire album of digital songs and can be played on a CD player or your notebook s CD drive A Digital Versatile Disc DVD is similar to a standard CD but has...

Page 98: ...s Media Player opens OR If a dialog box does not open with a list of CD players or DVD players click Start All Programs then click Windows Media Player Windows Media Player opens 4 Click play If you d...

Page 99: ...rograms CyberLink PowerDVD then click PowerDVD Help 1 Make sure that the speakers are turned on or headphones are plugged in and that the volume is turned up 2 Click Start All Programs CyberLink Power...

Page 100: ...nformation about playing WAV files see Playing WAV audio files on page 85 To record a WAV audio file Help and Support For more information about making or playing an audio recording click Start then c...

Page 101: ...e CDs Using Windows Media Player you can copy the tracks from a music CD to your notebook s hard drive as WMA or MP3 files WMA and MP3 are methods for digitally compressing high fidelity music into co...

Page 102: ...Click the arrow to open the Format list then click either mp3 or Windows Media Audio For more information on the differences between the two types of files click Learn more about MP3 formats 5 Click...

Page 103: ...ion to a music file You can add music tracks to your music library by Creating MP3 or WMA files When you create MP3 or WMA files from the tracks on your music CD Windows Media Player automatically add...

Page 104: ...on 1 Click Start All Programs then click Windows Media Player Windows Media Player opens 2 Click the Library tab 3 Right click the track you want to edit then click Advanced Tag Editor The Advanced Ta...

Page 105: ...single images and audio through the IEEE 1394 port optional on your notebook For more information about using Windows Movie Maker see its online help You may have received additional movie editing so...

Page 106: ...a 96 Windows Movie Maker recognizes your camera and the Video Capture Wizard opens 3 If the wizard does not open click Capture From Video Device 4 Complete the screens in the Video Capture Wizard clic...

Page 107: ...ure Wizard click Learn more aboutvideosettingsinthewizard orclick Help then click Help Topics in Windows Movie Maker Editing your video After your video file is captured on your notebook you can edit...

Page 108: ...music CDs and video DVDs Creating a music CD Important We recommend that you do not use your notebook for other tasks while creating CDs or DVDs If you record copyrighted material on a CD or DVD you...

Page 109: ...ck the Burn tab The Select files to burn window opens 5 Click Edit Playlist The Edit Playlist dialog box opens 6 Click songs in the left column to add them to the playlist After all the songs are adde...

Page 110: ...To create a music CD 1 Insert a blank writable CD into your CD or DVD drive 2 If a dialog box opens click Take no action then click OK 3 Click Start All Programs CyberLink DVD Solution Power2Go then c...

Page 111: ...ialog box closes 5 In the top pane browse to the folder that contains the files or folders you want to burn to the CD then click to select the file or folder Press and hold the CTRL key to select mult...

Page 112: ...ancel to return to Power2Go Creating a video DVD You can create a video DVD using CyberLink Power2Go If your operating system is Windows XP Media Center you can also use Media Center to record a video...

Page 113: ...te a video DVD using Cyberlink Power2Go 1 Insert a blank writable DVD into your DVD drive 2 If a dialog box opens click Take no action then click OK 3 Click Start All Programs CyberLink DVD Solution P...

Page 114: ...s the video files you want to burn to the DVD Click to select the file s Press and hold the CTRL key to select multiple files 7 Click Import The video files appear in the Video pane 8 Click the icon n...

Page 115: ...ic CDs and video DVDs 105 11 After you set up your DVD click The Configuration Information dialog box opens 12 Click the Video tab then select the television and audio format for your DVD 13 Click the...

Page 116: ...Go burns the files to the DVD OR If you have more than one DVD burner select the burner then click Burn The Burning dialog box opens and Power2Go burns the files to the CD or DVD 15 When a message tel...

Page 117: ...ecommend that you do not use your notebook for other tasks while creating CDs or DVDs If you record copyrighted material on a CD or DVD you need permission from the copyright owner Otherwise you may b...

Page 118: ...es from these CDs and you may not be able to listen to these CDs on your notebook To create a data CD or DVD 1 Inserta blank writable CDor DVDinto your CD or DVD drive 2 If a dialog box opens click Ta...

Page 119: ...column then click OK The Select a Burning Task dialog box closes 5 In the top pane browse to the folder that contains the files or folders you want to burn to the CD or DVD then click to select the fi...

Page 120: ...n The Burning dialog box opens and Power2Go burns the files to the CD or DVD OR If you have more than one CD or DVD burner select the burner then click Burn The Burning dialog box opens and Power2Go b...

Page 121: ...a CD or DVD To copy a disc 1 Click Start All Programs CyberLink DVD Solution Power2Go then click Power2Go Power2Go opens along with the Select a Burning Task dialog box 2 Click Copy disc in the left c...

Page 122: ...dialog box opens If you are using one drive Power2Go copies the tracks or files to your hard drive If you are using two drives Power2Go copies the tracks from the source disc to the blank recordable...

Page 123: ...more information see the Windows Media Player online help CyberLink Power2Go advanced features Power2Go includes the following disc utilities Burn Disc Image and Save Disc Image create an exact image...

Page 124: ...CHAPTER 7 Using Multimedia 114...

Page 125: ...CHAPTER 8 115 ManagingPower Monitoring the battery charge Recharging the battery Extending battery life Changing notebook power settings...

Page 126: ...balanced with optimized battery life when on battery power Closely monitor the battery charge When the battery charge gets low change the battery or connect to AC power immediately to prevent losing a...

Page 127: ...Remove PC Cards and IBM Microdrive cards if supported by your notebook when you do not need them Many PC Cards and Microdrive Cards use a small amount of power while inserted even if they are not bein...

Page 128: ...battery ies for times when you cannot use a power adapter To find AC power outlets in airports look for them next to support pillars in large areas such as boarding gates and under banks of telephones...

Page 129: ...anging notebook power settings You can change the function of your notebook s power button Standby system key and power saving timers by changing power settings on your notebook You can customize powe...

Page 130: ...a custom power scheme The processor installed in your notebook may use Intel SpeedStep technology to conserve battery power A SpeedStep equipped processor can change its operating speed according to t...

Page 131: ...le click the Power Options icon The Power Options Properties dialog box opens 3 Click the arrow button to open the Power Schemes list then click the power scheme you want OR Set the timers then click...

Page 132: ...box then click the arrow Alarms can alert you when the battery charge is low To change the alarm options 1 Click Start then click Control Panel The Control Panel window opens If your Control Panel is...

Page 133: ...r button and Standby system key You can also select which power saving mode is activated when you close the LCD panel To change advanced power management settings 1 Click Start then click Control Pane...

Page 134: ...hard drive then turns your notebook completely off The next time you turn on your notebook it reads the memory information from the hard drive and opens the programs and documents that were open when...

Page 135: ...mode As an automatic power savings mode Open the Power Options Properties dialog box then click the Power Schemes tab Click the arrow button to open a System hibernates list then click the time you w...

Page 136: ...CHAPTER 8 Managing Power 126...

Page 137: ...essNetworking Wireless networking Setting up your wireless network Testing your network Sharing resources Using the network Connecting to hotspots Adding a desktop computer to your network Adding devi...

Page 138: ...vailable in airports libraries book stores and coffee shops For the notebook user on the go wireless networking just makes life easier A wireless network uses radio waves to communicate Typically a wi...

Page 139: ...t makes it easier to set up and access your network Internet security features like a firewall to keep intruders out of your network Wireless security features like SecureEasySetup or 128 bit WEP encr...

Page 140: ...side your network can intercept the radio waves and take control of your network If you do not set up security for your network a hacker can gain access to your Internet connection to send spam e mail...

Page 141: ...dentify this computer on the network 1 Click Start right click My Computer then click Properties The System Properties dialog box opens 2 Click Computer Name 3 Click Change The Computer Name Changes d...

Page 142: ...twork click Start then click Help and Support Type one of the following keywords in the Help and Support Search box then click the arrow connect to an available network manually add a wireless network...

Page 143: ...ork is not broadcasting its SSID This is not an error and is one way to add security to your wireless network You will need to manually add the network to your notebook Testing your network Now that y...

Page 144: ...inters on each network computer are shared you can access them as though they were attached directly to your computer Then you can View a network drive Open and copy files stored on other network comp...

Page 145: ...R If you have previously enabled remote file access and you want to share a drive or folderwithothers onthenetwork network sharing click to select the Share this folder on the network check box type a...

Page 146: ...hen click Control Panel The Control Panel window opens If your Control Panel is in Category View click Printers and Other Hardware 2 Click Double click the Printers and Faxes icon The Printers and Fax...

Page 147: ...of each of the computers in your workgroup are listed 5 Double click the name of the computer containing the drive or folder you want to view All shared drives and folders are listed Mapping a network...

Page 148: ...file you want to open 2 Click File then click Open 3 Browse to the network drive that contains the file you want to open 4 Double click the folder containing the file then double click the file Copyin...

Page 149: ...e files on your notebook that are marked for sharing may be accessible to other users on the network Important If you want to access your company s network through a hotspot contact your network admin...

Page 150: ...Adding a printer to your network Instead of plugging a printer into your notebook you can add a printer to your wireless network To add a printer to the network do one of the following Use a printer t...

Page 151: ...nstalling and configuring Fax Sending a simple fax Setting up your cover page template Faxing from programs Faxing a scanned document Receiving and viewing a fax Canceling a fax Automatically retry se...

Page 152: ...l window opens Click Double click Add and Remove Programs The Add or Remove Programs dialog box opens Click Add Remove Windows Components The Windows Components Wizard opens 2 Click Fax Services then...

Page 153: ...e faxes 5 If you want the modem to automatically answer the telephone in order to receive faxes click the Enable Receive check box 6 Click Next The Transmitting Subscriber Identification TSID screen o...

Page 154: ...entifier information is required by law and can be the same identifier that you typed in Step 7 The Routing Options screen opens 10 If you set up your notebook to receive faxes select a folder you wan...

Page 155: ...send a simple fax 1 Click Start All Programs Accessories Communications Fax then click Send a Fax The Send Fax Wizard opens 2 On the Welcome to Fax Configuration Wizard screen click Next The Recipient...

Page 156: ...s 7 Click the arrow to open the Cover page template then click the cover page template you want to use 8 Type the subject text in the Subject line area 9 Type the message text in the Note area then cl...

Page 157: ...the Cover Page Editor Tips dialog box opens click OK If you want to include fields that are imported from the Send Fax Wizard or the Fax Configuration Wizard such as To or From add them to the page by...

Page 158: ...it was created in 2 Click File then click Print The Print dialog box opens 3 Click the arrow button to open the Name list then click the Fax printer 4 Click Print The Send Fax Wizard opens 5 Complete...

Page 159: ...pen it detects incoming faxes and stores them in the Inbox 2 To view a fax click Inbox then double click the fax you want to view The fax viewer opens where you can view and print the fax Canceling a...

Page 160: ...ontrol Panel window opens 2 If your Control Panel is in Category View click Printers and Other Hardware Click View installed printers or fax printers The Printers and Faxes window opens OR If your Con...

Page 161: ...View click Printers and Other Hardware Click View installed printers or fax printers The Printers and Faxes window opens OR If your Control Panel is in Classic View double click the Printers and Faxes...

Page 162: ...CHAPTER 10 Sending and Receiving Faxes 152...

Page 163: ...stomizingYournotebook Adjusting the screen and desktop settings Changing the mouse touchpad or pointing device settings Adjusting tablet and pen settings Adding and modifying user accounts Modifying s...

Page 164: ...ore information about adjusting display settings click Start then click Help and Support Type the keyword changing display settings in the Search box then click the arrow Color depth is the number of...

Page 165: ...olor depth 1 Right click any empty space on the desktop then click Properties The Display Properties dialog box opens 2 Click the Settings tab 3 Click the arrow button to open the Color quality list t...

Page 166: ...the screen resolution to fit more icons on your desktop or you can decrease the resolution to make reading the display easier The higher the resolution the smaller individual components of the screen...

Page 167: ...To change desktop colors 1 Right click any empty space on the desktop then click Properties The Display Properties dialog box opens 2 Click the Appearance tab 3 Click the arrow button to open the Colo...

Page 168: ...twice The new colors appear on your desktop Changing the desktop background Help and Support For more information about changing the desktop background click Start then click Help and Support Type the...

Page 169: ...on 4 If you want the picture you chose to cover the entire screen click the arrow button to open the Position list then click Stretchor Tile If the picture you chose does not cover the entire screen a...

Page 170: ...h box then click the arrow You can use a screen saver to keep others from viewing your screen while you are away from your notebook Windows supplies a variety of screen savers that you can choose from...

Page 171: ...he Wait box 4 Click OK Using an extended desktop Help and Support For more information about using an extended desktop click Start then click Help and Support Type the keyword multiple monitors in the...

Page 172: ...e double click speed pointer speed left hand or right hand configuration and other mouse touchpad or pointing device settings Changing mouse settings Help and Support For more information about changi...

Page 173: ...g the mouse touchpad or pointing device settings 163 2 Click Double click the Mouse icon The Mouse Properties dialog box opens 3 Click one of the tabs to change your mouse settings 4 Click OK to save...

Page 174: ...en click Help and Support Type the keyword mouse settings in the Search box then click the arrow To change your touchpad or pointing device settings 1 Click Start then click Control Panel The Control...

Page 175: ...u want to turn thedeviceonoroff click Enable or Disable Tips Tricks You may have received your notebook with the EZ Pad touchpad set to only accept clicking by using the touchpad buttons You can chang...

Page 176: ...k the Tablet and Pen Settings icon in the taskbar then tap or click Properties The Tablet and Pen Properties dialog box opens 2 Tap or click the Pen Options tab 3 Change the pen options settings then...

Page 177: ...g the Tablet PC Input Panel Settings Toadjustwritingpad writingtools andspeech settings 1 Tap or click the Keyboard icon 2 Tap or click the Tools and Options icon then tap or click Options 3 Tap or cl...

Page 178: ...e that account limited Remember that limited accounts may not be able to install some older programs If a program or peripheral device is installed in one account it may not be available in other acco...

Page 179: ...lick Switch User The Windows Welcome screen opens 3 Click theuser account that you want to use When you switch between user accounts any programs that were running for the previous user continue to ru...

Page 180: ...To modify security settings Click Start All Programs Accessories System Tools then click Security Center The Windows Security Center dialog box opens For more information about the Windows Security Ce...

Page 181: ...CHAPTER 12 171 MaintainingYourNotebook Caring for your notebook Protecting your notebook from viruses Updating Windows Using BigFix Managing hard drive space Moving from Your Old Computer...

Page 182: ...to extreme temperature changes The case and LCD panel can become brittle and easy to break in cold temperatures and can melt or warp in high temperatures Damage due to either extreme is not covered by...

Page 183: ...you shut down your notebook the power turns off but some electrical current still flows through your notebook To avoid possible injury from electrical shock unplug the power cord modem cable and netw...

Page 184: ...Cleaning the notebook screen Caution A notebook LCD screen is made of specially coated glass and can be scratched or damaged by abrasive or ammonia based glass cleaners Use a soft cloth and water to c...

Page 185: ...t the most recent updates and fixes to protect your notebook and keep it running smoothly Windows Update scans your notebook and provides you with a tailored selection of updates that apply only to th...

Page 186: ...ng hard drive space Windows provides several utilities you can use to manage your hard drive Checking hard drive space To check hard drive space 1 Click Start then click My Computer The My Computer wi...

Page 187: ...ace To use the Windows Disk Cleanup program 1 Click Start then click My Computer The My Computer window opens 2 Right click the hard drive that you want to delete files from for example Local Disk C t...

Page 188: ...cts file and folder problems and marks flawed areas on the hard drive so Windows does not use them If you use your notebook several hours every day you probably want to run Error checking once a week...

Page 189: ...rmation into pieces and stores them in different places on the hard drive This is called fragmentation and it is normal In order for your notebook to use a file Windows must search for the pieces of t...

Page 190: ...e Local Disk C thenclick Properties TheProperties dialog box opens 3 Click the Tools tab 4 Click Defragment Now 5 If Disk Defragmenter does not start automatically click Defragment Disk Defragmenter s...

Page 191: ...do a complete hard drive backup If you do not have a high capacity backup device and you want to purchase one visit the Accessories Store at accessories gateway com Scheduling maintenance tasks Import...

Page 192: ...rsonal settings such as display Internet and e mail settings from your old computer to your new one by using the Files and Settings Transfer Wizard The wizard also moves specific files or entire folde...

Page 193: ...ndows XP click Start then click My Documents The My Documents window opens and displays many of your saved personal data files Go to Step 4 OR In Windows 98 Windows Me or Windows 2000 double click the...

Page 194: ...2 Use Windows Find or Search to locate data files by file name or file type For help on findingfiles click Help thenclickHelpand Support Center or Help Topics For more information see Searching for fi...

Page 195: ...ir software and install it on your new notebook If you use MSN as your ISP or if you know yourISPsettings usethe WindowsInternet Connection Wizard To use the Internet Connection Wizard 1 Click Start A...

Page 196: ...e inthe Search box then click the arrow Help and Support For more information about installing a printer in Windows XP click Start then click Help and Support Type the keyword installing a printer in...

Page 197: ...not come installed on your new notebook such as personal finance software graphics programs or games Spend some time going through your old computer s Start and Programs menus making note of any prog...

Page 198: ...CHAPTER 12 Maintaining Your Notebook 188...

Page 199: ...CHAPTER 13 189 TravelingwithYourNotebook Packing your notebook Traveling by air Dial up modem Radio frequency wireless connections Files Security Power Additional tips...

Page 200: ...t pack it in checked luggage Keep your notebook stable during travel Secure it to prevent it from sliding around in overhead bins and car trunks Traveling by air Charge the battery in case airport sec...

Page 201: ...acoustic handset coupler Take a telephone line protector Take a telephone line tester to check for unsafe lines especially if you are traveling internationally Take remote access information with you...

Page 202: ...rfere with equipment on commercial aircraft Current aviation regulations require wireless devices to be turned off while traveling in an airplane IEEE 802 11a IEEE 802 11b IEEE 802 11g and Bluetooth c...

Page 203: ...information in a safe place Also tape your business card or an address label to your notebook and accessories Whoever sits next to you or behind you can see your notebook display Avoid working with co...

Page 204: ...ower on page 115 Additional tips If you plan to use several USB peripheral devices take a portable USB hub to provide additional USB ports Take a network cable if you need to connect to a network Some...

Page 205: ...CHAPTER 14 195 Troubleshooting Safety guidelines First steps Troubleshooting Telephone support...

Page 206: ...e any maintenance tasks where you remove the memory bay or hard drive bay cover make sure that you replace the cover reinstall any screws then replace the battery ies before you start your notebook Fi...

Page 207: ...rives on page 201 Device installation Help and Support For more information about IRQs click Start then click Help and Support Type the keyword IRQs in the Search box then click the arrow You have com...

Page 208: ...want to disable then click Disable The device or port is disabled Diskette drive The diskette drive is not recognized Shut down and restart your notebook The modular drive may not be inserted complete...

Page 209: ...error message Eject the diskette from the diskette drive then press ENTER Make sure that the diskette you are using is IBM compatible The modular drive status indicator is lit continuously Remove the...

Page 210: ...rmal and inherent in the TFT technology used in active matrix LCD screens Gateway s inspection standards keep these to a minimum If you feel these pixels are unacceptably numerous or dense on your dis...

Page 211: ...retainers hold the disc in place If your notebook has a modular drive it may not be inserted completely into the modular bay Press the module into the bay then try to access the disc again Make sure...

Page 212: ...are using powered speakers make sure that they are plugged in and turned on Clean the disc For more information see Cleaning CDs or DVDs on page 174 Your notebook may be experiencing some temporary me...

Page 213: ...ay the disc s regional code and your DVD drive s regional code may not match Make sure that a DVD player program has been installed on your notebook Important The television feature is available only...

Page 214: ...p For instructions on deleting unnecessary files see Deleting unnecessary files on page 177 Caution All deleted files will be lost when you empty the Recycle Bin Help and Support For more information...

Page 215: ...cess the drive again Internet Tips Tricks For the location of your modem and network jacks see the poster or hardware guide For the location of your modem and network jacks on an optional port replica...

Page 216: ...ies Connecting to a Web site takes too long Many factors can affect Internet performance The condition of the telephone lines in your residence or at your local telephone service The condition of the...

Page 217: ...et the keyboard dry before using it again If the keyboard does not work after it dries you may need to replace it A keyboard character keeps repeating or you see a Keyboard stuck or Key failure error...

Page 218: ...r a display device when you purchased your Media Center computer a progressive scan display device with a VGA input is the best choice Quality of video source The quality of the video signal coming in...

Page 219: ...screen resolution on page 156 Help and Support For more information about adjusting display settings click Start then click Help and Support Type the keyword changing display settings in the Search b...

Page 220: ...the even lines Because most TVs use this interlaced method to display the picture on the screen a standard interlaced analog TV will most likely flicker when displaying thin lines and small text An in...

Page 221: ...r Media Center computer to a DVD Yes you can The Media Center saves recorded videos in the DVR MS format You can burn a DVR MS file to a DVD with DVD recording burning software such as Power2Go and wi...

Page 222: ...indow Reboot your notebook Modem cable or DSL Tips Tricks For the location of your network jack see the poster or hardware guide For the location of your network jack on an optional port replicator se...

Page 223: ...ontact your telephone service to get the correct code to temporarily disable the service Also make sure that the modem dialing properties are set appropriately To check the dialing properties 1 Click...

Page 224: ...ure You can also call your telephone service and have the telephone line checked for noise or low line levels Try another telephone line either a different telephone number in your house or a telephon...

Page 225: ...on an optional port replicator see the port replicator user guide The modem is not recognized by your notebook Make sure that the line connected to the modem is working and plugged into the appropriat...

Page 226: ...is noisy when it dials and connects When your modem tries to connect to another modem it begins handshaking Handshaking is a digital getting acquainted conversation between the two modems that establi...

Page 227: ...mouse port works The external mouse works erratically Clean the mouse Some mouse pad patterns confuse optical mice Try the mouse on a different surface Networks wired Help and Support For more inform...

Page 228: ...l computers are using the same Subnet Mask If you assigned IP addresses to the computers make sure that all computers have different IP addresses For home networks IP addresses should be 192 168 N N w...

Page 229: ...as a member of a domain before you join a workgroup it is disjoined from the domain and your computer account disabled Contact your company computer department or network administrator for more inform...

Page 230: ...istance between your wireless network devices by radio interference and by interference from natural obstructions such as walls ceilings floors and doors If your wireless network is running slower tha...

Page 231: ...ilable networks are listed in the Windows XP Wireless Networking utility Ifthenetwork you are attemptingto access does not broadcast its SSID you need to request the SSID from the administrator and ad...

Page 232: ...urnotebookwaspreviouslyconnected directly to your cable or DSL modem and your ISP requires you to use a static IP address your notebook is not set up to use a DHCP server Caution If your notebook was...

Page 233: ...conflict For moreinformationonresourceconflicts see Device installation on page 197 Pen tablet PC The convertible notebook does not respond to the pen You are not using the correct pen Use only digiti...

Page 234: ...e the poster or hardware guide Tips Tricks For instructions on recalibrating your battery ies see the hardware guide Check the power management settings For more information about using power manageme...

Page 235: ...the printer you want to print to is not the default printer make sure that you have selected it in the printer setup To set a default printer 1 Click Start then click Control Panel The Control Panel w...

Page 236: ...3 Right click the name of the printer you want to use If the menu shows a check mark next to Use Printer Offline click Use Printer Offline to clear the check mark Wait until files have been printed be...

Page 237: ...tructions on how to adjust the volume control in Windows see Adjusting the volume on page 82 Make sure that Mute controls are turned off Status indicators The status indicators are not functioning Mak...

Page 238: ...to a port replicator make sure the external monitor or projector is connected to the monitor port on the port replicator and not on the notebook The notebook s monitor port may be disabled when connec...

Page 239: ...eyboard or mouse does not appear to work make sure that all cables are plugged in securely If you have recently installed hardware or software make sure thatyou have installed it according to the inst...

Page 240: ...mon problems 800 846 2118 Resource Service description How to reach Answers by Gateway Get tutorial assistance for hardware and software issues This is a fee based service www gateway com answers Gate...

Page 241: ...ith your hardware or software In many cases additional product information and online documentation for Gateway supplied hardware can be found in our Web site s Documentation Library This user guide T...

Page 242: ...are available on CD Select from several easy to use learning libraries www gateway com training Online Training from Learn With Gateway More than 450 online courses are available from Learn With Gate...

Page 243: ...APPENDIX A 233 SafetyandLegalInformation Important safety information Notices...

Page 244: ...he documentation are followed Setting up your system Read and follow all instructions marked on the notebook and in the documentation before you operate your notebook Retain all safety and operating i...

Page 245: ...em is electrically grounded to provide some protection against voltage surges and buildup of static charges Care during use Do not walk on the power cord or allow anything to rest on it Do not spill a...

Page 246: ...e notebook was dropped or the cabinet is damaged The notebook performance changes Replacement parts and accessories Use only replacement parts and accessories recommended by Gateway Notices Copyright...

Page 247: ...mages In the interest of continued product development Gateway reserves the right to make improvements in this manual and the products it describes at any time without notices or obligation Trademark...

Page 248: ...ected by U S patents and other intellectual property rights Use of this copyright protection technology must be authorized by Macrovision Corporation and is intended for home and other limited viewing...

Page 249: ...ying 87 automobile power adapter 118 AVI file 86 B background 158 backing up files 181 battery alternate power sources 118 charge indicator 116 charge status 116 charging 116 conserving power 117 icon...

Page 250: ...nternet 52 to Web site 53 video camera 80 connections digital video camera 72 95 Firewire 72 95 i Link 72 95 IEEE 1394 72 95 monitor VGA 74 parallel 72 projector 74 serial 72 S Video out 76 78 televis...

Page 251: ...opening 30 printing 31 saving 30 downloading files 54 drivers updating 3 drives backing up files 181 checking for errors 178 checking for free space 176 defragmenting 179 mapping network 137 sharing...

Page 252: ...irewall 169 Firewire port 72 95 fixing problems 175 folders copying 22 32 creating 20 cutting 22 32 deleting 11 23 32 finding 24 26 moving 22 opening 19 pasting 22 32 recovering 23 renaming 32 searchi...

Page 253: ...el changing resolution 156 cleaning 174 troubleshooting 199 using screen saver 160 line protector 191 line tester 191 links 52 lock cable 193 M maintenance backing up files 181 checking for drive erro...

Page 254: ...le creating 91 editing track information 94 playing 86 MPEG file playing 86 multimedia adjusting volume 82 playing audio CD 87 playing DVD 87 89 recording audio 90 using Windows Media Player 86 multip...

Page 255: ...lems fixing 175 programs closing 32 opening 11 reinstalling 187 projector adding 74 color quality 75 display properties 74 155 156 157 158 160 161 screen resolution 75 R radio listening with Windows M...

Page 256: ...ves 134 folders 134 printer 136 shortcuts adding to desktop 12 closing programs 32 closing windows 32 copying 32 cutting 32 deleting files and folders 32 keyboard 32 pasting 32 renaming files and fold...

Page 257: ...3 testing CD drive 113 DVD drive 113 tips pen 17 title bar 13 touchpad changing settings 162 TPM 59 training CD 232 classroom 232 Gateway Learning Libraries 232 Learn With Gateway 232 transferring fil...

Page 258: ...137 shared folders 137 virus protecting against 61 169 174 removing 61 174 voice recognition 14 volume adjusting 82 adjusting modem 216 controls 82 muting 82 troubleshooting 227 W WAV file 86 Web brow...

Page 259: ...t dialog box 145 146 Windows Security Center icon 11 using 61 169 Windows Update 67 169 175 Windows XP Tablet PC 2005 14 wired Ethernet troubleshooting 218 wireless Ethernet using while traveling 192...

Page 260: ...250 Index www gateway com...

Page 261: ......

Page 262: ...MAN BLADE PLATINUM USR GDE R2 2 06...

Reviews: