30
Replacing and Adding System Components
3.5-inch diskette or CD drives
Replacing the diskette drive
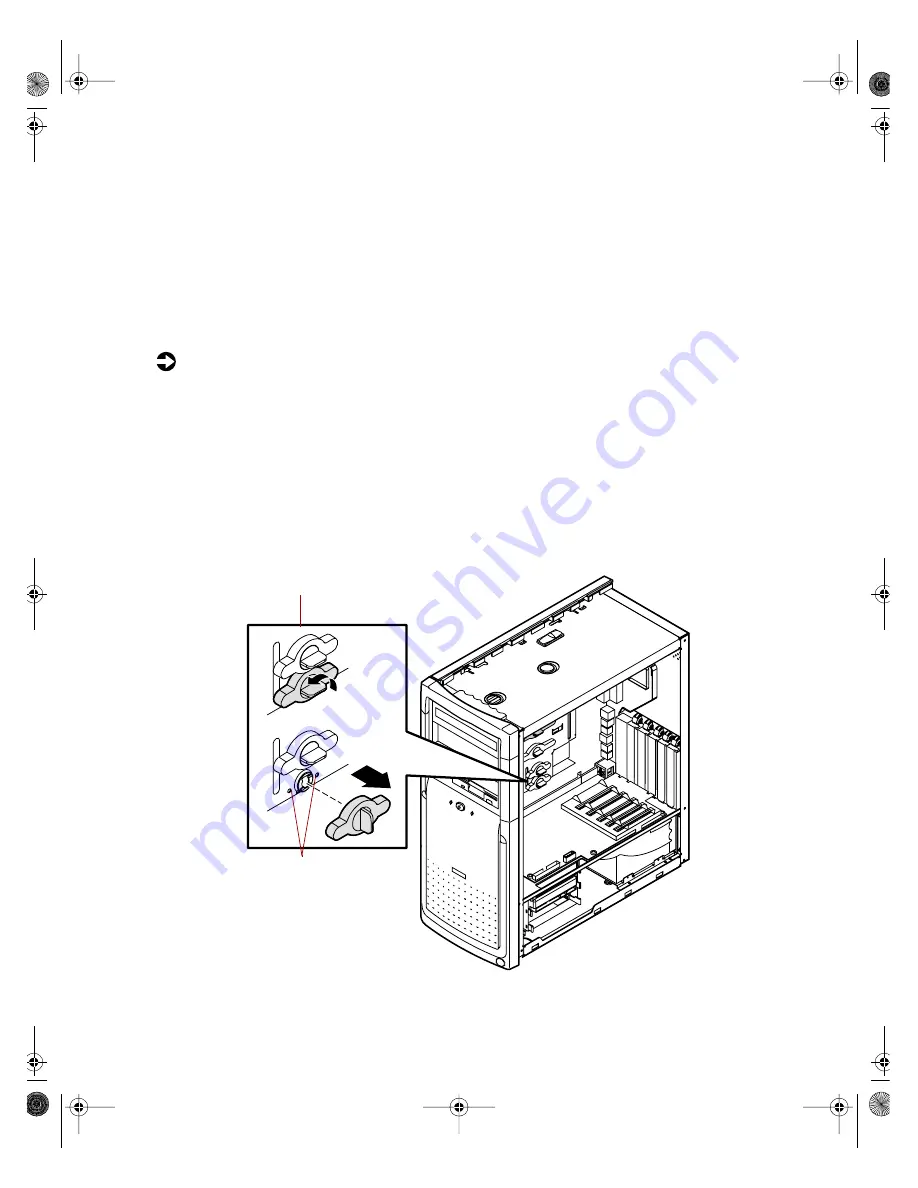
The 3.5-inch diskette drive is attached to the drive cage with a drive locking
tab. The drive cage is secured in the chassis with a drive cage release button.
You do not have to remove any screws to release the drive cage or remove
the diskette drive.
To replace a 3.5-inch diskette drive:
1
Turn off the computer, disconnect the power cord, modem cord (if
installed), and all external peripheral devices.
2
Remove the right panel. (See “Removing the side panels” on page 19 and
observe the “Static electricity precautions” on page 17.)
3
Disconnect the power and data cables from the back of the diskette drive.
4
Release the drive locking tab from the diskette drive bay by turning the
knob on the tab counter-clockwise to the unlock position, then remove
the tab from the drive cage.
Drive locking tab
Locking tab holes
05957.book Page 30 Monday, May 8, 2000 10:09 AM
Summary of Contents for E3400
Page 1: ...MAN US E3400 MT SYS GDE R0 04 00 E3400 Mid Tower System Manual...
Page 5: ...iv 05957 book Page iv Monday May 8 2000 10 09 AM...
Page 19: ...12 System Features 05957 book Page 12 Monday May 8 2000 10 09 AM...
Page 69: ...62 Replacing and Adding System Components 05957 book Page 62 Monday May 8 2000 10 09 AM...
Page 75: ...68 Using the BIOS Setup Utility 05957 book Page 68 Monday May 8 2000 10 09 AM...
Page 126: ...MAN US E3400 SYS GDE R0 04 00 E3400 Mid Tower System Manual...


