Installing and removing drives
www.gateway.com
37
Removing and installing a hard drive
Important
Gateway tests and verifies the operation
and compatibility of the drives it sells.
Especially in a hot-swap or
mission-critical environment, additional
or replacement drives must conform to
Gateway standards.
Use this procedure to add or replace a hard drive in a hot-swap bay. Your server
supports as many as six 1-inch high, 3.5-inch hot-swap SATA and SATA II hard
drives or six1-inch high, 3.5-inch hot-swap SAS hard drives. You can purchase
additional drives through your Gateway Sales or Customer Care representative.
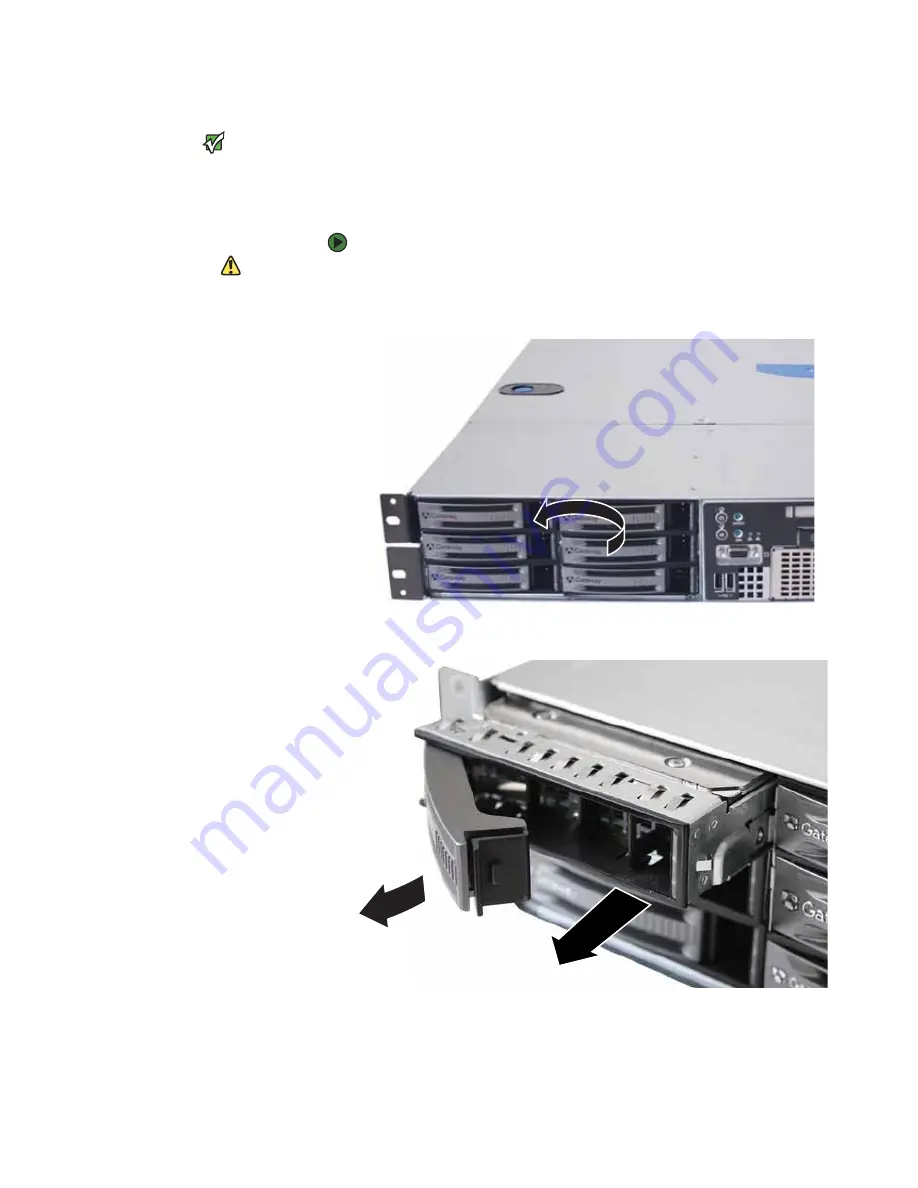
To remove and install a hot-swap hard drive:
Caution
Before you remove a failed drive, use the
appropriate software and utilities
installed on the server to stop all activity
on the failed drive. Instructions for using
the software are provided by the software
manufacturer. Failure to do so may
destroy the data on the drive.
1
Unlock the bezel (if necessary) and remove it by pulling it from the chassis.
2
Put your finger in the drive release lever and pull out. The drive release
lever opens.
3
Pull the drive carrier straight out of the server.
4
If you are replacing a hard drive, remove the four screws that secure the
old hard drive to the drive tray, then remove the drive from the tray.
5
Using the four screws you removed, install the new hard drive into the
drive tray.
Summary of Contents for E-9525R
Page 1: ...USER GUIDE Gateway E 9525R Server ...
Page 2: ......
Page 6: ...Contents www gateway com iv ...
Page 70: ...CHAPTER 4 Installing Components www gateway com 64 ...
Page 107: ...APPENDIX B 101 BIOSSettings ...
Page 118: ...APPENDIX B BIOS Settings www gateway com 112 ...
Page 119: ...APPENDIX C 113 Safety Regulatory and Legal Information ...
Page 128: ...Index www gateway com 122 user password 24 W Web site Gateway 10 ...
Page 129: ......
Page 130: ...A MAN E 9525R USR GDE R0 10 06 ...


