8
Chapter 1: Checking Out Your Gateway 450
www.gateway.com
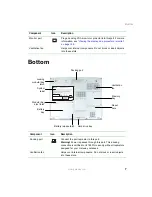
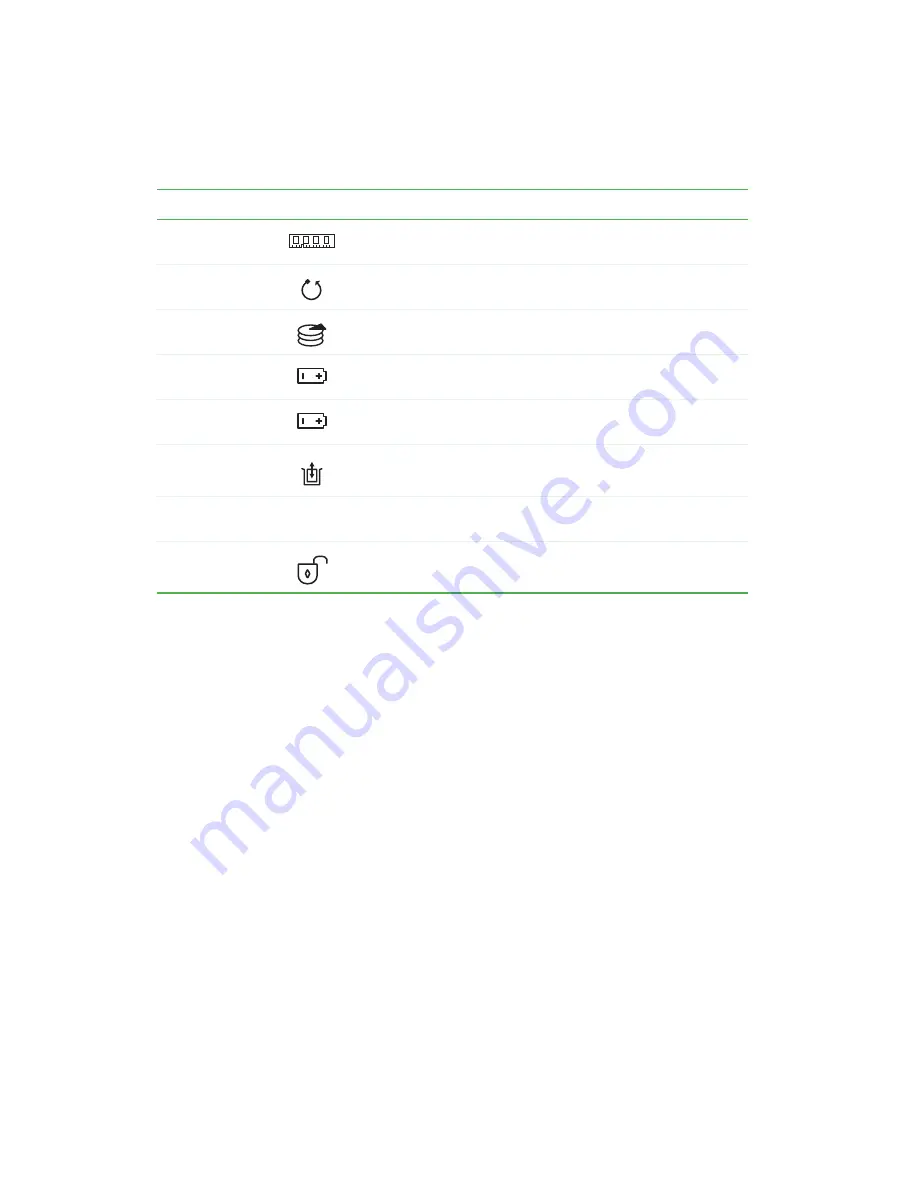
Memory bay
Install as many as two memory modules into this bay. For more
information, see
“Adding or replacing memory” on page 235
.
Reset hole
Insert a straightened paper clip into this hole to manually restart
the notebook.
Hard drive bay
The main hard drive is located in this bay. For more information,
see
“Replacing the hard drive” on page 239
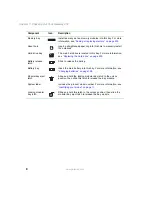
Battery release
latch
Slide to release the battery.
Battery bay
Insert the main battery into this bay. For more information, see
“Changing batteries” on page 155
.
Modular bay eject
latch
Slide and hold the locking modular bay latch to the unlock
position, then slide this latch to release the bay module.
System label
Includes the product model number. For more information, see
“Identifying your model” on page 11
Locking modular
bay latch
Slide and hold this latch to the unlock position, then slide the
modular bay eject latch to release the bay module.
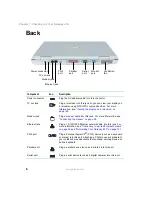
Component
Icon
Description
Summary of Contents for 450ROG
Page 1: ...User Guide Gateway 450ROG RGH Notebook...
Page 2: ......
Page 10: ...viii...
Page 60: ...50 Chapter 3 Getting Help www gateway com...
Page 82: ...72 Chapter 4 Using Windows www gateway com...
Page 92: ...82 Chapter 5 Using the Internet www gateway com...
Page 104: ...94 Chapter 6 Sending and Receiving Faxes www gateway com...
Page 184: ...174 Chapter 9 Traveling with Your Gateway 450 www gateway com...
Page 214: ...204 Chapter 12 Moving From Your Old Computer www gateway com...
Page 232: ...222 Chapter 13 Maintaining Your Gateway 450 www gateway com...
Page 290: ...280 Chapter 17 Troubleshooting www gateway com...
Page 304: ...294 Appendix A Safety Regulatory and Legal Information www gateway com...
Page 321: ......
Page 322: ...NSK DWL 450 ROG USR GDE R2 2 04...

