background image

-

64

-

Obligation of the purchaser

GG will have the right to reject any claims under Warranty in the event that:

a) 

The purchaser has failed to submit the vehicle to any of the inspections and/or maintenance work required in the Users’ Manual,

or has exceeded the date set for such inspections or maintenance work. Also excluded from guarantee are those faults that
appeared prior to the dates established for an inspection or maintenance work where the latter was not carried out, or was carried
out later than the date established.

b)

 An inspection, maintenance or repair has been performed on the vehicle by third parties not recognised or authorised by GG.

c)

 Any maintenance or repair has been carried out on the vehicle that violates the technical requirements, specifications and/or

instructions indicated by the manufacturer.

d)

 Spare parts whose use has not been authorised by GG have been used during the course of maintenance work or repairs to

the vehicle, or in the event that the vehicle has been used with fuels, lubricants or other liquids (including, amongst others, cleaning
products) that have not been expressly mentioned in the specifications set out in the User’s Manual.

e)

 The vehicle has been altered or modified in any way or fitted with components other than those expressly authorised by GG

as accepted components of the vehicle.

f)

 The vehicle has been stored or transported in a way that is not in accordance to the corresponding technical requirements.

g) 

The vehicle has been used for special purposes other than ordinary use, such as competition, races or record breaking attempts.

h) 

The vehicle has been directly or indirectly damaged as a result of a fall or an accident.

Warranty exclusions

The following items are not covered by this Warranty:

a)

 Worn parts, including, without any limitation, spark plugs, batteries, petrol filters, oil filter elements, (secondary) chains, engine

output pinions, rear sprockets, air filters, brake discs, brake pads, clutch plates and discs, bulbs, fuses, carbon brushes, footrest
rubbers, tyres, inner tubes, cables and other rubber components

b)

 Lubricants (for example, oil, grease, etc.) and working fluids (for example, battery liquid, coolant, etc.)

c)

 Inspection, adjustments and other maintenance tasks, as well as all kinds of cleaning work

d)

 Damage to the paint-work and consequent corrosion due to external causes, such as stones, salt, industrial fumes and other

environmental impact, or inadequate cleaning with inappropriate products

Summary of Contents for EC FSE 450

Page 1: ...MANUAL DEL USUARIO SERVICE MANUAL MANUEL D ENTRETIEN LIBRETTO D USO MANUAL DEL USUARIO SERVICE MANUAL MANUEL D ENTRETIEN LIBRETTO D USO...

Page 2: ......

Page 3: ...USER MANUAL USER MANUAL ENGLISH...

Page 4: ......

Page 5: ...t of many years of competition and experimentation in these demanding disciplines many great trial riders have contributed their expertise and achievements to the essential data we have used to create...

Page 6: ...injury or even death CAUTION This caution symbol identifies special instructions or procedures that if not strictly observed could result in damage to or destruction of equipment NOTE This symbol indi...

Page 7: ...Maintenance chart 15 Battery 16 Cooling system 17 Spark plug 20 Air filter 23 Accelerator cable 24 Clutch 25 Exhaust system 25 Chain guide 26 Tension adjustment 27 Handle bars 29 Brakes 29 Steering 31...

Page 8: ...k hydraulic action Secondary transmission By chain Gear ratio 1st 2 071 29 14 2nd 1 625 26 16 3rd 1 333 24 18 4th 1 100 22 20 5th 0 913 21 23 6th 0 791 19 24 Primary reduction ratio 2 85 57 20 Final r...

Page 9: ...chi 110 mm compressed without spring HLINS 110 mm compressed without spring BRAKES Type Front rear Disk brakes NISSIN pump and simple double callipers Effective disk diameter Front 260 mm Rear 220 mm...

Page 10: ...Clutch handle 2 Engine start button 3 Fuel tank cap 4 Front brake fluid tank 5 Front brake handle 6 Throttle control 1 Clutch handle 2 Engine start button 3 Fuel tank cap 4 Front brake fluid tank 5 F...

Page 11: ...Front brake callipers 14 Rear brake fluid tank 15 Shift pedal 16 Rear shock absorber 17 Chain guide 18 Chain 19 Silencer 20 Rear shock absorber gas tank 21 Tie rod and rocker suspension 22 Rear brake...

Page 12: ...anti clockwise direction To close the fuel cap rotate it in a clockwise direction SIDE STAND To unfold the side stand A the securing strap must be released B then the stand is opened to vertical posit...

Page 13: ...RECOMMENDED FUEL Use lead free petrol with an octane rating equal to or higher than that shown in the table OCTANE RATING METHOD OCTANE RATING MIN Antiknock Index RON MON 2 90 Research Octane No RON 9...

Page 14: ...tive The engine cannot start The key may be extracted from the ignition NOTE Starting the engine while the key is being turned to the ON position may cause a loss in battery power 12 STARTING THE ENGI...

Page 15: ...Careless incomplete shifts can cause the transmission to jump out of gear and lead to engine damage B Shift pedal 13 COLD STARTING The cold start function is responsible for aiding the engine start i...

Page 16: ...hese steps 1 Start the engine and let it run at idle until the engine is thoroughly warmed up 2 Stop and let the engine cool completely 3 Start the engine and ride for 10 minutes at moderate speed NEV...

Page 17: ...I I I I I I T Inspect each time that the motorcycle has run or when necessary Revise every 4 years Revise every 2 years Clean lubricate and inspect each time the motorcycle has run Revise every 4 year...

Page 18: ...ep the area ventilated and free from naked flames The operating instructions for the battery are as follows 1 Check the battery tension in open circuit status disconnected 2 In case the battery s tens...

Page 19: ...ater CAUTION Using a high pressure water source could damage the radiator fins and render it ineffective Do not obstruct or deviate the radiator air intake by installing non approved accessories Inter...

Page 20: ...tect the cooling system against freezing Use a permanent type of anti freeze soft water and ethylene glycol plus corrosion and rust inhibitor chemicals for aluminium engines and radiators in the cooli...

Page 21: ...ARNING If coolant gets on the tyres this will make them slippery and could result in an accident 19 NOTE Check the level when the engine is cold 1 Coolant level 2 Filler opening If the coolant level i...

Page 22: ...eriodically to check the electrode gap If the plug is oily or has carbon build up on it the clean it with a sand blaster Following abrasive particle cleaning the spark plug should be cleaned with a wi...

Page 23: ...ndes da os en el motor y estos da os no son cubiertos por la garant a Usar siempre las buj as recomendadas por la marca Consultar a los concesionarios o a un mec nico cualificado para saber qu buj a e...

Page 24: ...he gap in the plug between 0 7 and 0 8 mm 0 028 0 031 in Before removing the carbon deposits check its colour this colour tells us whether the standard plug is the best for our use WARNING When the in...

Page 25: ...ear and engine damage Inspect this without fault before and after each race or session Clean if necessary Cleaning the air filter WARNING Clean the filter in a well ventilated zone and ensure that the...

Page 26: ...e correct amount of play Tighten the locknut A Adjustment B Lock nut C Throttle grip D Brake fluid reservoir If the play can not be established by adjusting the cable remove the cable protection from...

Page 27: ...cover 2 Release the exhaust flange A Silencer B Silencer attachment bolts C Flange 25 CLUTCH Proper clutch lever play is 2 3 mm Play increases with the clutch wear and thus requires adjustment When th...

Page 28: ...ak WARNING A chain that breaks or jumps off the sprockets could snag on the engine sprocket or lock the rear wheel severely damaging the motorcycle and causing it to go out of control Checking tension...

Page 29: ...checked using the straightedge or string method WARNING Misalignment of the wheel will result in abnormal wear and may result in an unsafe riding condition Tighten the chain adjustment nuts Tighten t...

Page 30: ...n excessively or damaged replace it A Chain guide slide Visually inspect the upper and lower part of the chain slider on the swing arm If this is worn then replace it A Chain guide slide B Rocker arm...

Page 31: ...e bars to desired position A Apply oil A B A A A Tighten the bolts securely first the forward bolts then the rear to a torque of 25 Nm If the handlebar is correctly installed there will be a minimal g...

Page 32: ...e it It should also be changed if it is contaminated by water or dirt 30 A B C D Front brake lever Adjust brake lever to a comfortable position To adjust loosen the nut under the rubber protection B T...

Page 33: ...time Check for fluid leakage around the fittings Check for brake line damage WARNING Do not mix brands of fluid Change the brake fluid in the brake line completely if the brake fluid must be refilled...

Page 34: ...ove the handlebar by loosening the handlebar clamp bolts A Loosen the steering stem bolt B Loosen the bolts for the upper suspension plate and remove it C Rotate the steering adjustment bolt using the...

Page 35: ...the forks heat up or as operation time increases We don t recommend using air pressure as the forks are designed to work without adding any air Rebound and compression dampening adjustment This adjust...

Page 36: ...abilize the motorcycle upright Take out the handlebar bolts and take out the handlebars Remove the suspension caps from the rods Slowly compress the front forks all the way Lift the fork springs Holdi...

Page 37: ...k Refit all removed parts 1 Spring 2 Counter nut 3 Suspension cap 4 Cap spanner 5 Counter nut spanner Suspension rod spring Different springs can be used depending on the weight of the driver and the...

Page 38: ...eplaced with an optional one Also the dampening force can be adjusted easily so changing oil viscosity is unnecessary Extension adjustment To adjust this rotate the control on the rear of the shock by...

Page 39: ...est position is 258 mm Tighten the counter nut correctly Following the adjustment move the spring up and down to ensure that this is correctly in place Refit all removed parts Rear shock absorber spri...

Page 40: ...ber body may cause the spring and associated parts to be ejected at high velocity Always wear eye and face protection Removal and installation of spring should be performed by an official distributor...

Page 41: ...cylinders and callipers under the fuel tank If water gets into the ignition coil or into the spark plug cap the spark will jump through the water and be grounded out the affected parts must be dried F...

Page 42: ...ar axle bolt 19 Silencer support bolts 20 Sub chassis bolts 21 Rear shock bolts 22 Exhaust flange bolt 23 Upper suspension plate bolts 24 Steering head nut 25 Brake lever support bolt 26 Rod support b...

Page 43: ...mp cover drain plug Calliper mounting bolts Disc plate mounting screws Engine mounting bolts Front axle bolt Front brake lever support bolt Fork flange bolt Steering nut Rear axle nut Rear brake pedal...

Page 44: ...sing a high pressure spray washer Before lubricating each part clean off any rusty spots with rust remover and wipe off any grease oil dirt or grime General lubrication Clutch lever A Front brake leve...

Page 45: ...Checking the oil level and making the changes periodically are two very important operations to keep the engine in perfect shape Initially replace the oil after 5 hours of operation and then every 60...

Page 46: ...just the level when the motor oil is not hot Changing the oil and filter The oil should be changed when the engine is hot since this helps the oil to go out through the drain located in the lowest par...

Page 47: ...eep new or used oil away from the reach of children and animals Clean clothes sleeves and pants Wash yourself with soap if oil has been in contact with your skin To change the oil follow the following...

Page 48: ...ce the filter cover and put the screws that secure the cover but without tightening them too hard do not exceed the recommended torque 8 Replace the drain caps and screw them back on accordingly Pour...

Page 49: ...ing before making any setting evaluations or changes The major factors which must be considered in suspension tuning are rider weight rider skill and the track conditions as well as the rider s style...

Page 50: ...o hard Oil too dense Fork oil degraded Too soft The front forks dive excessively during braking and deceleration 1 Front fork oil level low 2 The springs are too soft 3 Oil too light 4 Fork oil degrad...

Page 51: ...and place one foot on the brake firmly If the bike maintains its level attitude as the suspension is compressed the suspensions are well balanced Sit astride the bike and take up a riding posture the...

Page 52: ...t check front and rear compatibility Adjustments depending on the bottoming of the suspension rear shock Bottoms at low speed Increase spring preload to maximum Bottom after successive 3 or 4 successi...

Page 53: ...care according to track conditions 1 In dry dusty conditions such as volcanic ash or fine powdery dust special care must be given to keep the air cleaner element clean 2 Wet heavy clay or mud stickin...

Page 54: ...Inspect the drive chain and rear sprocket for wear 3 Clean the pinion and rear sprocket 4 Check the piston cylinder and crankshaft bearing 5 Grease the throttle control and cable 5 Suggested spare pa...

Page 55: ...dampness away from the tire rubber Tie a plastic bag over the exhaust pipe to prevent moisture from entering Put a cover over the motorcycle to keep dust and dirt from collecting on it To put the mot...

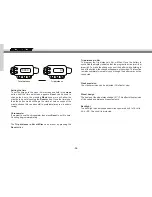
Page 56: ...Miles can be reset by pressing the Reset button 0 0 Trip distance 0000 Total distance Trip distance in Km To program the trip distance in Km or Miles Once the battery is connected the display indicat...

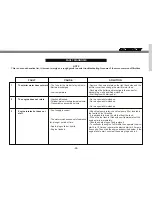
Page 57: ...check fuel pump filter located in the fuel tank isn t blocked It is advisable to drain the old fuel from the tank When the fuel tank is filled with new flammable fuel the engine starts immediately Ta...

Page 58: ...inder ring diameter tolerance excessive Remove the seat and the fuel tank clean the pin connector and treat it using a contact spray Clean the petrol tank ventilation Adjust the throttle body by pass...

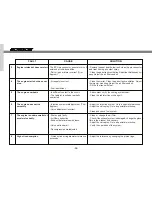
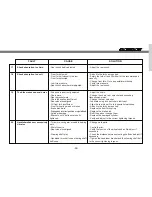
Page 59: ...hen they must be changed for new ones Change the cylinder head gasket Go to a specialist workshop Clean or change the air filter Go to a specialist workshop Go to a specialist workshop Change the gear...

Page 60: ...hock absorption too hard Replace the down selector mechanism spring Replace the gear drum Replace the ratchet spring of the selector Change gear fork Change Go to a specialist workshop Change Go to a...

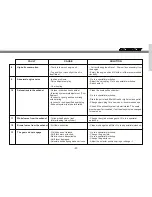
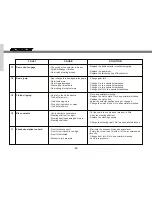
Page 61: ...cket loose steering shaft bolt loose Adjust the rear shock Add oil to the forks as required Empty the fork oil and fill with oil of the recommended viscosity Change front fork Go to a specialist works...

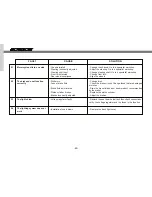
Page 62: ...y The lights blow The lighting system does not work Change the chassis Go to a specialist workshop Adjust the steering Go to a specialist workshop Change steering shaft Go to a specialist workshop Cha...

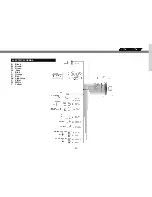
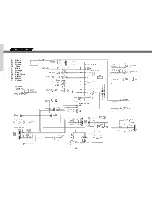
Page 63: ...61 B Black Br Brown G Green Gr Grey L Blue O Orange R Red Sb Light blue V Violet W White Y Yellow ELECTRIC SCHEMAS...

Page 64: ...62 B Black Br Brown G Green Gr Grey L Blue O Orange R Red Sb Light blue V Violet W White Y Yellow...

Page 65: ...s that become apparent within the period established in the Law decree 23 2003 on the 10th of July covering Warranties on Consumer Goods Sold from the time of delivery and in accordance with the Direc...

Page 66: ...the specifications set out in the User s Manual e The vehicle has been altered or modified in any way or fitted with components other than those expressly authorised by GG as accepted components of t...

Page 67: ...ditional obligations arising out of guarantees on parts replaced free of charge or any other service rendered free of charge are excluded from the effects of this present warranty The Warranty on part...

Page 68: ...Notes Notes...

Page 69: ...Notes Notes...

Page 70: ......

Page 71: ...a 17190 Salt Girona SPAIN Tel 34 902 47 62 54 Fax 34 902 47 61 60 E mail officegg gasgasmotos es partsgg gasgasmotos es FEBRERO FEBRUARY FEBRER 2005 RECOMIENDA EL USO DE ACEITE RECOMMENDS THE USE OF O...

Reviews: