
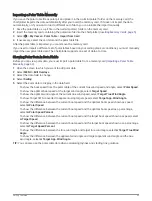
Initiating a Search Pattern
You can initiate a search pattern to search an area. Different patterns are better suited for different search
situations.
1 Select NAV INFO > Routes & Auto Guidance > New > Route Using SAR Pattern.
2 Select a pattern:
• Select Sector Search when the location of the object is fairly known, the search area is small, and an
intensive search is needed.
• Select Expanding Square when the location of the object is somewhat doubtful, the search area is small,
and an intensive search is needed.
• Select Creeping/Parallel Line when the location of the object is approximate, the search area is small, and
a consistent search is needed.
3 Enter the search parameters.
4 Select Done.
5 If necessary, select Engage.
Deleting a Saved Route
1 Select NAV INFO > Routes & Auto Guidance.
2 Select a route.
3 Select Review > Delete.
Deleting All Saved Routes
Select NAV INFO > Manage User Data > Delete User Data > Routes & Auto Guidance.
Auto Guidance
WARNING
The Auto Guidance feature is based on electronic chart information. That data does not ensure obstacle and
bottom clearance. Carefully compare the course to all visual sightings, and avoid any land, shallow water, or
other obstacles that may be in your path.
All route and navigation lines displayed on the chartplotter are only intended to provide general route guidance
or to identify proper channels, and are not intended to be precisely followed. Always defer to the navaids and
conditions on the water when navigating to avoid groundings or hazards that could result in vessel damage,
personal injury, or death.
NOTE: Auto Guidance is available with premium charts, in some areas.
You can use Auto Guidance to plot the best path to your destination. Auto Guidance uses your chartplotter to
scan chart data, such as water depth and known obstacles, to calculate a suggested path. You can adjust the
path during navigation.
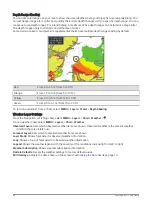
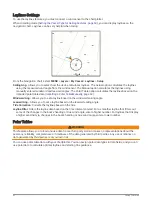
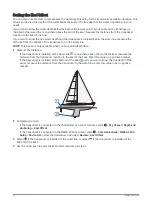
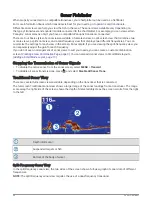
Setting and Following an Auto Guidance Path
1 Select a destination (
).
2 Select Navigate To > Auto Guidance.
3 Review the path, indicated by the magenta line.
4 Select Start Navigation.
5 Follow the magenta line, steering to avoid land, shallow water, and other obstacles (
).
NOTE: When using Auto Guidance, a gray segment within any part of the magenta line indicates that Auto
Guidance cannot calculate part of the Auto Guidance line. This is due to the settings for minimum safe water
depth and minimum safe obstacle height.
Navigation with a Chartplotter
53
Summary of Contents for GPSMAP1222
Page 1: ...GPSMAP 10X2 12X2SERIES Owner sManual...
Page 14: ......
Page 213: ......
Page 214: ...support garmin com GUID C3CEA164 A1CB 4B15 92F2 5C04944CC6F3 v21 January 2024...