1
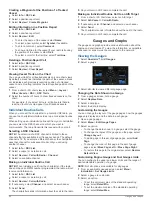
From the wind gauge, select
Menu
>
Compass Gauge
>
Heading Source
.
2
Select
GPS
or
Magnetic
.
NOTE:
When moving at low speeds or when stationary, the
magnetic compass source is more accurate than the GPS
source.
Customizing the Close-Hauled Wind Gauge
You can specify the range of the close-hauled wind gauge for
both the upwind scale and the downwind scale.
1
From the wind gauge, select
Menu
>
Compass Gauge
>
Gauge Type
>
Close Hauled Gauge
.
2
Select an option:
• To set the maximum and minimum values that appear
when the upwind close-hauled wind gauge appears, select
Change Upwind Scale
, and set the angles.
• To set the maximum and minimum values that appear
when the downwind close-hauled wind gauge appears,
select
Change Downwind Scale
, and set the angles.
• To view true or apparent wind, select
Wind
, and select an
option.
Viewing Trip Gauges
Trip gauges show information for odometer, speed, time, and
fuel for your present trip.
Select
Info
>
Trip & Graphs
>
Trip
.
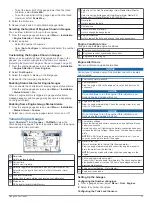
Resetting Trip Gauges
1
Select
Info
>
Trip & Graphs
>
Trip
.
2
Select an option:
• To set all the readings for the present trip to zero, select
Reset Trip
.
• To set the maximum speed reading to zero, select
Reset
Maximum Speed
.
• To set the odometer reading to zero, select
Reset
Odometer
.
• To set all the readings to zero, select
Reset All
.
Battery Management
You can view the battery and other power sources, and the
devices that use those sources.
Batteries are listed along the top of the screen. Other sources of
power, such as solar, alternator, converter, and wind generator,
are listed along the left side. The items along the right side of
the screen are devices that use the batteries and other power
sources.
Setting Up the Battery Management Page
1
Select
OneHelm™, A/V, Gauges
>
Battery Management
>
Menu
>
Edit Devices
.
2
Select an item.
3
Select
Device
, and select an item from the list.
4
If necessary, select
Name
, enter a name for this device, and
select
Done
.
5
If necessary, select
Change Icon
, select a new symbol, and
select
Done
.
6
Repeat steps 2 through 5 for each device.
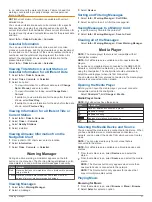
Viewing Graphs
Before you can view graphs of various environmental changes,
such as temperature, depth, and wind, you must have an
appropriate transducer or sensor connected to the network.
Select
Info
>
Trip & Graphs
>
Graphs
.
Setting the Graph Range and Time Scales
You can indicate the amount of time and the range of depth that
appear in the depth and water temperature graphs.
1
From a graph, select
Graph Setup
.
2
Select an option:
• To set a time-elapsed scale, select
Duration
. The default
setting is 10 minutes. Increasing the time-elapsed scale
allows you to view variations over a longer period of time.
Decreasing the time-elapsed scale allows you to view
more detail over a shorter period of time.
• To set the graph scale, select
Scale
. Increasing the scale
allows you to view more variation in readings. Decreasing
the scale allows you to view more detail in the variation.
inReach
®
Messages
WARNING
Do not read or reply to notifications while operating the vessel.
Failure to pay attention to the conditions on the water can result
in vessel damage, personal injury, or death.
You can connect an inReach Mini device to the chartplotter to
view, reply to, and send preset messages from the chartplotter.
NOTE:
The inReach Mini device must be connected to the
chartplotter and receiving satellite signals to send and receive
messages using the chartplotter.
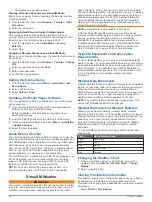
To open the InReach® page, select
OneHelm™, A/V, Gauges
>
InReach®
.
Connecting an inReach Device to the
Chartplotter
You can connect a compatible inReach device to the chartplotter
to manage messages.
1
Bring the inReach device within 3 m (10 ft.) of the
chartplotter.
2
From the main menu of the inReach device, select
Setup
>
ANT+
>
Status
>
On
.
3
On the chartplotter, select
OneHelm™, A/V, Gauges
>
InReach®
>
Start Pairing
.
The chartplotter begins searching for and connecting to the
inReach device. This can take up to 60 seconds.
4
If necessary, compare the code on the inReach device to the
chartplotter, and select
OK
if they match.
The inReach and chartplotter connect automatically when they
are within range.
Receiving inReach Messages
When your inReach device receives a message, a pop-up
notification appears briefly on the GPSMAP screen.
• To review the full message, select
Review
.
• To dismiss the pop-up notification, select
OK
or wait for the
notification to close automatically.
Sending an inReach Preset Message
Preset messages are messages that you created at
. Preset messages have predefined text and
recipients.
1
From the
InReach®
page, select
Messages
>
Send
inReach Preset
.
2
Select a preset message.
3
Select
Send
.
inReach
®
Messages
49


