


Installing the Mounting Bracket
NOTICE
Pan-head screws are included, but they may not be suitable for the mounting surface. If you provide different
mounting hardware, you must not use fasteners with a countersunk head. Hardware with a countersunk head
will damage the mounting bracket.
Before you install the mounting bracket, you must select a mounting location and determine what screws and
other mounting hardware are needed for the surface.
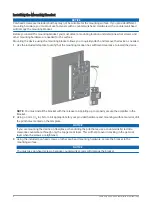
Mounting the device using the mounting bracket allows you to quickly attach and remove the device as needed.
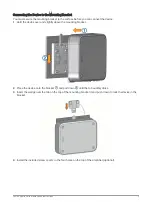
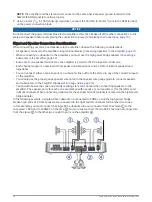
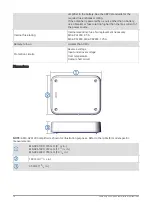
1 Use the included template to verify that the mounting location has sufficient clearance to install the device.
NOTE: You must install the bracket with the release tab pointing up to properly secure the amplifier in the
bracket.
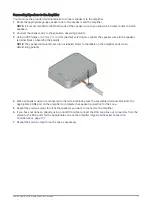
2 Using a 3 mm (
1
/
8
in.) bit or a bit appropriate for your provided hardware and mounting-surface material, drill
the pilot holes marked on the template.
NOTICE
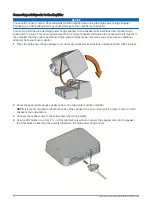
If you are mounting the device on fiberglass, when drilling the pilot holes, use a countersink bit to drill a
clearance counterbore through only the top gel-coat layer. This will help to avoid cracking in the gel-coat
layer when the screws are tightened.
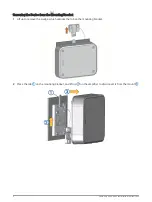
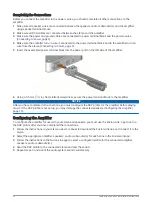
3 Using the included pan-head screws or other pan-head mounting hardware, secure the bracket to the
mounting surface.
NOTICE
You must use pan-head screws, because countersunk screws will damage the bracket.
4
Fusion Apollo Series Installation Instructions