background image

FR60 Owner’s Manual

Getting Started

resuming your activity, you must 

reestablish the connection with the 

FR60. 

To reestablish the connection

Make sure accessory is active. Stop 

and restart the training session  

OR  

Press 

MODE

 and cycle out of 

training mode and then back into 

training mode.
For instructions on using the 

heart rate monitor, see 

page 7

. For 

instructions on using the foot pod, 

see 

page 8

For information about purchasing 

additional accessories, go to  

http://buy.garmin.com

.

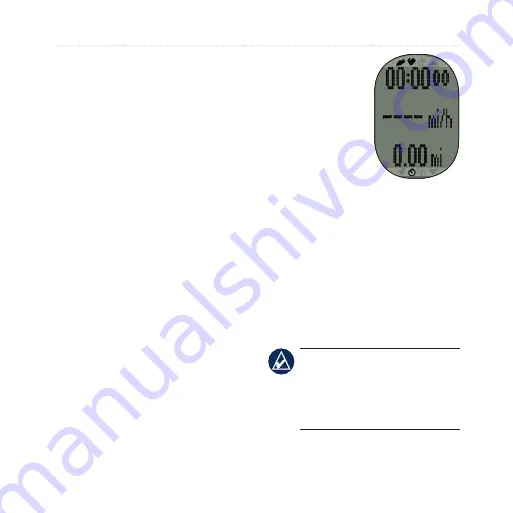
Going for a Run

1.  Press 

MODE

 to view the training 

page. 

2.  Press 

START

 to start the timer. 

3.  After 

completing 

your run, press 

STOP

4.  Press and hold 

LAP

 to save 

your activity 

and reset the 

timer. 

Downloading Free 

Software

1.  Go to 

www.garmin.com/FR60 

/owners

.

2.  Follow the on-screen instructions.

Sending Workout Data 

to Your Computer


nOTE: 

You must download 

software as instructed so that 

the necessary USB drivers are 

installed 

before

 connecting the 

USB ANT Stick to your computer.

Summary of Contents for FR60 - Women's Lilac Fitness Watch

Page 1: ...F R 6 0 owner s manual FITNESS WATCH WITH WIRELESS SYNC ...

Page 2: ...ion hereto provided that such electronic or printed copy of this manual must contain the complete text of this copyright notice and provided further that any unauthorized commercial distribution of this manual or any revision hereto is strictly prohibited Information in this document is subject to change without notice Garmin reserves the right to change or improve its products and to make changes...

Page 3: ...eep the original sales receipt or a photocopy in a safe place Contact Garmin Contact Garmin Product Support if you have any questions while using your FR60 In the USA go to www garmin com support or contact Garmin USA by phone at 913 397 8200 or 800 800 1020 In the UK contact Garmin Europe Ltd by phone at 0808 2380000 In Europe go to www garmin com support and click Contact Support for in country ...

Page 4: ...6 Sending Workout Data to Your Computer 6 Using the Heart Rate Monitor 7 Using the Foot Pod 8 Using the GSC 10 10 Using the Weight Scale 10 Time Mode 11 Setting the Time 11 Power Save 11 Set the Alarm 12 Using the Alarm 12 Set a Second Time Zone 12 Training Mode 13 Timed Workout 13 Training Alerts 13 Heart Rate Zones 14 Virtual Partner 17 Interval Workouts 18 Linking to Fitness Equipment 19 Histor...

Page 5: ... Computer Pairing 24 Settings 25 Run Settings 26 Biking Settings 27 Data Fields 28 Data Field Options 28 Appendix 30 Optional Accessories 30 Battery Information 30 Specifications 33 Troubleshooting 37 Software License Agreement 39 Declaration of Conformity DoC 39 Index 40 ...

Page 6: ...ee modes time training and menu see page 3 USB ANT stick to wirelessly transfer data from your FR60 to you computer and to your FR60 from your computer see page 35 USB ANT stick Heart rate monitor sends heart rate data to the FR60 see page 7 Heart Rate Monitor Foot pod optional sends speed cadence and distance data to the FR60 see page 8 Foot Pod For more information about compatible accessories g...

Page 7: ...scroll quickly through the settings On the Virtual Partner page press and hold to adjust the Virtual Partner pace The foot pod must be paired to view the Virtual Partner page LAP Press to create a new lap In training mode press and hold to save your activity In history mode press and hold to delete an activity START STOP ENTER In training mode press to start or stop the timer In menu mode press to...

Page 8: ... in a list Bike sensor active Foot pod sensor active Heart rate sensor active Data uploading or pairing with fitness equipment Timer is running Alarm on FR60 Backlight Press LIGHT to turn on the backlight The default backlight time is 5 seconds Press MODE SETTINGS SYSTEM BACKLIGHT to adjust the backlight time from 1 to 20 seconds Changing Modes Press MODE to change modes See image on page 3 ...

Page 9: ...DE to turn on your watch When you initially turn on the watch and are completing the setup wizard set your activity class and indicate if you are a lifetime athlete Use the chart on page 4 to determine your activity class A lifetime athlete is an individual who has trained intensely for many years with the exception of minor injuries and has a resting heart rate of 60 beats per minute bpm or less ...

Page 10: ...raining 2 to 3 times per week Approximately 45 minutes 5 45 minutes to 1 hour 6 1 to 3 hours 7 3 to 5 times per week 3 to 7 hours 8 Daily training Almost daily 7 to 11 hours 9 Daily 11 to 15 hours 10 More than 15 hours Activity Class Chart Activity Class Chart provided by Firstbeat Technologies Ltd portions of which are based on Jackson et al Prediction of functional aerobic capacity without exerc...

Page 11: ...y When paired your FR60 only receives data from your sensor and you can go near other sensors Paring Additional Accessories 1 Move away 10 m from other sensors while the FR60 is trying to pair with your sensor for the first time Bring your sensor within range 3 m of the FR60 2 Press MODE SETTINGS SPORT 3 Select RUN GENERAL or BIKE HEART RATE FOOT POD or BIKE SENSOR ON 3 While the FR60 scans for ne...

Page 12: ...e foot pod see page 8 For information about purchasing additional accessories go to http buy garmin com Going for a Run 1 Press MODE to view the training page 2 Press START to start the timer 3 After completing your run press STOP 4 Press and hold LAP to save your activity and reset the timer Downloading Free Software 1 Go to www garmin com FR60 owners 2 Follow the on screen instructions Sending W...

Page 13: ...end data Wear the heart rate monitor directly on your skin just below your breastplate It should be snug enough to stay in place during your activity Tab Heart Rate Monitor Strap Heart Rate Monitor Back Electrodes Heart Rate Monitor Front Slot 1 Push one tab on the strap through the slot in the heart rate monitor Press the tab down 2 Wet both electrodes on the back of the heart rate monitor to cre...

Page 14: ...Using the Foot Pod The foot pod is on standby and ready to send data as soon as you install it or move it Installing the Foot Pod on Your Shoe Laces 1 Press the tab on the lace clip Lift and separate the foot pod from the lace clip 2 Loosen your shoe laces 3 Thread the lace clip through two secure sections of your shoelaces allowing enough room at the top to tie the shoelaces Lace clip 4 Tie your ...

Page 15: ...pod 2 Press MODE to access training mode The foot pod icon appears on the training page 3 If or foot pod data does not appear you may have to pair the foot pod and the FR60 See page 5 Calibrating the Foot Pod Calibrating your foot pod is optional and can improve accuracy You can automatically or manually adjust the calibration Auto Calibration with a Known Distance The minimum calibration distance...

Page 16: ...inutes of inactivity the foot pod automatically turns off to conserve the battery Using the GSC 10 Your watch is compatible with the GSC 10 speed and cadence sensor for bikes The GSC 10 is an optional accessory that is available at http buy garmin com Using the Weight Scale If you have an ANT compatible weight scale the FR60 can read the data from the weight scale 1 Press and hold LIGHT until the ...

Page 17: ...OWN to adjust the hour 4 Press ENTER to advance to the minutes setting 5 Press UP and DOWN to adjust the minutes 6 Continue this process to set seconds day month and year 7 When finished press MODE to return to time mode Power Save After a period of inactivity the FR60 automatically enters a power save mode to conserve battery life The power save mode displays the time and date only Press any butt...

Page 18: ...d DOWN to adjust the minutes 7 When finished press MODE to save and return to the alarm page The icon appears Using the Alarm When the alarm sounds press MODE to turn off the alarm or press ENTER to snooze for 9 minutes Set a Second Time Zone You can set the FR60 time for two time zones 1 Press MODE SETTINGS WATCH TIME 2 2 Follow the instructions on page 11 to set the time 3 Press MODE to save and...

Page 19: ... To save the activity press and hold LAP for 3 seconds Training Alerts To set audible training alerts for your activities press MODE TRAINING ALERTS Note Training alerts are inactive during interval workouts TIME set an alert for a specific duration of time DISTANCE foot pod required set an alert for a specific distance CALORIES foot pod required set an alert for a specific amount of calories The ...

Page 20: ...alert sounds when your cadence is above or below the specified value range or when you have returned your target range Cadence is your rate of pedaling or spinning measured by the number of revolutions of the crank arm per minute rpm or by the number of strides per minute spm when running Heart Rate Zones 1 Press MODE SETTINGS SPORT 2 Select RUN BIKE or GENERAL HEART RATE HR ZONES 3 To change a he...

Page 21: ... and applying these principles Your heart rate is a good measure of exercise intensity Training in certain heart rate zones can help you improve cardiovascular capacity and strength Knowing your heart rate zones can prevent you from overtraining and can decrease your risk of injury You can set the low and high heart rate limits for each zone If you know your maximum heart rate you can use the tabl...

Page 22: ...g conversation possible Basic cardiovascular training good recovery pace 3 70 80 Moderate pace more difficult to hold conversation Improved aerobic capacity optimal cardiovascular training 4 80 90 Fast pace and a bit uncomfortable breathing forceful Improved anaerobic capacity and threshold improved speed 5 90 100 Sprinting pace unsustainable for long period of time labored breathing Anaerobic and...

Page 23: ...d are not saved when the timer is reset If you make changes to the Virtual Partner during an activity the Virtual Partner uses the new pace from your location Setting the Virtual Partner Pace 1 Press MODE SETTINGS SPORT 2 Select RUN GENERAL or BIKE VIRTUAL PARTNER ON 3 Use UP and DOWN to adjust the Virtual Partner pace 4 Press MODE to save your changes and return to the sport menu Starting a Virtu...

Page 24: ... FR60 The intervals can be based on time or distance for the activity and rest portions of the activity Creating an Interval Workout 1 Press MODE TRAINING INTERVALS SETUP 2 Press ENTER to select TIME or DISTANCE 3 Use UP and DOWN to enter a time interval Press enter to advance to the next field 4 Use UP and DOWN arrows to set highlighted value 5 Press ENTER to set a rest type 6 Use UP and DOWN to ...

Page 25: ...ss LAP to end your cool down period Press STOP to end your workout As you approach the end of each interval an alarm counts down the time until a new interval begins To end an interval early press the LAP button Linking to Fitness Equipment ANT technology links your FR60 to fitness equipment so you can send workouts and user information to the fitness equipment and receive and store workout statis...

Page 26: ...ogo on the fitness equipment for 2 seconds The watch will beep and display a message indicating that it is linked to the fitness equipment 4 Press START on the fitness equipment to begin Note The fitness equipment and your FR60 will stay linked until you end the session or until you leave the area 5 Press STOP on the fitness equipment to stop the watch and exercise session ...

Page 27: ...0 Owner s Manual 21 History History GENERAL RUN BIKE Select YES or NO HISTORY Press UP or DOWN to view activities TOTALS ACTIVITIES DELETE TRANSFER ALL ALL ACTIVITIES OLD ACTIVITIES ALL TOTALS History Menu ...

Page 28: ...rkouts Managing Memory Your FR60 holds up to 100 laps and up to 20 hours of exercise files When there is approximately one hour of memory remaining the LOW MEMORY warning appears on the FR60 screen in training mode When the memory is full the FULL MEMORY warning appears and your FR60 stops recording data Your watch automatically saves your session when the memory is full For information about uplo...

Page 29: ...necessary USB drivers are installed before connecting the USB ANT Stick to your computer 3 Connect the USB ANT Stick to an available USB port on your computer 4 Bring the FR60 within range 5 m of your computer 5 Verify that there are no FR60 timers running or active training sessions and that it is in regular time mode The FR60 automatically transmits data to the USB ANT Stick so you can use Garmi...

Page 30: ...TER PAIRING 3 Select ON Your computer detects the FR60 and requests to pair 4 Press YES Turning Off Computer Paring 1 Press MODE SETTINGS SYSTEM COMPUTER PAIRING 2 Select OFF Using the Power Save Transfer Mode The power save transfer mode turns off the computer beacon unless the watch is in regular time mode menu mode or training mode 1 Press MODE SETTINGS SYSTEM COMPUTER POWER SAVE TRANSFER 2 Sel...

Page 31: ...O SCROLL VIRTUAL PARTNER TRAINING PAGES HEART RATE FOOT POD PACE SPEED RACE MODE VIEW NAME GENDER AGE WEIGHT HEIGHT ATHLETE ACTIVITY CLASS WATCH SPORT USER SYSTEM TIME 1 TIME 2 ALARM LANGUAGE COMPUTER FITNESS EQUIPMENT SCALE KEY TONES MESSAGE TONES UNITS BACKLIGHT ABOUT SETTINGS HISTORY TRAINING ...

Page 32: ... your pace falls below a preset pace AUTO SCROLL use the auto scroll feature to automatically cycle through all of the training data pages while the timer is running Select a display speed SLOW MEDIUM or FAST VIRTUAL PARTNER turn Virtual Partner on or off You can also set the Virtual Partner pace see page 17 TRAINING PAGES set up the training pages and data fields you want to display during your r...

Page 33: ...AUTO PAUSE turn Auto Pause on or off When Auto Pause is on the timer automatically pauses stops when the your pace falls below a preset pace AUTO SCROLL use the auto scroll feature to automatically cycle through all of the training data pages while the timer is running Select a display speed SLOW MEDIUM or FAST VIRTUAL PARTNER turn Virtual Partner on or off You can also set the Virtual Partner pac...

Page 34: ...ress UP and DOWN to set the number of fields 5 Press and hold ENTER to change FIELD 1 Press UP and DOWN to change the data field 6 Repeat for the other data fields and data pages Data Field Options Requires an optional accessory Data Field Description CADENCE Revolutions of the crank arm or strides per minute A CADENCE Average cadence for the duration of your current activity L CADENCE Average cad...

Page 35: ...pleted PACE Current pace A PACE Average pace for the activity L PACE Average pace in the current lap SPEED Current speed A SPEED Average speed for the activity Data Field Description L SPEED Average speed in the current lap L STEPS Steps for the current lap TIME ELAPSED Total time elapsed for the activity TIME Stopwatch time A LAP TIME Average time to complete the laps so far LAP TIME Amount of ti...

Page 36: ...duct Information guide in the product box for important battery safety information FR60 Battery The FR60 battery will last for 1 year typical use When the battery is low the BATTERY LOW warning appears on the FR60 screen in Time mode Conserving Battery Life Excessive use of the backlight reduces battery life Set the backlight timeout to 5 seconds to ensure longer battery life Note If the battery i...

Page 37: ...emove the screws from the FR60 back cover 2 Carefully lift the back cover and remove the battery Note Be careful not to move the red O ring gasket in the battery compartment Note Be careful not to contaminate the O ring gasket Any contamination could compromise the performance of the watch 3 Replace the battery with the positive side facing up Note Make sure the gasket is seated correctly in the g...

Page 38: ...w on the cover points to OPEN 3 Remove the cover and battery Wait 30 seconds Insert the new battery with the positive side facing up Note Be careful not to damage or lose the O ring gasket on the cover 4 Use a coin to twist the cover clockwise so the arrow on the cover points to CLOSE Note After replacing the battery you may need to pair the heart rate monitor with your FR60 again Foot Pod Battery...

Page 39: ... the cover clockwise Note After replacing the battery you may need to pair the foot pod with your FR60 again Specifications FR60M Watch size W H D 1 5 2 2 0 51 in 38 56 13 mm Wrist band size L W D 7 0 0 9 0 12 in 177 23 3 mm Weight 1 6 oz 44 g LCD Display 28 5 mm 20 mm with backlight Water Resistance 50 m Note To maintain the water resistance do not operate FR60 buttons under water Data storage Up...

Page 40: ...168 16 3 75 mm Weight 1 4 oz 41 g LCD Display 28 5 mm 20 mm with backlight Water Resistance 50 m Note To maintain the water resistance do not push FR60 buttons under water Data storage Up to 100 laps and up to 20 hours of exercise files Computer interface Wireless automatic USB ANT Stick Battery user replaceable CR2032 3 volts Perchlorate Material special handling may apply See www dtsc ca gov haz...

Page 41: ... 1 3 0 4 in 34 7 3 4 1 1 cm Weight 1 6 oz 44 g Water Resistance 32 9 ft 10 m Transmission range approximately 9 8 ft 3 m Battery user replaceable CR2032 3 volts Perchlorate Material special handling may apply See www dtsc ca gov hazardouswaste perchlorate Battery Life approximately 3 years 1 hour per day Operating temperature from 14 F to 122 F from 10 C to 50 C Note In cold conditions wear approp...

Page 42: ...distance accuracy uncalibrated 95 calibrated 98 Battery user replaceable CR2032 3 volts Perchlorate Material special handling may apply See www dtsc ca gov hazardouswaste perchlorate Battery life 400 hours run time Operating temperature from 14 F to 122 F from 10 C to 60 C Sensor Accuracy Range from 32 F to 104 F from 0 C to 40 C Radio frequency protocol 2 4 GHz ANT wireless communications protoco...

Page 43: ...ltaneously This also restores the factory settings Workout data is deleted How do I set the time to AM or PM Verify that the time mode is set to 12 12 hour Press UP and DOWN to select the correct hour The A or P icon appears below the seconds on the time page For more information see page 11 The FR60 will not send data to my computer See page 24 to enable computer pairing The heart rate monitor or...

Page 44: ... sensor can interfere with heart rate signals Synthetic fabrics that rub or flap against the heart rate monitor can create static electricity that interferes with heart rate signals Wear a cotton shirt or wet your shirt if suitable for your activity Position the heart rate monitor on your back instead of your chest Strong electromagnetic fields and some 2 4 GHz wireless sensors can interfere with ...

Page 45: ...ies You further acknowledge that the structure organization and code of the Software are valuable trade secrets of Garmin and that the Software in source code form remains a valuable trade secret of Garmin You agree not to decompile disassemble modify reverse assemble reverse engineer or reduce to human readable form the Software or any part thereof or create any derivative works based on the Soft...

Page 46: ...2 bike profile 27 bike settings 27 buttons watch 1 light 1 mode 2 start stop enter 1 up down 1 C cadence sensor 10 calibrating foot pod 9 calories 28 computer pairing 24 conserving battery 5 11 30 D data sending to computer 6 data uploading 6 23 drivers USB 6 23 F fitness equipment link to 19 foot pod 8 calibrating 9 G Garmin Connect 23 GSC 10 10 H heart rate monitor 7 32 heart rate zones 14 Histo...

Page 47: ...ing the time 11 setup wizard 3 software free download 6 software license agreement 39 speed and cadence sensor 10 T technical specifications 33 time setting 11 time data fields 29 Time mode 11 time zones 12 Training mode 13 transferring data 6 23 troubleshooting 37 U uploading data 6 23 USB ANT stick iv 7 USB drivers 6 23 V virtual partner pace 17 workout 17 W weight scale 10 workout 13 17 18 20 ...

Page 48: ...2009 Garmin Ltd or its subsidiaries Garmin International Inc 1200 East 151st Street Olathe Kansas 66062 USA Garmin Europe Ltd Liberty House Hounsdown Business Park Southampton Hampshire SO40 9RB UK Garmin Corporation No 68 Jangshu 2nd Road Shijr Taipei County Taiwan Part Number 190 01001 00 Rev A ...

Reviews: