background image

Viewing Data Totals

You can view the accumulated data you have saved to the 

device, including the number of rides, time, distance, and 

calories.

Select 

History

 > 

Totals

.

Deleting a Ride

1

Select 

History

 > 

Rides

.

2

Select a ride.

3

Select   > 

Delete

 >  .

Garmin Connect

You can connect with your friends on Garmin Connect. Garmin 

Connect gives you the tools to track, analyze, share, and 

encourage each other. Record the events of your active lifestyle 

including runs, walks, rides, swims, hikes, triathlons, and more. 

To sign up for a free account, go t

www.garminconnect.com

/start

.

Store your activities

: After you complete and save an activity 

with your device, you can upload that activity to Garmin 

Connect and keep it as long as you want.

Analyze your data

: You can view more detailed information 

about your activity, including time, distance, elevation, heart 

rate, calories burned, cadence, an overhead map view, pace 

and speed charts, and customizable reports.

NOTE: 

Some data requires an optional accessory such as a 

heart rate monitor.

Plan your training

: You can choose a fitness goal and load one 

of the day-by-day training plans.

Share your activities

: You can connect with friends to follow 

each other's activities or post links to your activities on your 

favorite social networking sites.

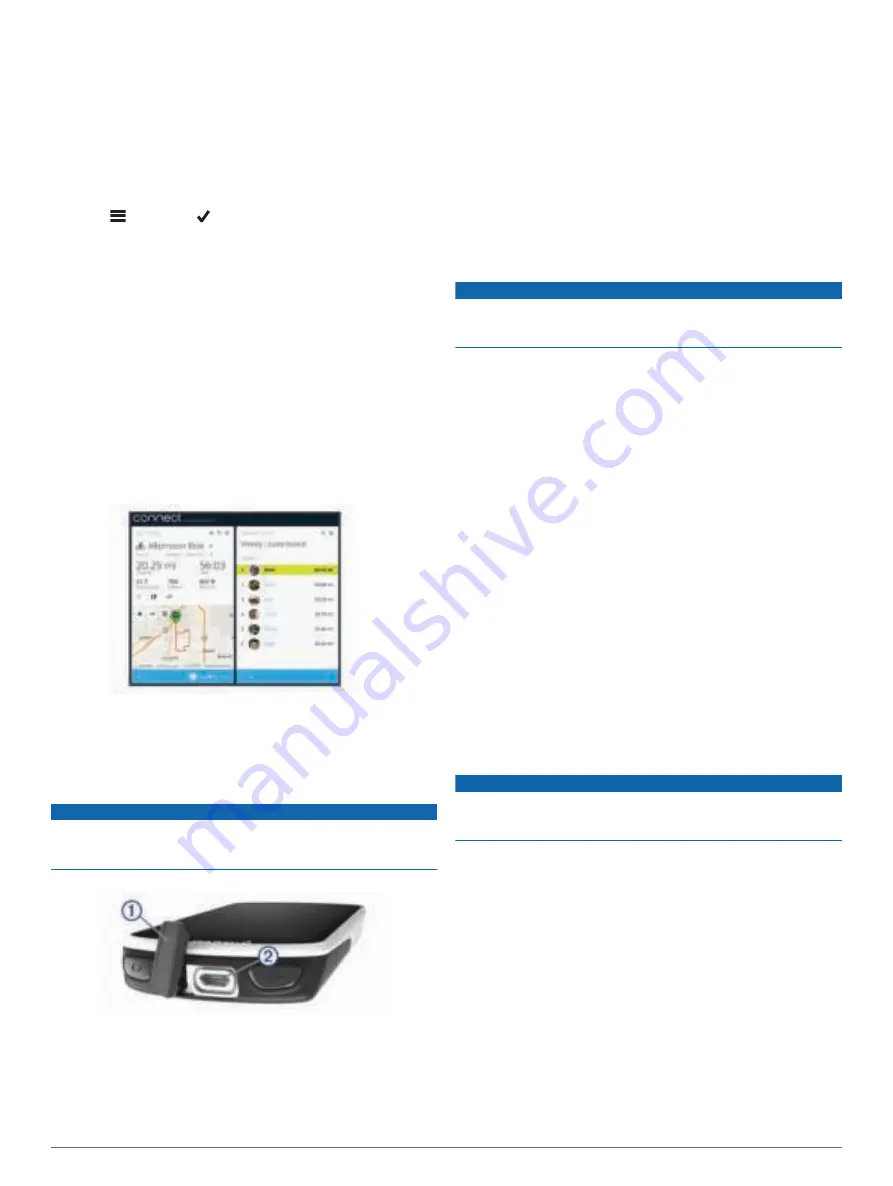
Sending Your Ride to Garmin Connect

NOTICE

To prevent corrosion, thoroughly dry the USB port, the weather 

cap, and the surrounding area before charging or connecting to 

a computer.

1

Pull up the weather cap 

À

 from the USB port 

Á

.

2

Plug the small end of the USB cable into the USB port on the 

device.

3

Plug the large end of the USB cable into a computer USB 

port.

4

Go to 

www.garminconnect.com/start

.

5

Follow the on-screen instructions.

Data Recording

The device uses smart recording. It records key points where 

you change direction, speed, or heart rate.
When a power meter is paired, the device records points every 

second. Recording points every second provides an extremely 

detailed track, and uses more of the available memory.
For information about data averaging for cadence and power, 

see 

Data Averaging for Cadence or Power

, page 13

.

Data Management

NOTE: 

The device is not compatible with Windows 95, 98, Me, 

Windows NT

®

, and Mac

®

 OS 10.3 and earlier.

Connecting the Device to Your Computer

NOTICE

To prevent corrosion, thoroughly dry the USB port, the weather 

cap, and the surrounding area before charging or connecting to 

a computer.

1

Pull up the weather cap from the USB port.

2

Plug the small end of the USB cable into the USB port.

3

Plug the large end of the USB cable into a computer USB 

port.
Your device appears as a removable drive in My Computer 

on Windows computers and as a mounted volume on Mac 

computers.

Transferring Files to Your Device

1

Connect the device to your computer.
On Windows computers, the device appears as a removable 

drive or a portable device. On Mac computers, the device 

appears as a mounted volume.

NOTE: 

Some computers with multiple network drives may not 

display device drives properly. See your operating system 

documentation to learn how to map the drive.

2

On your computer, open the file browser.

3

Select a file.

4

Select 

Edit

 > 

Copy

.

5

Open the portable device, drive, or volume for the device.

6

Browse to a folder.

7

Select 

Edit

 > 

Paste

.

The file appears in the list of files in the device memory.

Deleting Files

NOTICE

If you do not know the purpose of a file, do not delete it. Your 

device memory contains important system files that should not 

be deleted.

1

Open the 

Garmin

 drive or volume.

2

If necessary, open a folder or volume.

3

Select a file.

4

Press the 

Delete

 key on your keyboard.

NOTE: 

If you are using an Apple

®

 computer, you must empty 

the Trash folder to completely remove the files.

Disconnecting the USB Cable

If your device is connected to your computer as a removable 

drive or volume, you must safely disconnect your device from 

your computer to avoid data loss. If your device is connected to 

your Windows computer as a portable device, it is not necessary 

to safely disconnect the device.

1

Complete an action:
• For Windows computers, select the 

Safely Remove 

Hardware

 icon in the system tray, and select your device.

16

History

Summary of Contents for EDGE 1030

Page 1: ...EDGE 1030 Owner sManual...

Page 2: ...word mark and logos are owned by the Bluetooth SIG Inc and any use of such marks by Garmin is under license The Cooper Institute as well as any related trademarks are the property of The Cooper Instit...

Page 3: ...ations from the Map 8 Navigating to a Location 9 Navigating Back to Start 9 Stopping Navigation 9 Editing Locations 9 Deleting a Location 9 Projecting a Location 9 Courses 9 Planning and Riding a Cour...

Page 4: ...Tones On and Off 19 Changing the Device Language 19 Time Zones 19 Device Information 19 Specifications 19 Edge Specifications 19 Heart Rate Monitor Specifications 20 Speed Sensor and Cadence Sensor Sp...

Page 5: ...r successfully a message appears and your device syncs automatically with your smartphone Home Screen Overview The home screen gives you quick access to all the features of the Edge device Select to g...

Page 6: ...disk that best fits your bike The rubber tabs align with the back of the bike mount so it stays in place 3 Place the bike mount on the bike stem 4 Attach the bike mount securely using the two bands 5...

Page 7: ...Segment Explore Widget The Strava Segment Explore widget allows you to view and ride nearby Strava segments 1 From the Strava Segment Explore widget select a segment 2 Select an option Select to star...

Page 8: ...enter a custom value for the duration 6 Select Target to choose your goal during the step For example select Heart Rate Zone to maintain a consistent heart rate during the step 7 If necessary select...

Page 9: ...bike on the trainer and pair it with your device Pairing Your ANT Indoor Trainer page 5 You can use your device with an indoor trainer to simulate resistance while following a course activity or worko...

Page 10: ...still for 3 minutes It provides your overall stress level The scale is 1 to 100 and a lower score indicates a lower stress level Performance condition Your performance condition is a real time assess...

Page 11: ...y increase or decrease Getting Your Training Load Estimate Before you can view your training load estimate you must put on the heart rate monitor install the power meter and pair them with your device...

Page 12: ...score at approximately the same time and under the same conditions every day 1 Select My Stats Stress Score Measure 2 Stand still and rest for 3 minutes Turning Off Performance Notifications Performan...

Page 13: ...rses Following a previously recorded activity You can follow a saved course simply because it is a good route For example you can save and follow a bike friendly commute to work Racing against a previ...

Page 14: ...Select Summary to view details about the course Select Map to view the course on the map Select Elevation to view an elevation plot of the course Select Laps to select a lap and view additional inform...

Page 15: ...eractions Allows you to post an update to your favorite social media website when you upload an activity to Garmin Connect Weather updates Sends real time weather conditions and alerts to your device...

Page 16: ...y contacts and rider information in the Garmin Connect Mobile app Setting Up Rider Information and Emergency Contacts page 12 4 Enable incident detection on your device Turning Incident Detection On a...

Page 17: ...ike or shoe NOTE The LED flashes green for five seconds to indicate activity after two revolutions 5 Take a 15 minute test ride and inspect the sensor and bands to ensure there is no evidence of damag...

Page 18: ...ns Caring for the Heart Rate Monitor page 20 Wear a cotton shirt or thoroughly wet both sides of the strap Synthetic fabrics that rub or flap against the heart rate monitor can create static electrici...

Page 19: ...data to your Garmin Connect account Sending Your Ride to Garmin Connect page 16 Garmin Connect automatically looks for software updates and sends them to your Edge device 2 Bring your Edge device wit...

Page 20: ...e of the available memory For information about data averaging for cadence and power see Data Averaging for Cadence or Power page 13 Data Management NOTE The device is not compatible with Windows 95 9...

Page 21: ...rigger for your mountain biking profile Updating Your Activity Profile You can customize ten activity profiles You can customize your settings and data fields for a particular activity or trip 1 Selec...

Page 22: ...helpful for comparing your performance over different parts of a ride for example a long climb or training sprints During courses you can use the By Position option to trigger laps at all of the lap...

Page 23: ...Units of Measure page 19 Tone Settings Turning the Device Tones On and Off page 19 Language Settings Changing the Device Language page 19 Display Settings Select System Display Brightness Sets the ba...

Page 24: ...You must unsnap and remove the module before washing the strap A build up of sweat and salt on the strap can decrease the ability of the heart rate monitor to report accurate data Go to www garmin com...

Page 25: ...t you no longer use Turning On Battery Save Mode Battery save mode adjusts the settings automatically to extend the battery life for longer rides During an activity the screen turns off You can enable...

Page 26: ...econd moving average of the left right power balance Balance Avg The average left right power balance for the current activity Balance Lap The average left right power balance for the current lap Batt...

Page 27: ...e 10 second moving average of power output Power 10s Avg watts kg The 10 second moving average of power output in watts per kilogram Power 30s Avg The 30 second moving average of power output Power 30...

Page 28: ...ng a workout or course the remaining time when you are using a time target Time to Next The estimated time remaining before you reach the next waypoint in the route You must be navigating for this dat...

Page 29: ...ular 1785 24 1 1 8 1795 24 1 1 4 1905 24 1 75 1890 24 2 00 1925 24 2 125 1965 26 7 8 1920 26 1 59 1913 26 1 65 1952 26 1 25 1953 26 1 1 8 1970 26 1 3 8 2068 26 1 1 2 2100 26 1 40 2005 26 1 50 2010 26...

Page 30: ...e map 8 locking screen 1 M maps 8 10 finding locations 8 orientation 10 settings 10 updating 22 memory card 20 microSD card See memory card mounting the device 2 N navigation 8 9 back to start 9 stopp...

Page 31: ......

Page 32: ...support garmin com August 2017 190 02220 00_0A...

Reviews: