NOTICE
To prevent corrosion of the metal contacts, cover unused
connectors with weather caps.
Tips and Shortcuts
• Press to turn on the chartplotter.
• From any screen, press repeatedly to scroll through the
brightness levels. This can be helpful when the brightness is
so low you cannot see the screen.
• Hold a numbered key to create a shortcut to a screen.
• Select
HOME
from any screen to return to the Home screen.
• Select
MENU
to open additional settings about that screen.
• Select
MENU
to close the menu when finished.
• Press to open additional options, such as adjusting the
backlight and locking the touchscreen.
• Press , and select
Power
>
Turn Off Device
, or hold
until the
Turn Off Device
bar fills to turn off the chartplotter,
when available.
• Press , and select
Power
>
Sleep Device
to set the
chartplotter to standby mode, when available.
Downloading the Manuals from the Web
You can get the latest owner's manual and translations of
manuals from the Garmin website.
1
Go to
.
2
Download the manual.
Garmin Support Center
Go to
for help and information, such as
product manuals, frequently asked questions, videos, software
updates, and customer support.
Inserting Memory Cards
You can use optional memory cards with the chartplotter. Map
cards allow you to view high-resolution satellite imagery and
aerial reference photos of ports, harbors, marinas, and other
points of interest. You can use blank memory cards to record
Garmin Quickdraw
™
Contours mapping, record sonar (with a
compatible transducer), transfer data such as waypoints and
routes to another compatible chartplotter or a computer, and use
the ActiveCaptain
®
app.
This device supports up to a 32 GB microSD memory card,
formatted to FAT32 with speed class 4 or higher. Use of an 8
GB or higher memory card with speed class 10 is
recommended.
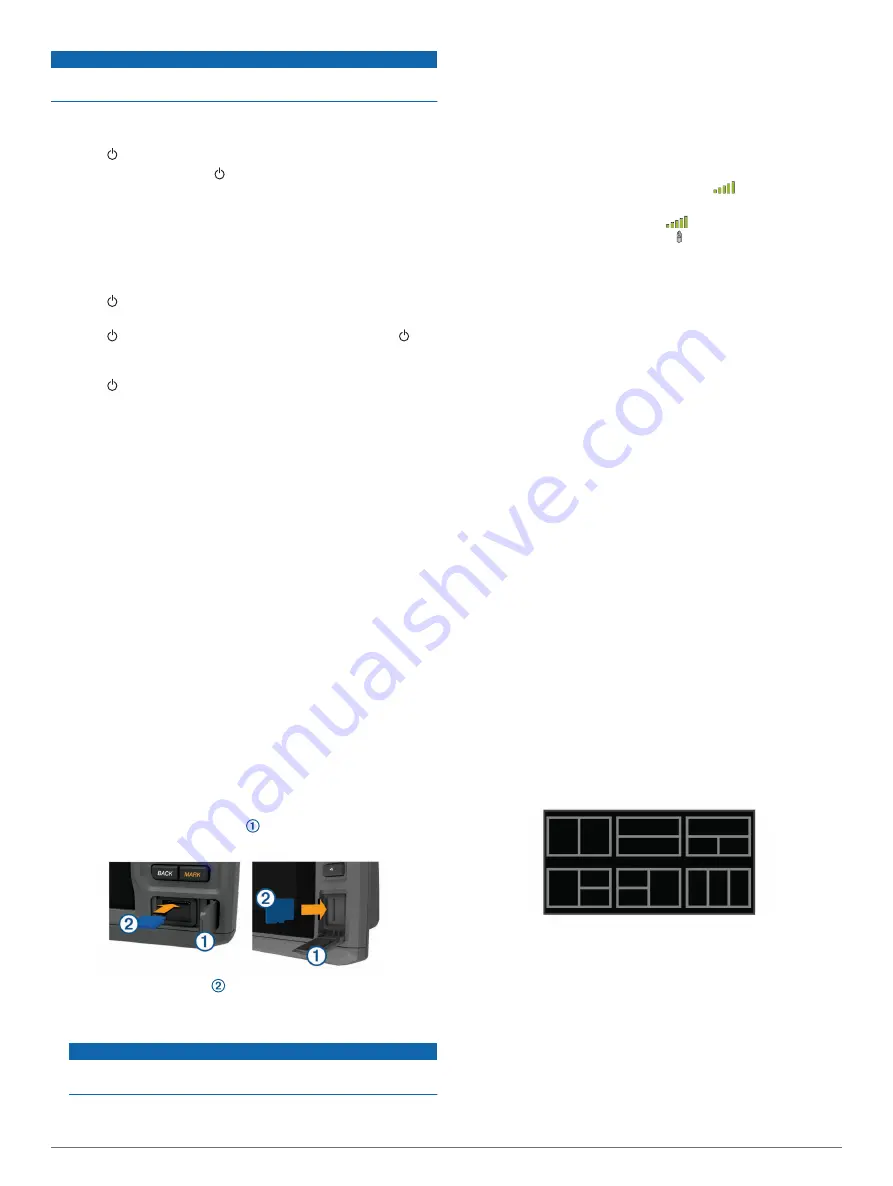
1
Open the access flap or door on the front of the
chartplotter.
2
Insert the memory card .
3
Press the card in until it clicks.
4
Clean and dry the gasket and door.
NOTICE
To prevent corrosion, be sure the memory card, gasket, and
door are thoroughly dry before closing the door.
5
Close the door.
Acquiring GPS Satellite Signals
The device may need a clear view of the sky to acquire satellite
signals. The time and date are set automatically based on the
GPS position.
1
Turn on the device.
2
Wait while the device locates satellites.
It may take 30 to 60 seconds to acquire satellite signals.
When the device acquires satellite signals,
appears at the
top of the Home screen.
If the device loses satellite signals,
disappears and a
flashing question mark appears over on the chart.
For more information about GPS, go to
.
For help acquiring satellite signals, see (
).
Selecting the GPS Source
You can select your preferred source for GPS data, if you have
more than one GPS source.
1
Select
Settings
>
System
>
GPS
>
Source
.
2
Select the source for GPS data.
Customizing the Chartplotter
Customizing the Home Screen
You can add items to and rearrange items on the Home screen.
1
From the Home screen, select
Customize Home
.
2
Select an option:
• To rearrange an item, select
Rearrange
, select the item to
move, and select the new location.
• To add an item to the Home screen, select
Add
, and
select the new item.
• To remove an item you have added to the Home screen,
select
Remove
, and select the item.
• To change the Home screen background image, select
Background
, and select an image.
Customizing Pages
Creating a New Combination Page with the ECHOMAP
UHD 70/90
You can create a custom combination page to suit your needs.
1
Select
Combos
>
Customize
>
Add
.
2
Select a layout.
3
Select an area.
4
Select a function for the area.
5
Repeat these steps for each area of the page.
6
Drag the arrows to resize the areas.
7
Hold an area to rearrange it.
8
Hold a data field to select new data.
9
Select
Done
when you have finished customizing the page.
10
Enter a name for the page, and select
Done
.
2
Customizing the Chartplotter
Summary of Contents for ECHOMAP UHD
Page 1: ...ECHOMAP UHD Owner sManual...
Page 6: ......


