Preparing the torque and angle wrench
22
WARNING
Risk of injury due to unintentional
adjustment of the switching lever or
switching disk on the plug-in ratchet.
Prior to the bolting process, use the
switching lever or switching disk to
set the desired working direction.
Do not touch the switching lever or
switching disk during the bolting
process.
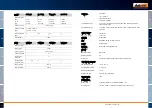
When using a plug-in ratchet, switch this by
turning the switching lever or switching disk to the
desired working direction.
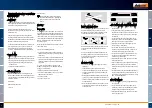
Plug the appropriate insert onto the square drive
of the reversible ratchet until it audibly engages.
Proceed as follows to remove plug-in tools:
Press the orange QuickRelease button on the
underside of the wrench head (A).
Pull the plug-in tool out (B).
Press the orange QuickRelease button on the
underside of the wrench head (A).
Pull the plug-in tool out (B).
Determining the extension length
WARNING
Danger of severe injuries due to an
incorrect extension length.
Check the extension length in the
case of each plug-in tool.
Set the appropriate extension length
for plug-in tools.
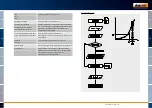
Use a caliper gauge to determine the extension
length S as shown in the drawing. If combinations of
plug-in tools and adapter cards are used, the sum
of all "S" values must be taken into consideration.
Further information can be found in the Hoffmann
Group catalogue.
T
19.5
mm.
If an extension length which does not
correspond to the standard extension length is
input, the
symbol is shown on the display.
Input the corresponding extension length when
the extension length is queried.
The torque and angle wrench automatically corrects
the torque according to the set extension length.
Preparing the torque and angle wrench
23
Switching the torque and angle wrench
on and off
To switch the torque and angle wrench on, press
any button for approx. one second.
A long audible signal is heard.
The menu language set on delivery is German.
To change the menu language, proceed as
described from page 38.
When the torque and angle wrench is not in
use, it switches off after a specified period of
time. The shut-off time can be defined using the
TWdrive software, see page 38.
To switch the torque and angle wrench off, press
the ESC button for more than one second.
Three short audible signals are heard.
Taring the torque and angle wrench
To ensure precise measurement, the torque and
angle wrench must be tared in the case of each
bolting process.
WARNING
Risk of injury due to incorrect
measured values caused by improper
taring.
Make sure that the torque and angle
wrench is not moved or loaded
during the taring process.
The torque and angle wrench is automatically
tared each time when it is switched on.
Taring on switching on
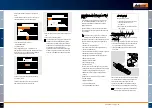
Place the switched off torque and angle wrench
onto a flat surface.
To tare the torque and angle wrench with a
plug-in tool installed, have this e.g. project over
the edge of the bench.
Make sure that no forces are acting on the torque
and angle wrench.
Keep the torque and angle wrench steady
throughout the entire taring process.
To switch the torque and angle wrench on, press
any button.
The symbol and TARE are shown on the
display. The torque and angle wrench is tared within
a few seconds.
The completed taring process can be recognised by
the
symbol (taring process ended) on the
display.
Manual taring
Manual taring is necessary if, for example, a value
which is not zero is shown on the display after
bolting processes.
Place the switched on torque and angle wrench
onto a flat surface.
To tare the torque and angle wrench with a
plug-in tool installed, have this e.g. project over
the edge of the bench.
Make sure that no forces are acting on the torque
and angle wrench.
Keep the torque and angle wrench steady
throughout the entire taring process.
Press the TARE button for longer than two
seconds.
The symbol and TARE are shown on the
display. The torque and angle wrench is tared within
a few seconds.
The completed taring process can be recognised by
the
symbol (taring process ended) on the
display.
DE
FR
IT
ES
www.hoffmann-group.com
23
22
DE
EN
FR
IT
ES
DE
EN
FR
IT
ES

