


GAT ECO.Side Lock 7010 (NW) F/ISO
Commissioning
www.gantner.com
HB_GAT-ECOSide-Lock7010-FISO--EN_11
35
Do not operate the GAT ECO.Side Lock 7010 F/ISO while replacing the batteries. Following battery replacement, the
GAT ECO.Side Lock 7010 F/ISO must be returned to its normal operating mode using the Battery data carrier (see
section “6.5.5. BATTERY Data Carrier”). In addition, the time and date must be set again using a PC and GAT Config
Manager (see section "
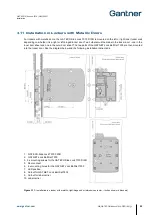
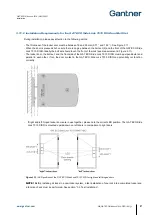
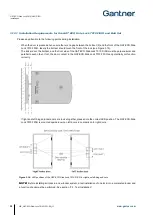
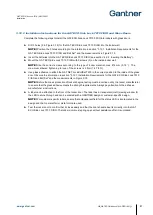
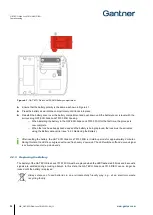
► Unscrew the 3 screws that hold the GAT ECO.Side Lock 7010 F/ISO to the locker wall and remove the
lock from the locker.
► Follow the instructions described in section “4.2.2. Inserting the Battery”.
► Mount the GAT ECO.Side Lock 7010 F/ISO to the locker wall inner side again.
► Press the locker door shut with one hand.
► Hold the Battery data carrier next to the RFID reading field.
o
The internal counter in the GAT ECO.Side Lock 7010 F/ISO is reset and the lock returns to its
normal operating mode.
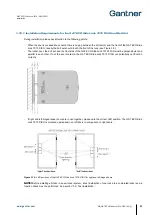
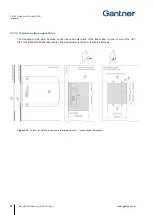
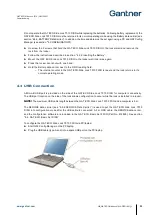
4.3 USB Connection
A Micro-B USB port is provided on the side of the GAT ECO.Side Lock 7010 F/ISO for computer connectivity.
The USB port location on the side of the lock allows configuration to occur while the lock is installed in a locker.
NOTE!
The maximum USB cable length between the GAT ECO.Side Lock 7010 F/ISO and a computer is 5 m.
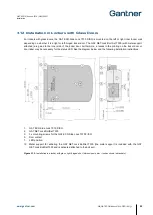
The SERVICE
data carrier (see “6.5.6 SERVICE Data Carrier”) is used to put the GAT ECO.Side Lock 7010
F/ISO into configuration mode after the USB cable is connected. A 3 m USB cable, the SERVICE data carrier,
and the configuration software are included in the GAT ECO.Basic Set F/ISO (Part No. 812528). See section
“6.4. GAT ECO.Basic Set F/ISO”.
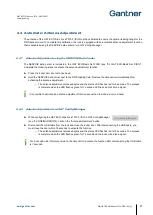
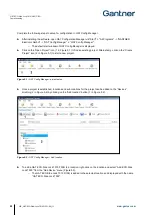
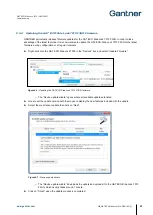
To configure the GAT ECO.Side Lock 7010 F/ISO via PC/laptop:
► Start GAT Config Manager on the PC/laptop.
► Plug the USB cable (type-A end) into a spare USB port on the PC/laptop.
Summary of Contents for GAT ECO.Side Lock 7010 F/ISO
Page 63: ......


