background image

11

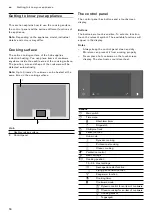
 Getting to know your appliance      

en

Touchscreen display

The touchscreen display gives you an overview of the 
cookware on the cooking surface and the buttons for 
activating the various functions.

When an item of cookware is set down on the cooking 
surface, the cooking position display for this cookware 
is shown on the display.

Overview of the menus

The intuitive menu structure helps you to find your way 
around the control panel of your hob. You can find out 
more about the most important menus in this section.

Main screen

The main display provides an overview of the indicators 
for the cookware on the cooking surface. It displays the 
cooking mode, power levels, and the timer functions 
that are set for the cooking zones that are switched on.

Function bar

The function bar provides access to a number of 
functions and other menus.

The following options are shown in the function bar:

¯

 Childproof lock

H

 Pause function

g

 Cooking mode

S

 Ventilation control

t

 Basic settings

Info menu

The info menu provides you with information about the 
appliance or the functions that are currently active.

To access the info menu, touch the 

=

 symbol on the 

function bar. The sensor will show when the function is 
available.

Notifications and alerts

Notifications let the user know that the appliance's 
status has changed or tell them when they need to 
confirm something.

To return to the main screen, touch the 

G

 symbol.

Note: 

The top line of the display lights up orange.

The information makes you aware that a measure is 
required.

Follow the instructions in the display and touch the 

G

 symbol to return to the main screen.

Note: 

The top line of the display lights up blue.

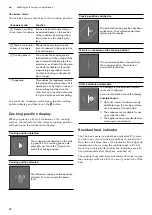
Cooking mode

The hob has various functions for the entire cooking 
surface.

To access the hob mode menu, touch the 

 g

 button on 

the function bar.

Cooking mode

Function

¬

 Professional cook-

ing

Allows the heat setting to be 
selected based on the position of 
the cookware on the cooking sur-
face, from right to left.

Ê

 Classic cooking

Allows you to select the heat setting 
for the cooking position.

Ë

 Dynamic cooking

Allows the heat setting to be 
selected based on the position of 
the cookware on the cooking sur-
face, from front to back.

Summary of Contents for CX 482

Page 1: ...Instruction manual CX 482 Full surface induction cooktop...

Page 2: ...s for use 22 Activating 22 Deactivating 22 zKeep warm function 23 Activating 23 Deactivating 23 sTransfer function 23 Activation 23 Wireless temperature sensor 24 Preparing and maintaining the wireles...

Page 3: ...Hob surround 48 Frequently Asked Questions FAQ 49 3Trouble shooting 52 Warnings and fault messages 52 Tips 52 Demo mode 53 4Customer service 54 Product number E no and production number FD no 54 Addit...

Page 4: ...vices or child protection grilles approved by ourselves Unsuitable safety devices or child protection grilles may result in accidents This appliance is not intended for operation with an external cloc...

Page 5: ...always turn off the hob at the main switch Do not wait until the hob turns off automatically after the pan is removed m Warning Risk of electric shock Incorrect repairs are dangerous Repairs may only...

Page 6: ...very hot when removing it from the saucepan Wear oven gloves or use a tea towel to remove it Risk of injury When cooking in a bain marie the hob and cooking container could shatter due to overheating...

Page 7: ...hob Overview The table below lists the commonest kinds of damage Damage Cause Remedy Stains Food boiling over Remove any food that has boiled over immediately with a glass scraper Unsuitable cleaning...

Page 8: ...irectly in the item of cookware This offers numerous advantages Saves time when boiling and frying Energy savings Easier to care for and clean Spilled food does not burn on as quickly Heat control and...

Page 9: ...e the cookware or try again with a different pot or pan If you lift the active cookware from the cooking surface for more than 30 seconds the cooking position automatically switches off Empty cookware...

Page 10: ...ol panel has buttons and a touchscreen display Buttons The buttons are touch sensitive To select a function touch the relevant symbol The available functions will appear in the display Notes Always ke...

Page 11: ...info menu provides you with information about the appliance or the functions that are currently active To access the info menu touch the symbol on the function bar The sensor will show when the funct...

Page 12: ...can use the cooking sensor that is attached to the outside of the pan to automatically keep the tem perature at a set level Cooking sen sor mode is suitable for food that requires large quantities of...

Page 13: ...ly switch off if the cooking positions have been switched off for more than 30 seconds The settings are stored for 10 seconds after the hob has been switched off If you switch the hob back on during t...

Page 14: ...urer s instructions Do not cook food for too long otherwise the nutrients will be lost The kitchen clock can be used to set the optimum cooking time For a more healthy cooking result smoking oil shoul...

Page 15: ...k 2 4 5 5 5 20 30 Hamburgers 2 cm thick 2 6 0 7 0 10 20 Fish and fish fillet plain 5 0 6 0 8 20 Fish and fish fillet breaded 6 0 7 0 8 20 Fish breaded and frozen e g fish fingers 6 0 7 0 8 15 Prawns a...

Page 16: ...re has been detected will be set For more information on the size and positioning of the cookware see the section entitled Induction cooking Activation 1 Touch the g symbol 2 Touch the symbol followed...

Page 17: ...ls is displayed on the main screen This function has now been activated Set down the cookware If active cookware is on the cooking position before you activate the function the cooking position displa...

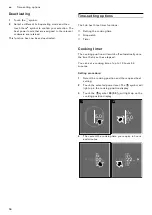
Page 18: ...ree timer functions Setting the cooking time Stopwatch Timer Cooking timer The cooking position will switch off automatically once the time that is set has elapsed You can set a cooking time of up to...

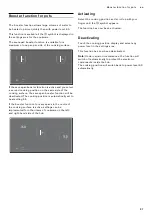
Page 19: ...ators will go out and the signal tone will stop Stopwatch function The stopwatch function displays the time that has elapsed since activation This functions independently from the cooking positions an...

Page 20: ...e will start to count down Changing or deleting the time Touch the symbol Change the time that is currently set and touch the symbol to confirm the setting you have chosen To delete the time touch the...

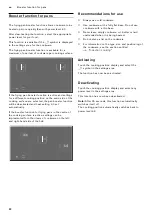
Page 21: ...will be deactivated The cooking position is automatically set to heat setting 9 0 If the booster function for saucepans in the centre of the cooking surface is active settings can be implemented for...

Page 22: ...on for frying pans in the centre of the cooking surface is active settings can be implemented for other items of cookware on the left and right hand side of the hob Recommendations for use Always use...

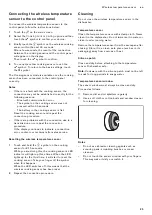
Page 23: ...power level or temperature setting and the cooking time from one cooking position to another If you remove an item of cookware from the cooking surface or move it the cooking position it was previous...

Page 24: ...ve area with a spirit 2 Remove the protective film from the silicone patch Adhere the silicone patch to the outside of the pan in the correct place using the enclosed template as a guide 3 Press down...

Page 25: ...onnection error contact our technical after sales service Resetting the wireless temperature sensor 1 Touch and hold the symbol on the cooking sensor for 8 10 seconds While you are doing this the cook...

Page 26: ...st align with the notches on the lower section of the housing Tighten the screws with a screwdriver 4 Reattach the silicone cover to the lower section of the temperature sensor housing Note Use only h...

Page 27: ...r point from specialist retailers or through our technical after sales service or our online shop You can use up to three cooking sensors at the same time Note You can order it by specifying the refer...

Page 28: ...the temperature recommended in the table Deep fat frying It is recommended that you heat oil with a lid on Once the signal tone has sounded remove the lid and add the food Select the temperature recom...

Page 29: ...s now active The temperature symbol next to the cooking position will light up gradually until the selected temperature has been reached Then an audible signal will sound and the temperature symbol wi...

Page 30: ...25 Deep fat frying Deep fat frying chicken portions 3 170 C 10 15 Deep fat frying meatballs 3 170 C 10 15 1 Heat up and cook with the lid on Add the food after the signal tone sounds 2 Add the food at...

Page 31: ...d mushrooms 3 170 C 4 8 Deep fat frying mushrooms in beer batter 3 170 C 4 8 1 Heat up and cook with the lid on Add the food after the signal tone sounds 2 Add the food at the start 3 Heat the oil wit...

Page 32: ...he food after the signal tone sounds 2 Add the food at the start 3 Stir frequently Soups Temperature Time min Poaching Instant creamy soups 2 90 C 10 15 Boiling Home made broths 1 100 C 60 90 Instant...

Page 33: ...frying chips 3 180 C 4 8 1 Heat up and cook with the lid on Add the food after the signal tone sounds 2 Add the food at the start 3 Heat the oil with the lid on Deep fat fry one portion after the othe...

Page 34: ...are see the section entitled Induction cooking Activation Place the cookware on the cooking surface 1 Touch the cooking position display for the cookware 2 Touch the i symbol 3 Use your finger to scro...

Page 35: ...he teppanyaki grill and its position on the cooking surface are displayed Then touch the G symbol to confirm your choice 4 Select the heat setting you require from the settings area The display will s...

Page 36: ...me s you have set have stopped If the timer or stopwatch is active it will continue running If the pause function has been activated the timer duration cannot be changed The pause function has no effe...

Page 37: ...for dynamic cooking mode for an item of cookware CAL Cooking sensor calibration Set your height above sea level to adjust the boiling point Cooking sensor pairing Connect the wireless cooking sensor...

Page 38: ...Connect services in your country Home Connect services are not available in every country You can find more information on this at www home connect com Notes Hobs are not designed to be used unattende...

Page 39: ...and then touch the G symbol to confirm your choice 5 You have 2 minutes to tap the WPS button on the router as indicated on the display 6 A message will be displayed to notify you when the hob is succ...

Page 40: ...irm 9 Then open the Home Connect app on your mobile device and follow the instructions for establishing the connection on the display 10 A message will be displayed to notify you when connection to th...

Page 41: ...tion Connection Enables the Wi Fi network to be switched on and off Connect with App You can connect to one or more Home Connect accounts Settings via the app You can choose whether to allow cooking s...

Page 42: ...nection will also be deleted if you restore the factory settings on your appliance Connecting to your home network 1 To open the basic settings touch the t symbol on the main screen 2 Scroll left or r...

Page 43: ...shooting or security updates To use the app you must first register as a Home Connect user install the app on your mobile device and connect to the Home Connect server The Home Connect app will tell y...

Page 44: ...u Hausger te GmbH hereby declares that the appliance which features Home Connect is in accordance with the basic requirements and the other relevant provisions of the directive 2014 53 EU A detailed R...

Page 45: ...from the hob will appear on the main screen If you wish to change the setting select the Hood control option S again and then change the setting as required Connecting via your home network You requir...

Page 46: ...ivation 1 Touch the H symbol on the main screen 2 Select the Hood control option 3 Select the Automatic option Depending on how the extractor hood sensor is configured the fan will start automatically...

Page 47: ...ns when the hob is switched on Run on function The run on function keeps the fan running for a certain amount of time after the hob is switched off Brightness You can choose the brightness setting at...

Page 48: ...best removed with a glass scraper available from retailers Observe the manufacturer s instructions You can obtain a suitable glass scraper from customer services or through our online shop Using a sp...

Page 49: ...hese may occur if two cooking positions are used at the highest power level at the same time The whistling noises disappear or become quieter when the power level is reduced Crackling This occurs when...

Page 50: ...ation on positioning cookware see the section entitled Induction cooking You can cook with up to three items of cookware on one side If there is an item of cookware in the centre of the cooking surfac...

Page 51: ...e network after the WPS button has been pressed on the router Once the Connect automatically option has been selected press the WPS button on the router within the next two minutes If this time has al...

Page 52: ...Change the total power under Maximum power consumption in the basic settings If a very large item of cookware is being used this may have an effect on the maximum power level for that half of the hob...

Page 53: ...ng sensor is not responding Replace the 3 V CR2032 battery See section Replacing the battery If this does not solve the problem press and hold the symbol on the cooking sensor for 8 10 seconds and the...

Page 54: ...mic hob You can check the after sales service index KI and production number FD no by going to the basic settings Refer to the section entitled Basic settings to find out how to do this Please note th...

Page 55: ......

Page 56: ...DJJHQDX DXVJHUlWH PE DUO HU 6WUD H 0 QFKHQ 50 1 ZZZ JDJJHQDX FRP 9001351292 9001351292 980604 en...

Reviews: