Electrical connection
en-us
9
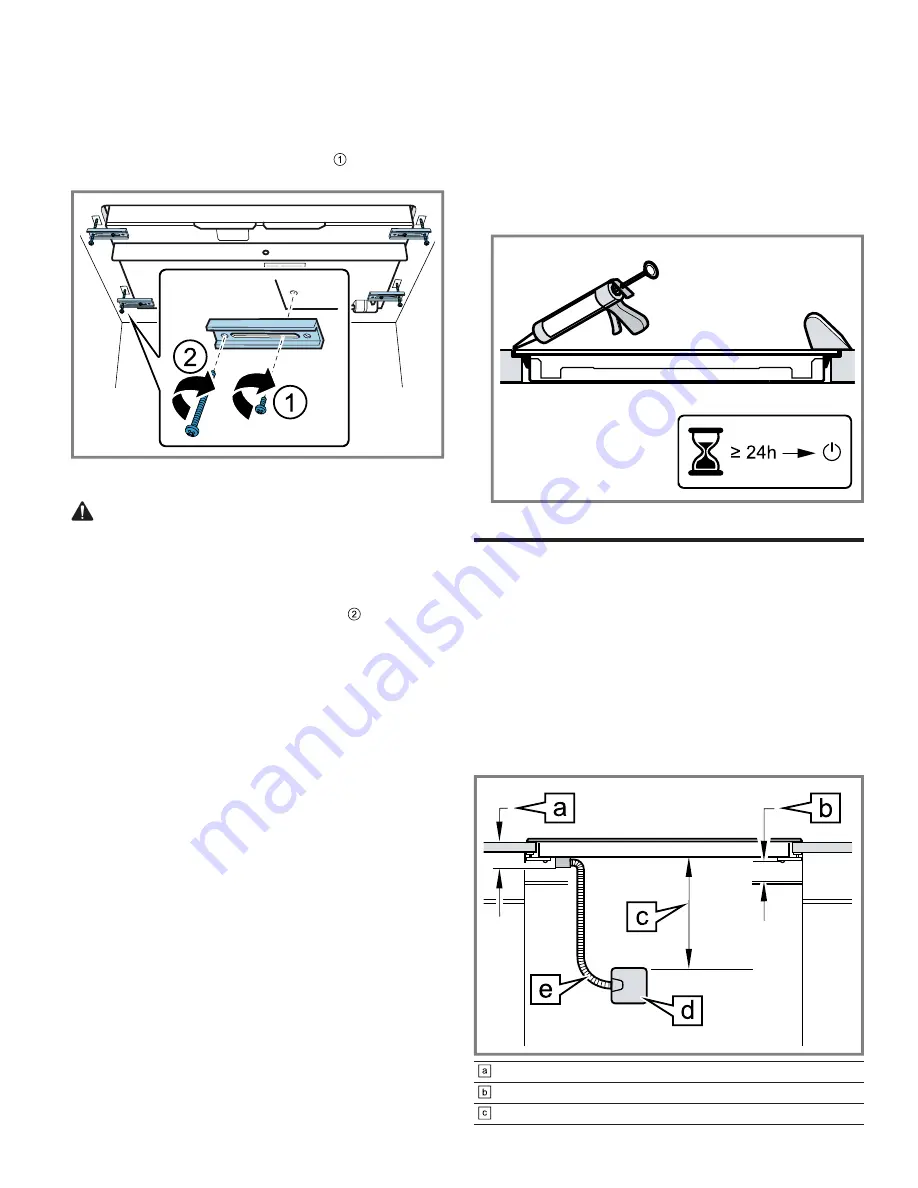
4.3 Securing the cooktop to the countertop
The cooktop must be secured from below using the hold-
down brackets provided, so it does not slip.
1.
Place the cooktop face down on a soft underground.
2.
Attach the hold-down brackets to the underside of the
cooktop with the provided short screws . Do not
tighten the screws.
3.
Rotate the hold-down brackets so that the appliance
can be placed in the cutout.
4.
CAUTION Do not let the cooktop drop into place.
▶
Make sure that the cooktop is supported along the
edges when carefully placing it into the cutout.
Turn the cooktop over and place it carefully into the
countertop cutout.
5.
Insert the clamping screws into the hold-down bracket
and secure the cooktop to the countertop . Protect
delicate countertops by placing a wooden disk under-
neath.
6.
Tighten the hold-down bracket screws on the cooktop
underside.
7.
Only for flush mount installation:
‒
Carry out the installation test before carrying out this
step.
‒
Grout the surrounding gap with a suitable tempera-
ture-resistant silicone adhesive.
‒
Smooth the joint seal with a smoothing agent recom-
mended by the manufacturer. Follow the processing
instructions for the silicone glue.
‒
Let the silicone glue dry completely for at least 24
hours, depending on the room temperature before
switching on the appliance.
Electrical connection
5 Electrical connection
Electrical connection
Read these instructions to safely connect your appliance
to the electrical supply.
5.1 Electrical requirements
Ensure that the following general requirements are met.
¡
You can find the rating plate with the electrical specifi-
cations on the underside of the appliance.
"Rating plate location", Page 11
¡
The junction box must be located within 3 feet of the
cooktop connection. It should be easily accessible for
service purposes.
max. 2¾" (69 mm) + fitting/conduit 1" (25 mm)
min. 1" (25 mm) air clearance
approx. 12" (300 mm)


