Thread Inspection
®
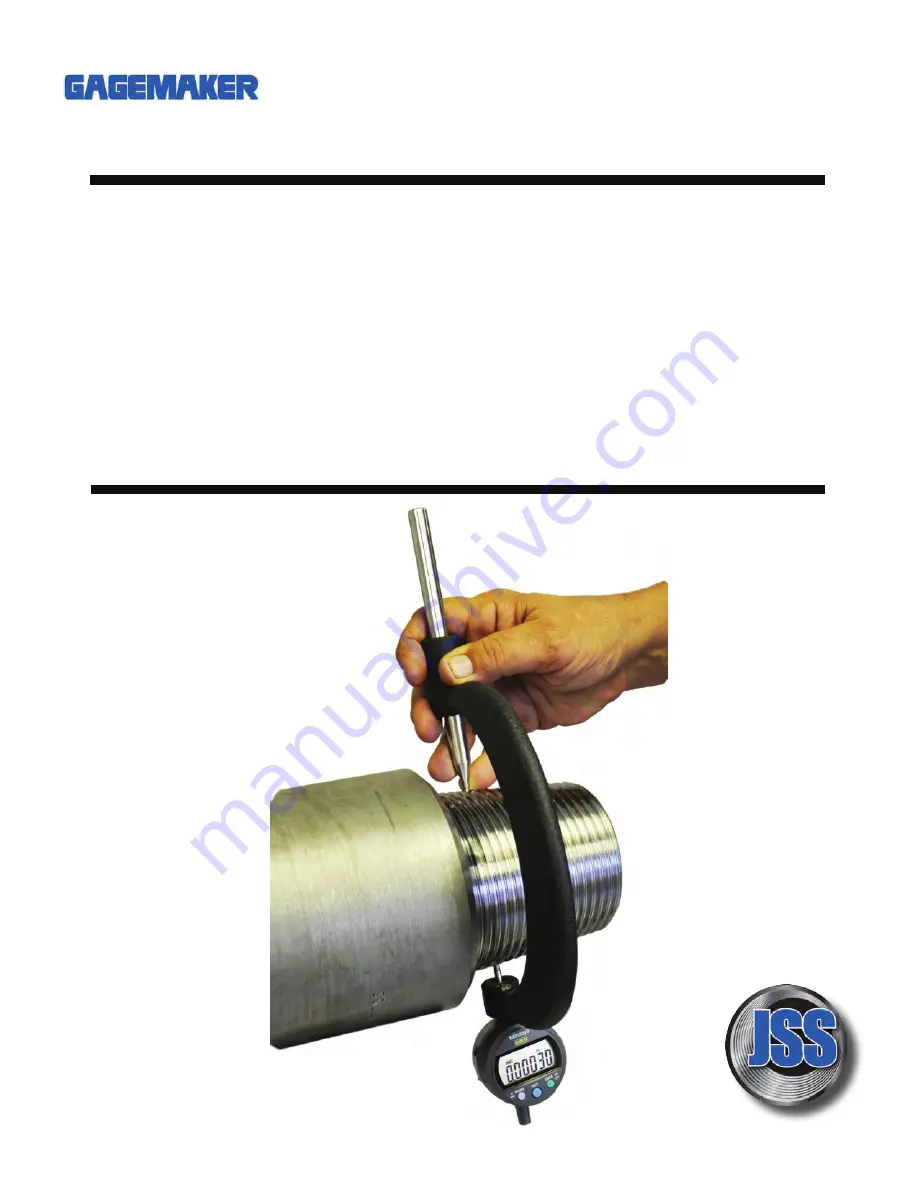
PD-8000-RSC
Rotary Shouldered Pin Connection
OPERATION MANUAL
Page 1: ...Thread Inspection PD 8000 RSC Rotary Shouldered Pin Connection PD 8000 RSC Rotary Shouldered Pin Connection OPERATION MANUAL ...
Page 2: ...that the template threads are fully seated and parallel to the pin centerline Using a slight twisting motion slide the template in a clockwise direction or away from you until the left edge of the template contacts the shoulder The twisting motion ensures that the template is seated properly in the threads and against the pin shoulder The pin pitch diameter location template or LPP is similar to a...
Page 3: ...l and square against the pin shoulder 7 The connection is now properly marked and ready to measure the pitch diameter using the PD 8000 RSC gage 1 The PD 8000 RSC gage must be preset and locked to a calculated dimension for the particular connector you are inspecting It is recommended that a ground setting standard rod or a MIC TRAC is used for presetting the gage Gages setting standards and parts...
Page 4: ... locate the smallest reading and zero the indicator The reading on the indicator is the amount of deviation from the nominal pitch diameter 5 With the indicator on the bottom side of the connector place the fixed contact ball at the point where the LPP was located and marked 6 Trace the same thread groove counter clockwise to the opposite side of the connector and place the moveable contact ball i...
Page 5: ...Spindle displacement Meaning of the icons 0 001mm 00005 model only To calculation Coefficient setting Selection sign next digit Repeat the above procedures until all digits Complete setting Selection Selection Selection Selection Selection Key pressing method ON Normal ON Enlarged No change Setting tolerance Setting preset value Refer to the user s manual Quit setting mode Upper limit value settin...
Page 6: ...ODE BUTTON FOR MORE THAN TWO SECONDS TO RETURN TO STANDARD MEASUREMENT MODE Press within 2 sec Press and hold 2sec or more HOW TO CHANGE LINEAR DIRECTION MODE 1 PRESS AND HOLD MODE BUTTON FOR MORE THAN TWO SECONDS A BLINKING Dir WILL DISPLAY 2 PRESS THE SET BUTTON THE Dir ON DISPLAY WILL STOP BLINKING 3 PRESS MODE BUTTON TO TOGGLE BETWEEN BLANK AND REVERSE DIRECTION SET MODE 4 PRESS DON T HOLD THE...
Page 7: ...Notes 2016 Gagemaker LP JSS and Gagemaker are registered trademarks of Gage maker LP All rights reserved ...
Page 8: ...Gagemaker LP P O Box 87709 Houston Texas 77287 7709 712 East Southmore Ave Pasadena Texas 77502 Phone 713 472 7360 Fax 713 472 7241 Web site www gagemaker com 2016 Gagemaker LP ...