G-PLAY Installation Guide
Page 6
8. Attaching G-PLAY to Your Computer
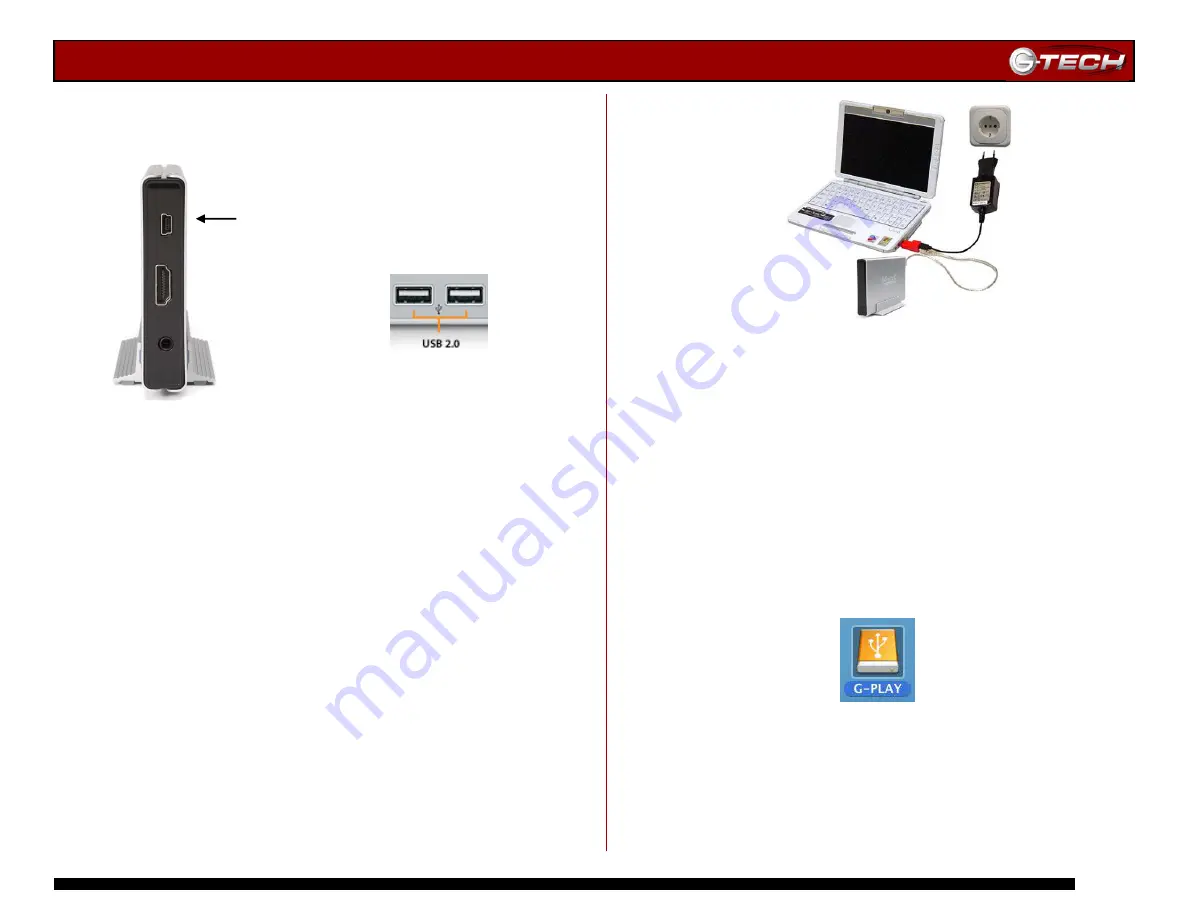
1. Attach the supplied USB cable to USB port located on the
back of G-PLAY as shown below.
2. Attach the other end of the cable to a USB 1.1/2.0 port
on your computer as shown above.
8.1
Connecting the Power Boost Adapter
G-PLAY should power on automatically after the USB cable is
connected. If G-PLAY does not power on, follow the directions
below to utilize the included USB Power Boost Adapter.
1. Connect the Power Boost adapter to an available USB
port on your computer.
2. Connect G-PLAY to the Power Boost Adapter using the
included USB cable.
3. Plug the USB power adapter in to an electrical outlet and
then connect it to the Power Boost Adapter.
Connection diagram for the optional Power Boost Adapter
9. INITIALIZING G-PLAY
Now that G-PLAY is connected to your computer, it must be
initialized for use with your operating system.
•
For Mac OS X installations, follow the instructions below
•
For Windows 2000/XP installations, proceed to
Section 9.3
9.1
Mac OS X (10.4)
G-PLAY is initialized at the factory as an HFS+ Mac OS X
volume. Power on G-PLAY. G-PLAY will mount on the
desktop as shown below.
USB 1.1/2.0 Port


