Battery Powered Rivet Gun
Special for Aluminium Car Body
KRS-505 Kit
Instruction Manual
Page 1: ...Battery Powered Rivet Gun Special for Aluminium Car Body KRS 505 Kit Instruction Manual...
Page 2: ...riveting pressing out punching and shaping Hole punching riveting kit for using in riveting pressing out punching and shaping 7 9 10 11 Installation 8 Shaping of the rivet head Pressing out rivets and...
Page 3: ...not abuse the power cable like using it to drag the charger or pull out the plug D Once the charger suffers severe impact or other damage hand it over to professional maintenance personnel E Do not ch...
Page 4: ...s provide correct hydraulic pressure with double protection during riveting process After riveting the piston will move forward slowly Compact Structure and Ergonomically Designed The removable handle...
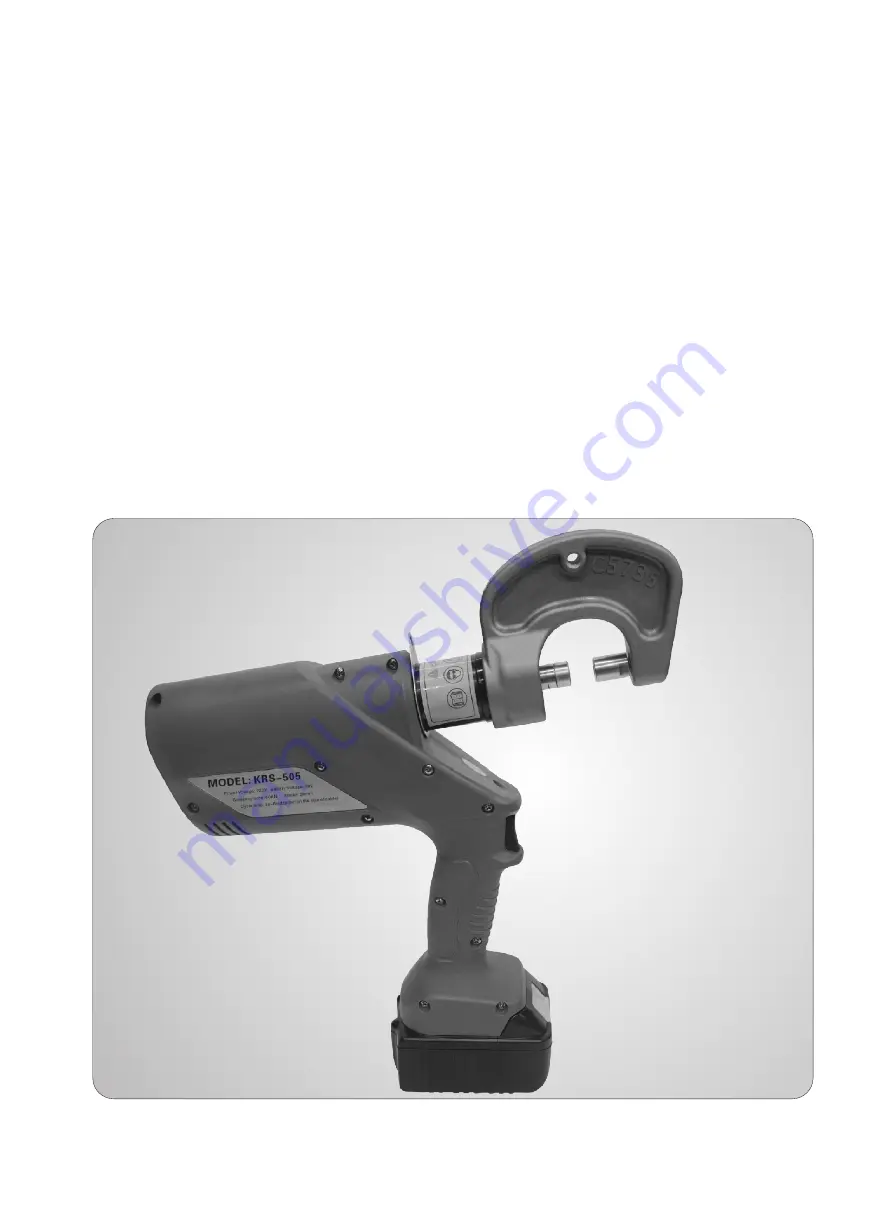
Page 5: ...12 11 04 3 Introduction and Specifications 1 Die heads box 2 Charger 3 Wrenches 4 Charger plug 5 Arm handle 6 Rivet gun 7 U arm 8 Die head slot 9 Indicator 10 Reset button 11 Start button 12 Battery...
Page 6: ...peeds 1 Available for removing rivets 2 Available for sheet shaping and flattening 3 Available for self piercing riveting 4 Available for semi tubular riveting 5 Available for piercing 3 3 Features Ap...
Page 7: ...for accident prevention operated or misused causing a severe physical injury Wear face shield and protective gloves when operating the equipment The metallic parts can fly off with high pressure if th...
Page 8: ...nching and riveting Tool sets for punching riveting and shaping A1 A2 H1 H2 G1 G2 8mm E1 E1 6011 C1 C2 D1 D2 6mm NO 666202 NO 666203 NO 666204 NO 666206 NO 666207 NO 666208 NO 666209 5 Self piercing r...
Page 9: ...ng out punching and shaping Tool sets for pressing out old rivets Tool sets for hole punching riveting Tool sets for hole punching and shaping B1 B2 B3 B4 C1 C2 G1 G2 8mm blanking bits E1 E1 6011 D1 D...
Page 10: ...nto the base of the equipment if not it runs out of battery 2 Choose required die head and install it into the slog Use wrench to tighten up 2 3 Install the front die head and tighten it up by wrench...
Page 11: ...vets often need to be removed from the metal structure Instead of drilling out the old rivets they can be pressed out of the sheet metal structure using the accessories C1 C2 thereby minimizing damage...
Page 12: ...ol kit E1 E1 5 2 a 5 2 b 5 2 c 5 2 d 5 2 e 5 2 f Install the kit as shown above Position the shaping kit on the rivet head Apply shaping The defective metal component can be removed after the shaping...
Page 13: ...ct the corresponding blanking bits Check the hydraulic pressure before each use Insert the blanking bits on the punch stud Position blanking bit centred on the old rivet Pressing out old rivet and mak...
Page 14: ...4 hours continuously the power will be disconnected by microprocessor causing starting failure Please unplug the battery from the unit and replug it back 6 Do not connect the positive terminal and the...