1. INTRODUCTION
1-5
1.7
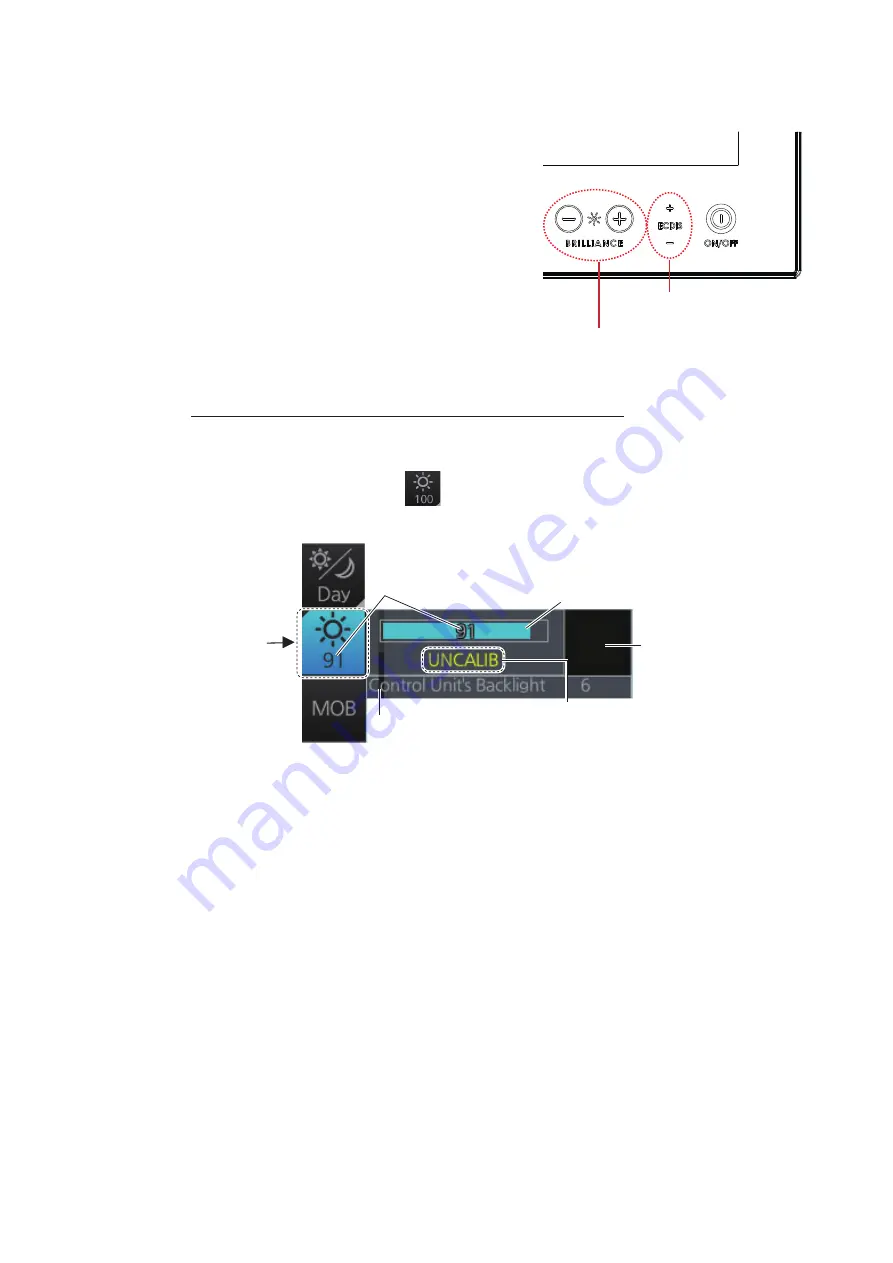
How to Adjust the Display Brilliance
Normally, the brilliance is automatically adjust-
ed with the palette setting. However, the bril-
liance can also be adjusted manually. Operate
the
BRILLIANCE
control at the bottom right
corner on the PCU to adjust the brilliance.
Push “+” to raise the brilliance; “-” to lower it.
The text "ECDIS" illuminates in green when
the brilliance is within the ECDIS standard.
"ECDIS" and the “+” or “-” symbol illuminate in
red when the brilliance is higher or lower than
the ECDIS standard. Adjust the brilliance to
show "ECDIS" in green.
How to adjust the brilliance with the trackball control
Check that the brilliance status shows "ECDIS" in green before adjusting the brilliance.
1. Click the [BRILL] button (
) on the InstantAccess bar
™
to show the brilliance
adjustment window.
2. For coarse adjustment, place the cursor at the approximate location on the slide-
bar where you want to set the brilliance, then click to change the brilliance.
For fine adjustment, place the cursor on the slide bar, then spin the scrollwheel,
or drag and drop the slide bar.
When the brilliance settings is changed, the calibration state indication changes
to "UNCALIB" (as shown in the figure above).
3. Click the [BRILL] button on the InstantAccess bar
™
to close the brilliance adjust-
ment window.
Note:
To return the brilliance setting to factory default, at step 2 of the above pro-
cedure, click the [CALIB] button. The calibration state indication changes to "CAL-
IB".
Brilliance Status
Brilliance Control
Current brilliance level
[BRILL]
button
Calibration state
(CALIB or UNCALIB)
Current brilliance setting
Slide-bar
[CALIB]
button
Not used on FMD-3100.
Summary of Contents for FMD3100
Page 36: ...1 INTRODUCTION 1 20 This page is intentionally left blank ...
Page 70: ...2 OPERATIONAL OVERVIEW 2 34 This page is intentionally left blank ...
Page 128: ...5 VECTOR S57 CHARTS 5 12 This page is intentionally left blank ...
Page 140: ...7 C MAP BY JEPESSEN CHARTS 7 6 This page is intentionally left blank ...
Page 206: ...11 HOW TO MONITOR ROUTES 11 16 This page is intentionally left blank ...
Page 230: ...13 TRACKED TARGET TT FUNCTIONS 13 10 This page is intentionally left blank ...
Page 244: ...14 AIS TARGET FUNCTIONS 14 14 This page is intentionally left blank ...
Page 250: ...15 AIS SAFETY NAVTEX MESSAGES 15 6 This page is intentionally left blank ...
Page 294: ...19 RECORDING FUNCTIONS PLAYBACK FUNCTIONS 19 14 This page is intentionally left blank ...
Page 312: ...20 ALERTS 20 18 This page is intentionally left blank ...
Page 332: ...22 SETTINGS MENU 22 16 This page is intentionally left blank ...
Page 338: ...23 MAINTENANCE AND TROUBLESHOOTING 23 6 This page is intentionally left blank ...
Page 395: ......


