4-14
Chapter 4 Connection to the External Devices
Connection with the Laser Printer
Connection with the Laser Printer
This section explains the setup procedure for the laser printer connected to the central monitor.
(Only when connected to DS-LAN III network)
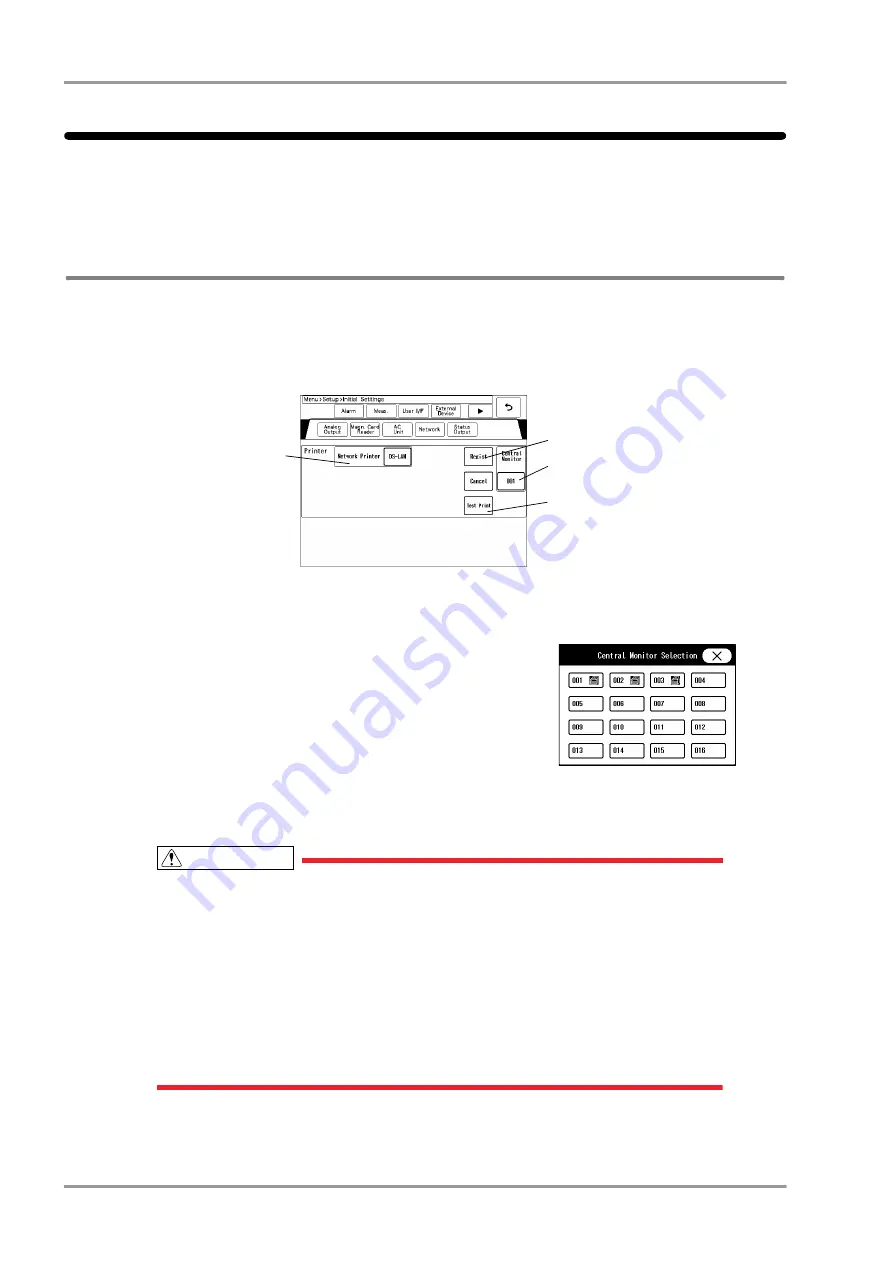
Laser Printer Setup
Set the central ID of the central monitor which is connected to the laser printer.
1
Press the [Menu], [Setup], [Initial Settings], [External Device], [Network] keys.
The "Network" setup menu will be displayed.
2
Select [DS-LAN] for "Network Printer".
3
Specify the central ID of the central monitor to perform the printing.
(shown on right)
The "Central Monitor Selection" window will be displayed.
The central ID with the printer icon displayed can be selected.
4
Press the [Regist] key, then [OK] key.
It is necessary to press the [OK] key to validate the setting.
5
Perform test printing. Verify that the printing is properly performed.
CAUTION
If the output characters are garbled, printer specification may be incorrectly set on the
central monitor. Refer to the operation manual of the printer and check the printer
specification.
On the central monitor, bedside printer output will be prioritized over the laser printer
output. If the bedside printer output is started during the laser printer output, the laser
printer output will resume after the bedside printer output.
[DS-LAN] can be selected only when [DS-LAN III] is set for "DS-LAN Setup". If the "DS-
LAN Setup" setting is changed to [DS-LAN II], the "Network Printer" setting will change
from [DS-LAN] to [OFF].
On the DS-8007 system, the network printer settings are saved on the AC Unit (DSA-81).
2
4
3
5
Summary of Contents for Dynascope 8000 Series
Page 1: ......
Page 2: ......
Page 8: ...Contents ...
Page 14: ...Contents ...
Page 16: ...ii Safety About the Safety Precautions DSA 81 AC Unit HR 800 Recorder Unit ...
Page 40: ...1 2 Chapter 1 Installation of the Unit Contents ...
Page 52: ...2 2 Chapter 2 Network System Construction Contents ...
Page 62: ...3 2 Chapter 3 Using the External Media Contents ...
Page 68: ...3 6 Chapter 3 Using the External Media Formatting the Full Disclosure Waveform Card ...
Page 70: ...4 2 Chapter 4 Connection to the External Devices Contents ...
Page 86: ...5 2 Chapter 5 Initial Settings Contents ...
Page 112: ...6 2 Chapter 6 Setup Item Default Value Contents ...
Page 128: ...7 2 Chapter 7 Replacement Parts Contents ...
Page 132: ...8 2 Chapter 8 Cleaning Disinfecting Storing Contents ...
Page 138: ...8 6 Chapter 8 Cleaning Disinfecting Storing Cleaning the Equipment and Sensors ...
Page 140: ...9 2 Chapter 9 Maintenance Check Contents ...
Page 153: ......
Page 154: ......


