86
4.7
Using the Network Settings Menus
4.7.1 Giving the Scanner an IP Address
An IP address must be set in order to connect the scanner to a network.
1. Select the [Network Settings] tab on the top menu.
2. Select the [IP Address] tab on the left side menu.
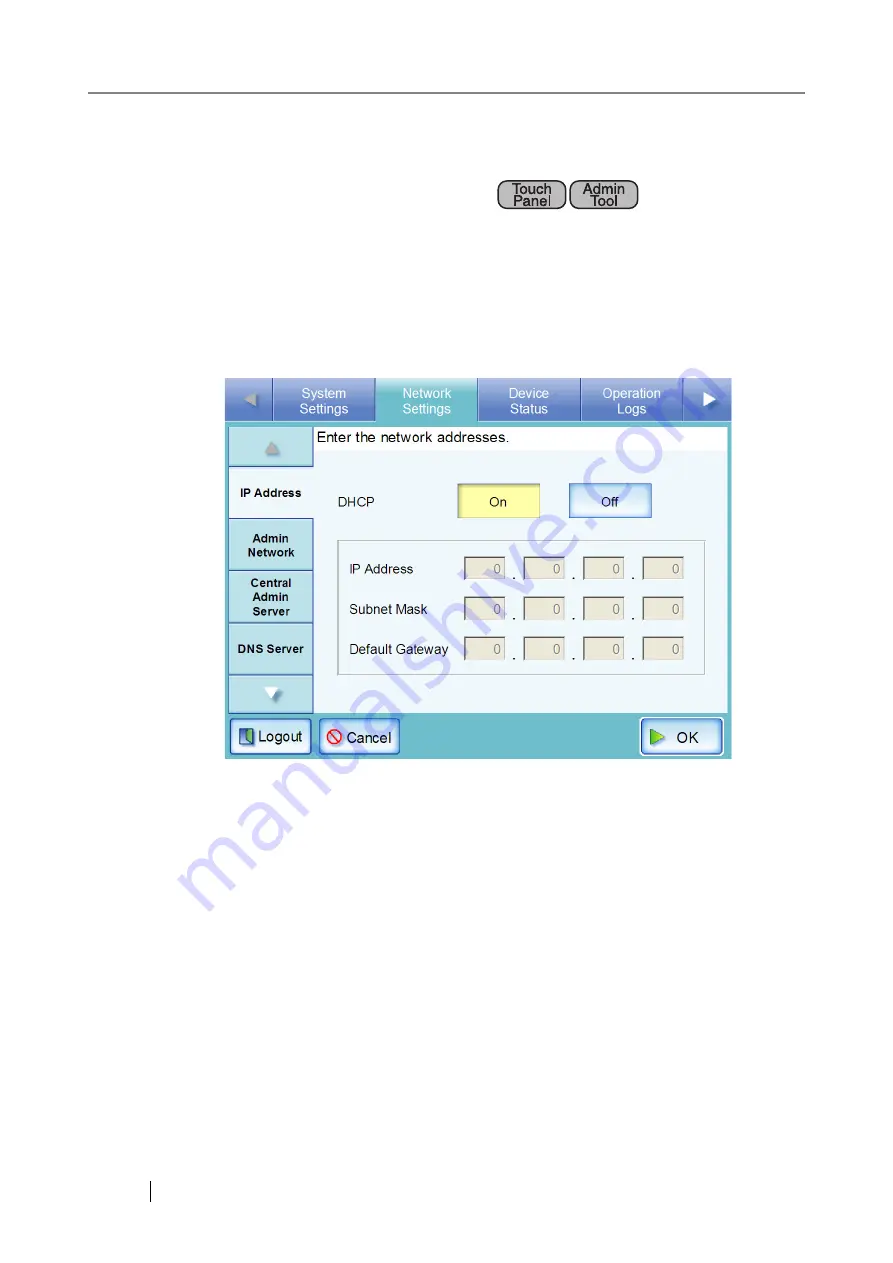
The DHCP or IP address setting screen appears.
3. Select whether or not a DHCP is required.
Set the scanner's IP address. This may be done automatically, by pressing the DHCP [On]
button. By default, this is set as [On].
The IP address may also be set manually, by pressing the DHCP [Off] button and entering
the following numerical addresses:
z
IP Address
z
Subnet Mask
z
Default Gateway
Summary of Contents for ScanSnap iScanner fi-6010N
Page 1: ...Operator s Guide P3PC 2962 01ENZ0 fi 6010N Network Scanner ...
Page 2: ......
Page 38: ...xxxvi ...
Page 60: ...22 ...
Page 74: ...36 ...
Page 144: ...106 Example 4 When searching for all users no Search Base DN setting or DC example DC com ...
Page 260: ...222 ...
Page 404: ...366 z Save tab z Quality tab ...
Page 488: ...450 ...
Page 526: ...488 ...
Page 532: ...494 ...
Page 646: ...608 ...
Page 652: ...614 ...
Page 653: ...fi 6010N Network Scanner Operator s Guide 615 G Appendix G Glossary ...
Page 658: ...620 ...


