64
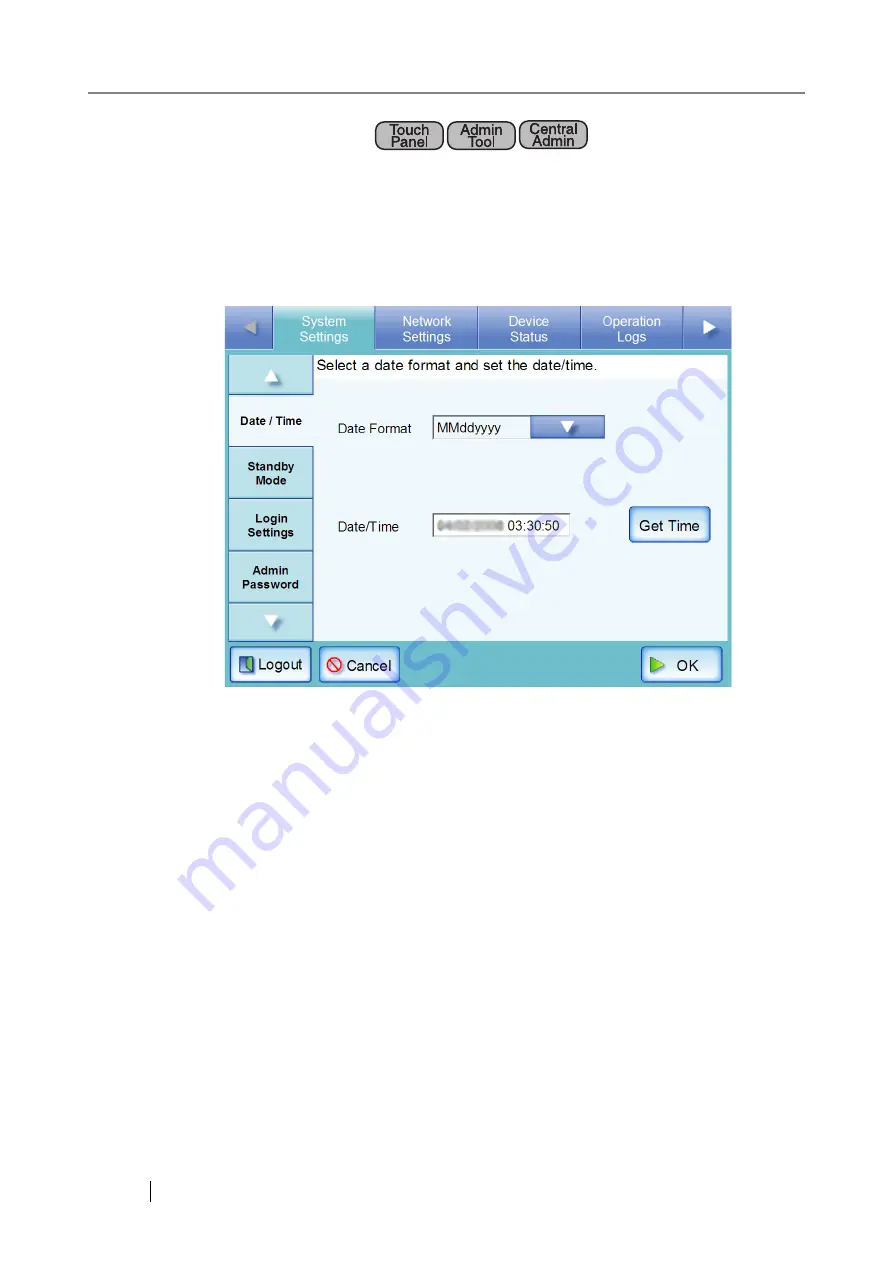
4.6.5 Setting the Date/Time
1. Select the [System Settings] tab on the top menu.
2. Select the [Date/Time] tab on the left side menu.
The "Date/Time" screen appears, with the date/time of the screen display shown in
[Date/Time].
For Central Admin Console, the "Date/Time" input field and [Get Time] button cannot be
used.
3. Press the Date Format [List] button.
A date format list appears.
4. Select a date format.
This date format is applied to the date/time when it is used to name scan data files and the
date shown on screens.
5. Enter the current date and time in the "Date/Time" input field.
The date and time shown are those current for when the "Date/Time" tab on the left side
menu was selected.
The date/time range that may be entered is from "April 1st 2008, 00:00:00" to "December
31st 2037, 23:59:59".
When entering a one digit number for date and time, such as for January, prepend "0" and
enter "01" in the input field.
Summary of Contents for ScanSnap iScanner fi-6010N
Page 1: ...Operator s Guide P3PC 2962 01ENZ0 fi 6010N Network Scanner ...
Page 2: ......
Page 38: ...xxxvi ...
Page 60: ...22 ...
Page 74: ...36 ...
Page 144: ...106 Example 4 When searching for all users no Search Base DN setting or DC example DC com ...
Page 260: ...222 ...
Page 404: ...366 z Save tab z Quality tab ...
Page 488: ...450 ...
Page 526: ...488 ...
Page 532: ...494 ...
Page 646: ...608 ...
Page 652: ...614 ...
Page 653: ...fi 6010N Network Scanner Operator s Guide 615 G Appendix G Glossary ...
Page 658: ...620 ...


