▶
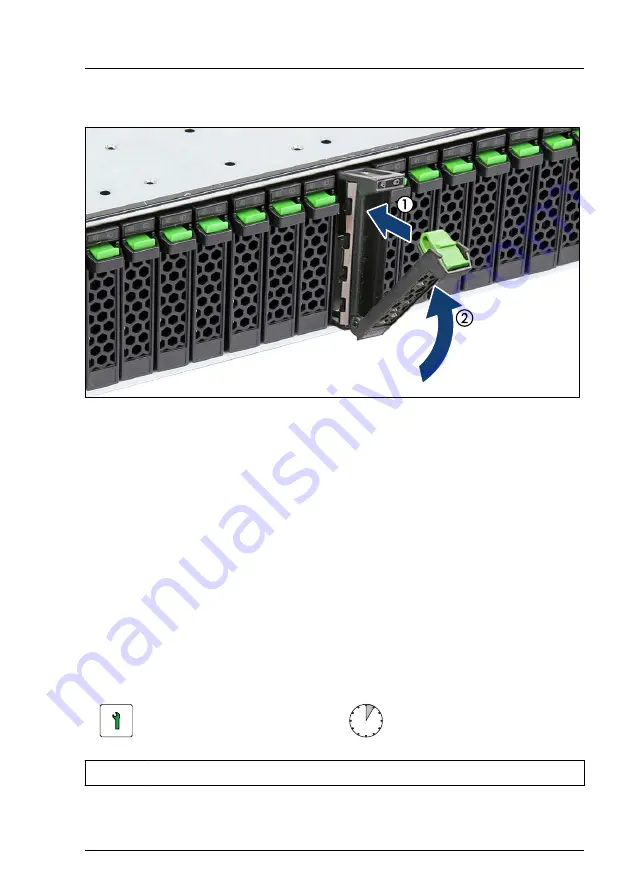
Pinch the green locking clips (1) and open the locking lever (2).
Figure 82: Installing the 2.5-inch PCIe SSD module
▶
Insert the PCIe SSD module into a drive bay and carefully push back as far
as it will go (1).
▶
Close the locking lever to lock the PCIe SSD module in place (2).
Concluding steps
▶
"Switching on the server" on page 69
▶
"Installing the front cover with lock" on page 69
.
▶
If applicable, rescan available devices from your operating system.
7.5.6
Removing 2.5-inch PCIe SSD modules
Customer Replaceable
Unit (CRU)
Hardware: 5 minutes
Tools:
tool-less
Hard disk drive (HDD) / solid state disk (SSD)
RX2540 M6
Upgrade and Maintenance Manual
175
Summary of Contents for PRIMERGY RX2540 M6
Page 8: ...Upgrade and Maintenance Manual RX2540 M6 ...
Page 34: ...Before you start 34 Upgrade and Maintenance Manual RX2540 M6 ...
Page 86: ...Basic hardware procedures 86 Upgrade and Maintenance Manual RX2540 M6 ...
Page 120: ...Basic software procedures 120 Upgrade and Maintenance Manual RX2540 M6 ...
Page 232: ...Fans 232 Upgrade and Maintenance Manual RX2540 M6 ...
Page 328: ...Expansion cards and backup units 328 Upgrade and Maintenance Manual RX2540 M6 ...
Page 366: ...Processor CPU 366 Upgrade and Maintenance Manual RX2540 M6 ...
Page 462: ...Front panel 462 Upgrade and Maintenance Manual RX2540 M6 ...
Page 570: ...Appendix A 570 Upgrade and Maintenance Manual RX2540 M6 ...
Page 672: ...List of all used screws for PRIMERGY Servers Assembled in WCZ and FIT June 2021 ...


